


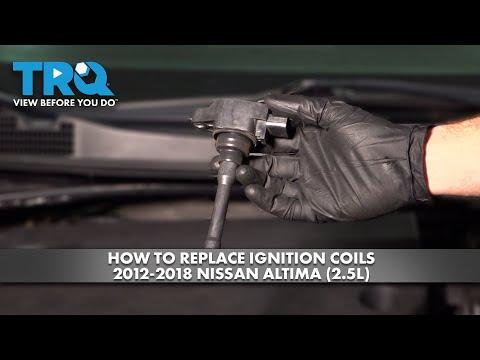







How to Replace Ignition Coils on a 2019-2024 Nissan Altima 2.0L VC-Turbo (Trim: Edition ONE | Engine: Inline 4 2.0L)
Step-by-step DIY instructions with required tools, parts, torque specs, and safety tips for 2019
How to Replace Ignition Coils on a 2019-2024 Nissan Altima 2.0L VC-Turbo (Trim: Edition ONE | Engine: Inline 4 2.0L)
Step-by-step DIY instructions with required tools, parts, torque specs, and safety tips for 2019


🔧 Altima - Ignition Coil Replacement
This is a clean beginner-friendly job, and the ignition coils are now listed in the parts sidebar. Your Altima uses four coil-on-plug units, meaning each spark plug has its own coil sitting directly above it. Replace the diagnosed bad coil, or replace all four if testing confirms multiple failures.
Difficulty Level: Beginner | Estimated Time: 30-60 minutes
Assumption: This procedure is for the listed 2.0L KR20DDET VC-Turbo engine. Nissan’s parts catalog identifies four ignition coils for that engine. nissanpartsdeal.com
⚠️ Safety & Precautions
- ⚠️ Let the engine cool completely. Turbocharged engine components can remain hot after shutdown.
- 🔑 Keep the ignition switched off and the key away from the car while connectors are unplugged.
- 🔋 Disconnect the negative battery cable if you’re concerned about accidentally switching the ignition on.
- 🧹 Clean around each coil before removal so dirt cannot fall into the spark plug well.
- 🛑 Don’t drive with a flashing check-engine light. A severe misfire can damage the catalytic converter.
🔧 Required Tools
You'll need the following tools for this repair:
- 10mm socket
- 3-inch socket extension
- 1/4-inch drive ratchet
- Inch-pound torque wrench
- 10mm combination wrench
- Small flat-blade screwdriver
- Soft detailing brush
- Compressed-air duster
- OBD-II scan tool
- Mechanic gloves
- Safety glasses
🔩 Required Parts
HowToo sells all the parts you need for this repair:
- Ignition coil - Qty: 1 for one confirmed failed coil
- Ignition coils - Qty: 4 if replacing the complete set
- Dielectric grease - Qty: 1 small tube
The parts sidebar has several matched coil options starting at approximately $38.88 each. I’d normally replace only the failed coil unless the others are also misfiring, damaged, or similarly worn. Parts cannons are loud and expensive.
📋 Before You Begin
- 🚗 Park your Altima on level ground, select Park, and engage the parking brake.
- ❄️ Wait until the engine is cool enough to touch comfortably.
- 🔑 Switch the ignition completely off and move the key away from the vehicle.
- 📱 Scan for diagnostic trouble codes before disconnecting the battery. A code such as P0301 identifies cylinder 1, P0302 cylinder 2, and so on.
- 📷 Photograph the connectors and coil positions before removing anything.
- 🔋 If disconnecting power, use the 10mm wrench to loosen the negative battery terminal and isolate it from the battery post.
🔨 Step-by-Step Instructions
Follow these steps in order:
Step 1: Remove the engine cover
- Put on the mechanic gloves and safety glasses.
- If fitted, grip the plastic engine cover near its mounting points and pull it upward evenly.
- Set it aside without twisting or forcing the plastic.
- Nissan notes that some Altimas may not have an engine cover. nialtima.com
Step 2: Locate and clean around the coils
- Locate the four ignition coils along the top of the engine.
- Use the soft detailing brush and compressed-air duster to remove loose dirt around the coil bases.
- Don’t blow debris directly into an open spark plug well.
Step 3: Disconnect the electrical connector
- Press the release tab on the affected coil’s connector and pull the plastic connector straight back.
- Use the small flat-blade screwdriver only to gently help release a stubborn tab.
- Never pull on the wires. Old connector locks can be brittle.
Step 4: Remove the retaining bolt
- Use the 10mm socket, 3-inch extension, and 1/4-inch ratchet to remove the coil retaining bolt.
- Place the bolt somewhere secure so it cannot fall into the engine compartment.
Step 5: Remove the ignition coil
- Grip the coil body and gently rotate it a few degrees in each direction.
- Pull the coil straight upward out of the spark plug well.
- Don’t pry against the valve cover or wiring.
- Inspect the rubber boot for cracking, burning, carbon tracking, or oil contamination.
- If the spark plug well contains oil, stop and repair the valve-cover sealing problem before installing the coil.
Step 6: Inspect the spark plug well
- Use the compressed-air duster to clean around the well while the spark plug remains installed.
- Look for moisture, oil, corrosion, or a damaged coil connector.
- If the removed coil shows a white or black lightning-like line down its boot, the spark plug may also need inspection.
Step 7: Install the replacement coil
- Place a very small film of dielectric grease inside the opening of the new coil’s rubber boot.
- Dielectric grease is a silicone moisture barrier. Don’t pack the boot full of it.
- Align the coil with the spark plug well and push it straight down until fully seated.
- Align the coil’s mounting hole with the threaded hole in the valve cover.
Step 8: Install and tighten the retaining bolt
- Start the bolt by hand for several turns to prevent cross-threading.
- Use the inch-pound torque wrench and 10mm socket to tighten the bolt to 7 Nm (62 in-lbs).
- Don’t use a foot-pound wrench at this low setting. The small bolt and valve-cover mounting point are easily damaged.
- Snug is enough here. More isn’t better.
Step 9: Reconnect the coil
- Push the electrical connector onto the coil until its lock clicks.
- Gently pull on the connector housing to confirm it’s latched.
- Repeat Steps 3 through 9 for any additional coils being replaced.
Step 10: Reassemble the engine compartment
- If disconnected, reinstall the negative battery cable with the 10mm wrench and tighten it securely without crushing the terminal.
- Position the engine cover over its mounts and press down evenly until seated.
- Check that no tools, bolts, or loose connectors remain in the engine compartment.
✅ After Repair
- 🚘 Start the engine and let it idle while listening for smooth, even operation.
- 🔍 Confirm that the check-engine light isn’t flashing and inspect for a loose connector.
- 📱 Use the OBD-II scan tool to clear the stored misfire code after recording it.
- 🛣️ Take a short, gentle test drive and rescan for pending misfire codes.
- ⚠️ If the same-cylinder misfire returns, inspect the spark plug, connector wiring, fuel injector, and cylinder compression rather than installing another coil blindly.
💰 DIY vs Shop Cost
Shop Cost: $140-$350 for one coil, or approximately $350-$700 for four
DIY Cost: Approximately $39-$88 for one coil, or $156-$352 for four
You Save: Approximately $100-$350 by doing it yourself!
Shop labor rates vary but typically run $100-$150/hour. This repair takes a shop approximately 0.5-1.0 hour.
🎯 Ready to get started?
HowToo makes it easy: same-day/2-day shipping on every part, plus all the tools and specialty tools you need! Check out the parts and tools sections below to add everything to your cart.
