








How to Replace Ignition Coils on a 2019-2024 Cadillac XT4 2.0L Turbo (Engine: Inline 4 2.0L)
Step-by-step DIY instructions with required tools, parts, torque specs, and safety tips for 2019, 2020, 2021, 2022, 2023, 2024
How to Replace Ignition Coils on a 2019-2024 Cadillac XT4 2.0L Turbo (Engine: Inline 4 2.0L)
Step-by-step DIY instructions with required tools, parts, torque specs, and safety tips for 2019, 2020, 2021, 2022, 2023, 2024


🔧 XT4 - Ignition Coil Replacement
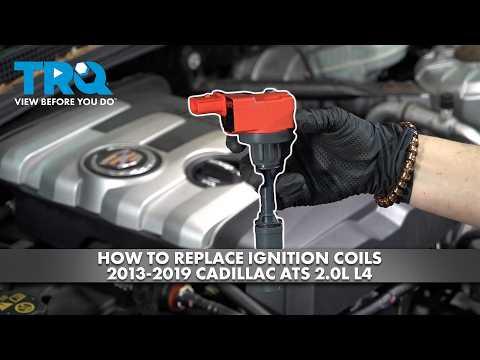
This is a straightforward job. Remove the engine cover, disconnect each coil, transfer the boots if required, and install the replacements. Your XT4 uses four coils, one directly above each spark plug.
Difficulty Level: Beginner | Estimated Time: 30-60 minutes
Assumption: This procedure replaces all four coils on the stock 2.0L turbo engine.
⚠️ Safety & Precautions
- ⚠️ Let the engine cool completely before touching the coils or surrounding components.
- ⚠️ Switch the ignition off and keep the key fob away from the vehicle.
- ⚠️ Don’t pull electrical connectors by their wires.
- ⚠️ Keep dirt and dropped hardware out of the open spark-plug wells.
- ⚠️ Battery disconnection isn’t normally required for this repair.
🔧 Required Tools
You'll need the following tools for this repair:
- 10mm socket
- 1/4-inch drive ratchet
- 1/4-inch drive 3-inch extension
- Inch-pound torque wrench rated below 100 in-lbs
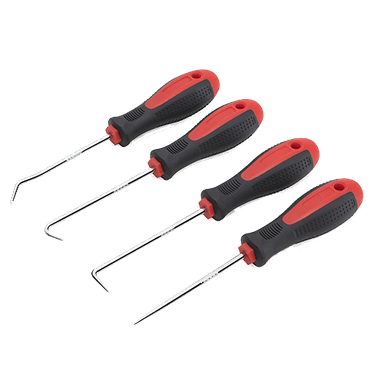
- Small plastic pick tool
- Compressed-air blow gun
- Safety glasses
- Nitrile gloves
🔩 Required Parts
HowToo sells all the parts you need for this repair:
- Vehicle-matched ignition coils - Qty: 4
- Dielectric silicone grease - Qty: 1 small tube
The premium vehicle-matched coil currently shown in the parts sidebar is approximately $46.43 each. Replace all four if they’re the same age and you want to avoid repeating the job. Otherwise, replacing only the confirmed failed coil is acceptable.
📋 Before You Begin
- 📋 Park your XT4 on level ground and select Park.
- 📋 Switch off the climate control, lights, and ignition.
- 📋 Allow at least 30 minutes for the turbocharged engine to cool.
- 📋 Take a quick photo of the coil connectors before unplugging anything.
- 📋 If diagnosing a misfire, record the trouble code before clearing it.
🔨 Step-by-Step Instructions
Follow these steps in order:
Step 1: Remove the engine appearance cover
- Grip the engine cover near its mounting points with both hands.
- Pull upward evenly to release it from the rubber mounting grommets.
- Set the cover aside where its underside won’t collect dirt.
Step 2: Clean around the coils
- Put on the safety glasses.
- Use the compressed-air blow gun to remove loose dirt around the four coils.
- A spark-plug well is the narrow opening beneath each coil. Don’t allow debris to fall into it.
Step 3: Disconnect the first ignition coil
- Use the small plastic pick tool to carefully release the connector lock, if fitted.
- Press the connector release and pull the connector straight back by its plastic housing.
- Don’t pry hard against the connector. Old plastic gets surprisingly dramatic.
Step 4: Remove the coil retaining bolt
- Use the 10mm socket, 3-inch extension, and 1/4-inch drive ratchet to remove the coil bolt.
- Place the bolt in a clean container so it can’t fall into the engine compartment.
Step 5: Remove the old coil
- Grip the coil body and gently rotate it a few degrees in each direction.
- Pull the coil straight upward.
- Don’t lever the coil against the camshaft cover.
- Inspect the rubber boot for oil, coolant, corrosion, cracking, or white electrical tracking marks.
- Oil inside the well should be diagnosed before installing the new coil.
Step 6: Prepare the replacement coil
- Confirm the new coil’s connector, bolt location, boot length, and overall shape match the removed coil.
- Apply a very thin film of dielectric silicone grease inside the lower lip of the rubber boot.
- Dielectric grease is insulating silicone grease that helps seal out moisture. Don’t pack the boot full.
Step 7: Install the replacement coil
- Position the replacement directly over the spark plug.
- Push it straight down until the boot seats firmly on the plug.
- Align the retaining-bolt hole without forcing or twisting the coil.
Step 8: Tighten the retaining bolt
- Start the bolt several turns by hand to avoid cross-threading.
- Use the 10mm socket, 3-inch extension, and inch-pound torque wrench.
- Torque to 10 Nm (89 in-lbs). Don’t convert this to 89 ft-lbs. That would destroy the mounting point. howtoo.com
Step 9: Reconnect the electrical connector
- Push the connector onto the coil until the release tab clicks.
- Re-engage the connector lock, if equipped.
- Give the connector housing a light pull to confirm it’s secured.
Step 10: Replace the remaining coils
- Repeat Steps 3 through 9 for the other three cylinders.
- Work on one coil at a time to keep the connectors organized.
- Use the same 10 Nm (89 in-lbs) torque setting for every retaining bolt. howtoo.com
Step 11: Reinstall the engine cover
- Check that no tools or loose hardware remain on the engine.
- Align the engine cover with its rubber mounting grommets.
- Press straight downward by hand over each mounting point until seated.
✅ After Repair
- ✅ Start the engine and let it idle for approximately one minute.
- ✅ Confirm that it idles smoothly without shaking or flashing the check-engine light.
- ✅ Switch the engine off and inspect all four connectors again.
- ✅ If a misfire remains, scan for trouble codes before replacing more parts.
- ✅ A continuing misfire can also come from a spark plug, injector, wiring fault, compression problem, or oil inside the plug well.
- ✅ A flashing check-engine light indicates an active severe misfire. Shut the engine off to protect the catalytic converter.
💰 DIY vs Shop Cost
Shop Cost: $300-$600 for four coils, parts and labor
DIY Cost: Approximately $186-$220 for four coils and grease
You Save: Approximately $110-$380 by doing it yourself!
Shop labor rates vary by region. This repair usually takes a professional approximately 0.5-1.0 hour.
🎯 Ready to get started?
HowToo makes it easy: same-day/2-day shipping on every part, plus all the tools and specialty tools you need! Check out the parts and tools sections below to add everything to your cart.
