

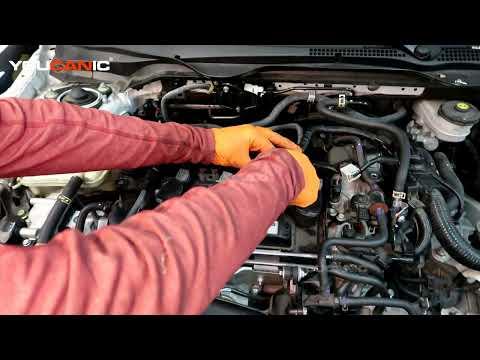







How to Replace Ignition Coils on a 2019-2022 Honda Insight 1.5L Hybrid (Trim: LX | Engine: Inline 4 1.5L)
Step-by-step DIY instructions with tools, diagnosis tips, safety precautions, and torque specs for 2019, 2020, 2021, 2022
How to Replace Ignition Coils on a 2019-2022 Honda Insight 1.5L Hybrid (Trim: LX | Engine: Inline 4 1.5L)
Step-by-step DIY instructions with tools, diagnosis tips, safety precautions, and torque specs for 2019, 2020, 2021, 2022


🔧 Insight - Ignition Coil Replacement
This is a beginner-friendly repair. Your Insight has four coil-on-plug ignition coils, one directly above each spark plug. Replace the failed coil only when diagnosis identifies one cylinder, or replace all four if age, mileage, or repeated failures justify a complete set.
Difficulty Level: Beginner | Estimated Time: 30-60 minutes
Assumption: These instructions cover the stock 1.5L hybrid engine and accessible top-mounted coils.
⚠️ Safety & Precautions
- ⚠️ Let the engine cool completely before touching the valve-cover area.
- ⚠️ Turn the vehicle fully off, not merely out of EV Ready mode.
- ⚠️ Keep the key fob at least 10 feet away so the hybrid system cannot wake unexpectedly.
- ⚠️ Disconnect the negative terminal of the 12-volt battery before unplugging the coils.
- ⚠️ Do not touch, disconnect, or probe any orange high-voltage cable or connector.
- ⚠️ High-voltage battery isolation is not required for this repair.
- ⚠️ Never pull an ignition coil connector while the vehicle is running.
🔧 Required Tools
You'll need the following tools for this repair:
- 10mm socket
- 1/4-inch drive ratchet
- 6-inch extension with 1/4-inch drive
- 1/4-inch drive torque wrench rated 2-20 Nm
- Plastic trim-removal tool
- Small plastic pick tool
- OBD-II scan tool
- Compressed-air nozzle
- Nitrile gloves
- Safety glasses
An OBD-II scan tool reads the diagnostic code that identifies which cylinder is misfiring.
🔩 Required Parts
HowToo sells all the parts you need for this repair:
- Ignition coil - Qty: 1 for a confirmed single failure
- Ignition coils - Qty: 4 for a complete matched replacement
- Engine-cover grommets - Qty: As needed if torn or missing
The matching ignition-coil aisle is open in the parts list. Four coils are not automatically necessary. A proper diagnosis can save you from throwing a full set at one bad cylinder. The parts cannon is loud and rarely accurate.
📋 Before You Begin
- 📋 Park your Insight on level ground, select Park, and apply the parking brake.
- 📋 Turn the vehicle off and confirm the green READY indicator is extinguished.
- 📋 Open the hood and allow the engine to cool for at least 30 minutes.
- 📋 If diagnosing a misfire, use the OBD-II scan tool before disconnecting the battery and record all codes.
- 📋 Cylinder-specific misfire codes are P0301 through P0304; P0300 indicates random or multiple-cylinder misfires.
- 📋 Disconnecting the 12-volt battery may reset the clock, learned idle values, and some stored settings.
- 📋 No infotainment service mode, electronic parking-brake mode, battery registration, or high-voltage scan command is required.
🔨 Step-by-Step Instructions
Follow these steps in order:
Step 1: Shut Down and Disconnect the 12-Volt Battery
- Verify the READY indicator is off and move the key fob away from the vehicle.
- Access the 12-volt battery area and use the 10mm socket with the 1/4-inch drive ratchet to loosen the negative-terminal clamp.
- Lift the negative clamp from the battery post and position it where it cannot spring back into contact.
- Wait at least three minutes before working on electrical connectors.
Step 2: Remove the Engine Cover
- Use your hands to lift the plastic engine cover straight upward from its rubber grommets.
- Use the plastic trim-removal tool only if a corner will not release easily.
- Inspect the rubber grommets and replace any that are split or missing.
- Pull upward instead of twisting the cover.
Step 3: Inspect the Coil Area
- Wear safety glasses and use the compressed-air nozzle to remove loose dirt around the coils.
- Check for engine oil or water around each coil and inside the spark-plug wells.
- Stop and correct a valve-cover seal leak if a coil boot is soaked with oil.
Step 4: Disconnect the Electrical Connector
- Press the locking tab on the selected ignition-coil connector by hand.
- Pull on the connector housing, not its wires.
- Use the small plastic pick tool gently if the locking tab is difficult to depress.
- Repeat for all four connectors only when replacing the complete set.
Step 5: Remove the Coil Retaining Bolt
- Use the 10mm socket, 6-inch extension, and 1/4-inch drive ratchet to remove the coil retaining bolt.
- Keep each bolt away from the open spark-plug wells.
- Do not remove nearby valve-cover or harness-bracket fasteners by mistake.
Step 6: Remove the Ignition Coil
- Grip the solid upper portion of the ignition coil.
- Rotate it slightly left and right, then pull it straight upward.
- Do not pry against the plastic connector or aluminum valve-cover area.
- Inspect the rubber boot for tears, carbon tracks, oil, or moisture.
Step 7: Install the Replacement Coil
- Compare the new and old coils. Confirm the connector, mounting ear, boot length, and sealing shape match.
- Lower the replacement coil squarely into the spark-plug well.
- Press downward until the boot fully seats over the spark plug.
- Do not pack the boot with grease. Excess grease can prevent proper seating.
Step 8: Install and Torque the Retaining Bolt
- Start the retaining bolt several turns by hand to prevent cross-threading.
- Use the 10mm socket and 1/4-inch drive torque wrench to tighten the bolt.
- Torque to 12 Nm (9 ft-lbs). This specification is listed for the 2019-2022 Insight coil replacement procedure. howtoo.com
- Do not overtighten this small fastener into the aluminum engine assembly.
Step 9: Reconnect the Coil Connector
- Push the electrical connector onto the ignition coil until its lock clicks.
- Pull lightly on the connector housing to confirm it is secured.
- Repeat Steps 4 through 9 for each additional coil being replaced.
Step 10: Reinstall the Engine Cover
- Align the engine cover with its rubber mounting grommets.
- Press directly above each mounting point using your hands.
- Confirm the cover is level and does not rock.
Step 11: Reconnect the 12-Volt Battery
- Place the negative-terminal clamp fully onto the battery post.
- Use the 10mm socket and 1/4-inch drive ratchet to tighten it securely without crushing or distorting the clamp.
- Confirm the terminal cannot rotate by hand.
✅ After Repair
- ✅ Move the key fob back to the vehicle and start the hybrid system.
- ✅ Confirm the green READY indicator appears.
- ✅ Let the gasoline engine run when commanded and listen for smooth operation.
- ✅ Use the OBD-II scan tool to clear the misfire code only after recording it.
- ✅ Road-test the vehicle for 10-15 minutes and recheck for pending codes.
- ✅ A flashing check-engine light means an active catalyst-damaging misfire. Stop driving and diagnose it immediately.
- ✅ If the same cylinder still misfires, inspect its spark plug, connector, wiring, fuel injector, and compression rather than replacing more coils blindly.
💰 DIY vs Shop Cost
Shop Cost: $180-$650 USD, depending on whether one or four coils are replaced
DIY Cost: Approximately $27-$225 USD for the currently listed coils
You Save: Approximately $100-$425 by doing it yourself!
Local labor around Sonīpat varies, while these estimates use typical U.S.-market parts and labor pricing. This repair takes a shop approximately 0.5-1.0 hour.
🎯 Ready to get started?
HowToo offers same-day/2-day shipping on every part, plus all the tools and specialty tools you need! Check out the parts and tools sections below to add everything to your cart.