


How to Replace Ignition Coils on a 2018 Ford Explorer
Step-by-step instructions with tools, parts, torque specs, and safety tips for 2012, 2013, 2014, 2015
How to Replace Ignition Coils on a 2018 Ford Explorer
Step-by-step instructions with tools, parts, torque specs, and safety tips for 2012, 2013, 2014, 2015
🔧 Ignition Coils - Replacement
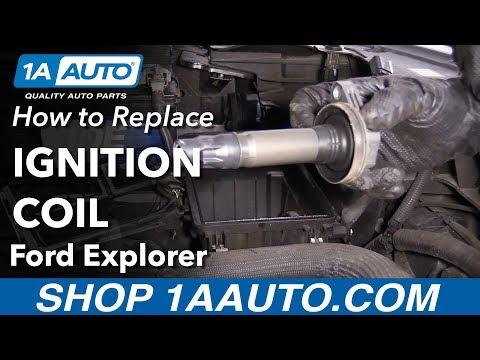
On your Explorer, the ignition coils sit on top of the engine and send high-voltage spark to each spark plug. Replacing a weak coil can fix misfires, rough idle, shaking, and check engine lights.
Difficulty Level: Beginner | Estimated Time: 1-2 hours
⚠️ Safety & Precautions
- Work with the engine completely cool before touching the coils.
- Ignition systems can produce high voltage. Do not pull on coil wiring with the key on.
- Disconnect the negative battery cable before starting. The battery is under the hood.
- Keep dirt and tools out of the spark plug wells.
- If the engine has been misfiring badly, avoid extended driving until repaired.
🔧 Required Tools
You'll need the following tools for this repair:
- 8mm socket
- 1/4-inch ratchet
- 1/4-inch extension
- Trim panel tool
- Needle-nose pliers
- Torque wrench
- Safety glasses
- Gloves
🔩 Required Parts
HowToo sells all the parts you need for this repair:
- Ignition coil - Qty: 4
📋 Before You Begin
- Park on level ground and set the parking brake.
- Let the engine cool fully.
- Open the hood and remove any loose items from the engine bay.
- Disconnect the negative battery cable before unplugging coils.
🔨 Step-by-Step Instructions
Follow these steps in order:
Step 1: Disconnect battery power
- Use an 8mm socket to loosen the negative battery terminal.
- Move the cable aside so it cannot spring back onto the post.
- Keep the cable isolated.
Step 2: Remove the engine cover
- Lift the engine cover straight up by hand. If it is tight, use a trim panel tool gently at the edge.
- Set the cover aside in a clean spot.
Step 3: Unplug the ignition coils
- Press the release tab on each coil connector.
- Use needle-nose pliers only if a tab is stiff, and pull on the connector body, not the wires.
- Disconnect all 4 coil connectors.
Step 4: Remove the coils
- Use an 8mm socket, 1/4-inch ratchet, and 1/4-inch extension to remove each coil hold-down bolt.
- Pull each coil straight up out of the spark plug well.
- Twist slightly if the rubber boot sticks.
Step 5: Install the new coils
- Compare each new coil to the old one before installing.
- Slide each coil boot straight down onto the spark plug.
- Install the hold-down bolt by hand first, then tighten with the 8mm socket.
- Torque to 8 Nm (71 in-lbs).
Step 6: Reconnect the coil connectors
- Push each electrical connector on until it clicks.
- Make sure the connector locks are fully seated.
Step 7: Reinstall the engine cover and battery cable
- Press the engine cover back into place by hand.
- Reconnect the negative battery cable with the 8mm socket.
- Torque to 5 Nm (44 in-lbs) if using a torque wrench.
✅ After Repair
- Start the engine and let it idle.
- Check for rough running, warning lights, or flashing check engine light.
- If the check engine light was on before, clear codes with a scan tool and confirm they do not return.
- If a misfire remains, the spark plugs may also need service.
💰 DIY vs Shop Cost
Shop Cost: $250-$500 (parts + labor)
DIY Cost: $80-$220 (parts only)
You Save: $170-$280 by doing it yourself!
Shop labor rates vary but typically run $100-$150/hour. This repair takes a shop approximately 0.8-1.2 hours.
🎯 Ready to get started?
HowToo makes it easy: same-day/2-day shipping on every part, plus all the tools and specialty tools you need! Check out the parts and tools sections below to add everything to your cart.
