
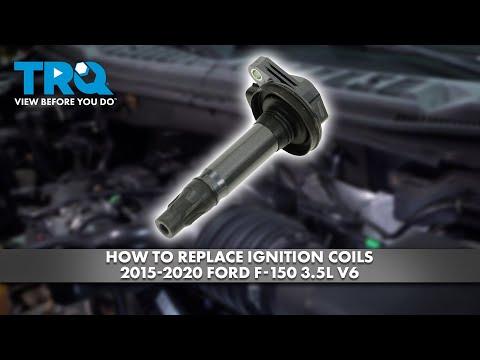







How to Replace Ignition Coils on a 2018-2020 Ford F-150 3.5L EcoBoost (Trim: Limited | Engine: V6 3.5L)
Step-by-step DIY instructions with tools, parts, torque specs, diagnostics, and safety tips for 2018, 2019, 2020
How to Replace Ignition Coils on a 2018-2020 Ford F-150 3.5L EcoBoost (Trim: Limited | Engine: V6 3.5L)
Step-by-step DIY instructions with tools, parts, torque specs, diagnostics, and safety tips for 2018, 2019, 2020


🔧 F-150 - Ignition Coil Replacement
This is a manageable beginner repair. Your F-150 uses six coil-on-plug units, one directly above each spark plug. Replace only the diagnosed bad coil unless several have failed or you’re intentionally installing a complete matched set.
Difficulty Level: Beginner | Estimated Time: 30-60 minutes for one coil, 1-2 hours for all six
Assumption: These instructions cover the stock turbocharged 3.5L gasoline engine.
⚠️ Safety & Precautions
- ⚠️ Work only with the engine completely cool. The turbochargers and nearby plumbing get extremely hot.
- ⚠️ Switch the ignition off and keep the key away from the truck.
- ⚠️ Disconnect the negative battery cable before unplugging the coils.
- ⚠️ Never pull a coil connector while the engine is running. Ignition voltage can cause injury.
- ⚠️ Clean around each coil before removal so dirt cannot enter the spark plug well.
- ⚠️ Don’t use power tools on the coil bolts. The threaded valve-cover inserts are easy to damage.
🔧 Required Tools
You'll need the following tools for this repair:
- 8mm deep socket
- 10mm socket
- 1/4-inch drive ratchet
- 1/4-inch drive 3-inch extension
- Inch-pound torque wrench rated from 40-100 in-lbs
- Torque-angle gauge (specialty)
- Small plastic trim tool
- Compressed-air blow gun with regulated nozzle
- Shop vacuum with narrow nozzle
- Digital scan tool capable of reading misfire codes
- Nitrile work gloves
- Safety glasses
🔩 Required Parts
HowToo sells all the parts you need for this repair:
- Vehicle-matched ignition coil - Qty: 1 per failed cylinder
- Vehicle-matched ignition coil set - Qty: 6 if replacing all coils
- Ignition coil connector - Qty: As needed for broken locks or damaged wiring
- Dielectric silicone grease - Qty: 1 small tube, optional
The vehicle-scoped ignition-coil aisle is open in the parts sidebar. I’d stay with an OE-quality coil rather than the cheapest six-pack available. Turbo boost finds weak ignition parts quickly, which is a rather expensive way to save a few dollars.
📋 Before You Begin
- 📋 Park your F-150 on level ground, select Park, and apply the parking brake.
- 📋 Let the engine cool completely before touching the coils or turbo plumbing.
- 📋 Read and record any diagnostic trouble codes before disconnecting the battery.
- 📋 Switch off the lights, climate control, radio, and ignition.
- 📋 Wait at least two minutes, then disconnect the negative battery terminal.
- 📋 If replacing several coils, work on one cylinder at a time. This prevents crossed connectors.
🔨 Step-by-Step Instructions
Follow these steps in order:
Step 1: Disconnect the battery
- Use a 10mm socket and 1/4-inch drive ratchet to loosen the negative battery-terminal clamp.
- Lift the clamp from the negative post and position it where it cannot spring back into contact.
- Ford notes that the engine-management system may need a short relearn period after battery power is restored. fordservicecontent.com)
Step 2: Remove the engine cover
- Release any visible retainers with the small plastic trim tool.
- Lift the engine cover evenly from its rubber mounting grommets.
- Set it somewhere clean so dirt doesn’t transfer into the engine area.
Step 3: Locate the correct ignition coil
- Find the six coils along the tops of the cylinder heads. Each coil has a small electrical connector and one retaining bolt.
- If you have a misfire code, use the digital scan tool to confirm the affected cylinder before removing anything.
- If the diagnosis isn’t confirmed, move the suspected coil to another cylinder, clear the codes, and retest. A misfire code that follows the coil confirms a bad coil.
- Label moved coils before testing.
Step 4: Clean around the coil
- Use the shop vacuum with narrow nozzle to remove loose sand and debris around the coil.
- Use the compressed-air blow gun with regulated nozzle for remaining dirt while wearing safety glasses.
- Don’t direct high-pressure air into disconnected electrical connectors.
Step 5: Disconnect the electrical connector
- Release the connector’s locking tab with your fingers or the small plastic trim tool.
- Pull on the connector body, not the wires.
- Stop if the plastic lock is brittle or cracked. Replace the connector rather than forcing it back together.
Step 6: Remove the coil retaining bolt
- Use the 8mm deep socket, 3-inch extension, and 1/4-inch drive ratchet to loosen the bolt.
- Finish removing the bolt by hand and place it somewhere clean.
- Ford applications of this generation use a small coil retaining fastener, so avoid excessive force. An 8mm socket is used for removal. carparts.com
Step 7: Remove the old ignition coil
- Grip the coil body and gently twist it side to side to release the rubber boot from the spark plug.
- Pull the coil straight upward. Don’t pry against the plastic valve cover.
- Inspect the boot for oil, coolant, water, cracks, or a thin white tracking line caused by escaping voltage.
- Oil inside the well usually indicates a sealing problem that should be repaired before installing another coil.
Step 8: Compare and prepare the replacement coil
- Compare the old and new coils. The connector, mounting tab, boot length, and internal spring position must match.
- Confirm the new boot’s internal spring is straight and fully seated.
- If using dielectric silicone grease, apply only a very thin film inside the boot opening. Don’t pack the boot with grease.
Step 9: Install the replacement coil
- Lower the coil straight over the spark plug.
- Press firmly until the boot seats and the mounting tab lies flat.
- Start the retaining bolt by hand for several turns. If it won’t turn easily, remove it and realign the coil.
Step 10: Tighten the retaining bolt
- Use the 8mm deep socket and in-lb torque wrench.
- Torque Stage 1 to 7 Nm (62 in-lbs).
- Use the torque-angle gauge for Stage 2: tighten an additional 50 degrees.
- Don’t substitute a strong pull on a regular ratchet. The valve-cover insert can loosen or pull out.
Step 11: Reconnect the coil
- Push the electrical connector straight onto the coil until its lock clicks.
- Gently tug the connector body to verify it’s secured.
- Repeat Steps 3-11 for each additional coil, working one at a time.
Step 12: Reinstall the engine cover
- Align the cover with its rubber grommets.
- Press down evenly by hand until each mounting point is fully seated.
- Reinstall any retainers using the small plastic trim tool.
Step 13: Reconnect the battery
- Place the negative clamp fully onto the battery post.
- Use the 10mm socket and 1/4-inch drive ratchet to tighten the clamp until secure.
- Don’t overtighten or distort the battery terminal.
✅ After Repair
- ✅ Start the engine and let it idle. Confirm that it runs smoothly and that no connector was left unplugged.
- ✅ Use the digital scan tool to clear the stored misfire code after recording it.
- ✅ Road-test gently, then apply moderate acceleration once the engine reaches normal temperature.
- ✅ Rescan for pending misfire codes after the road test.
- ✅ If the misfire remains on the same cylinder, inspect the spark plug, coil connector, injector, compression, and plug-well contamination.
- ✅ Slightly unusual driving behavior can occur for roughly 5 miles after battery disconnection while the engine computer relearns. fordservicecontent.com
💰 DIY vs Shop Cost
Shop Cost: $180-$350 for one coil, or approximately $650-$1,100 for all six
DIY Cost: Approximately $30-$140 per coil, depending on the selected brand
You Save: Approximately $100-$500 by doing it yourself!
Local labor prices vary. This repair generally takes a shop approximately 0.5-1.5 hours.
🎯 Ready to get started?
HowToo makes it easy: same-day/2-day shipping on every part, plus all the tools and specialty tools you need! Check out the parts and tools sections below to add everything to your cart.