







How to Replace Ignition Coils on a 2016 Dodge Journey (Fix Misfire & Rough Idle)
Step-by-step coil pack replacement with tools, parts list, safety tips, and 9 Nm (80 in-lbs) torque spec for 2009, 2010, 2011, 2012, 2013, 2014, 2015, 2016, 2017, 2018, 2019, 2020
How to Replace Ignition Coils on a 2016 Dodge Journey (Fix Misfire & Rough Idle)
Step-by-step coil pack replacement with tools, parts list, safety tips, and 9 Nm (80 in-lbs) torque spec for 2009, 2010, 2011, 2012, 2013, 2014, 2015, 2016, 2017, 2018, 2019, 2020


🔧 Journey - Ignition Coil Replacement
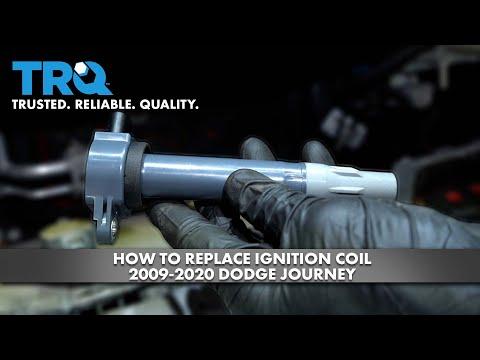
Your Journey’s ignition coils sit on top of the spark plugs and create the high voltage needed to fire the engine. When a coil gets weak or fails, you can get a misfire, rough idle, flashing check engine light, or loss of power.
Difficulty Level: Beginner | Estimated Time: 0.5-1.5 hours
⚠️ Safety & Precautions
- ⚠️ Work on a cool engine; the exhaust and cylinder head get very hot.
- ⚠️ Keep the key out of the vehicle so the engine can’t be started accidentally.
- ⚠️ If the check engine light was flashing, avoid driving until repaired (can damage the catalytic converter).
- ⚠️ Battery disconnect is recommended to prevent accidental shorts.
🔧 Required Tools
You'll need the following tools for this repair:
- Safety glasses
- Nitrile gloves
- 10mm socket
- 1/4" drive ratchet
- 1/4" drive extension (3"-6")
- Trim clip tool
- Torque wrench (inch-pound or low-range Nm)
- 10mm wrench
- OBD-II scan tool (basic code reader)
- Flashlight
🔩 Required Parts
HowToo sells all the parts you need for this repair:
- Ignition coils - Qty: 4
- Dielectric grease (silicone) - Qty: 1
📋 Before You Begin
- Park on level ground, shift to Park, and set the parking brake.
- Open the hood and let the engine cool fully.
- Disconnect the negative battery cable using a 10mm wrench; move it aside so it can’t spring back.
- Replace coils as a set for best results.
🔨 Step-by-Step Instructions
Follow these steps in order:
Step 1: Remove the engine cover (if equipped)
- Use a flashlight to locate the plastic engine cover on top of the engine.
- Pull upward evenly to release it from the rubber grommets, or remove any retainers using a trim clip tool.
Step 2: Locate the ignition coils
- Use a flashlight and find the row of coils on top of the engine; each coil has an electrical connector.
- Work on one coil at a time so nothing gets mixed up.
Step 3: Unplug the coil electrical connector
- Press the connector lock tab and pull the connector straight off.
- If it’s stubborn, gently help it with a trim clip tool; do not pull on the wires.
Step 4: Remove the coil hold-down bolt
- Use a 10mm socket, 1/4" drive ratchet, and 1/4" drive extension (3"-6") to remove the coil bolt.
- Set the bolt aside where it won’t get lost.
Step 5: Remove the ignition coil
- Twist the coil slightly left-right, then pull straight upward to remove it from the spark plug.
- If it feels stuck, keep twisting gently—don’t pry hard against plastic parts.
Step 6: Prep and install the new coil
- Apply a tiny dab of dielectric grease inside the new coil boot; dielectric grease is a non-conductive silicone grease that helps prevent moisture and eases future removal.
- Push the new coil straight down until you feel it seat firmly onto the spark plug.
Step 7: Reinstall the coil bolt and torque it
- Thread the bolt in by hand first to avoid cross-threading.
- Use a 10mm socket and torque wrench (inch-pound or low-range Nm) to tighten: Torque to 9 Nm (80 in-lbs).
Step 8: Reconnect the electrical connector
- Push the connector on until it clicks and locks.
Step 9: Repeat for the remaining coils
- Repeat Steps 3 through 8 for the other coils (total of 4).
Step 10: Reinstall the engine cover and reconnect the battery
- Reinstall the engine cover by pressing it back into the grommets.
- Reconnect the negative battery cable using a 10mm wrench and tighten snugly.
✅ After Repair
- Start the engine and let it idle for 1-2 minutes; it should run smooth with no shaking.
- If the check engine light is on, use an OBD-II scan tool (basic code reader) to clear codes and confirm the misfire does not return.
- Take a short test drive and recheck for any warning lights.
- If misfire remains, spark plugs may be worn.
💰 DIY vs Shop Cost
Shop Cost: $250-$550 (parts + labor)
DIY Cost: $100-$320 (parts only)
You Save: $150-$230 by doing it yourself!
Shop labor rates vary but typically run $100-$150/hour. This repair takes a shop approximately 0.7-1.2 hours.
🎯 Ready to get started?
HowToo makes it easy: same-day/2-day shipping on every part, plus all the tools and specialty tools you need! Check out the parts and tools sections below to add everything to your cart.
Assumption: 2.4L uses coil-on-plug with 10mm hold-down bolts; torque shown is typical for this setup.