

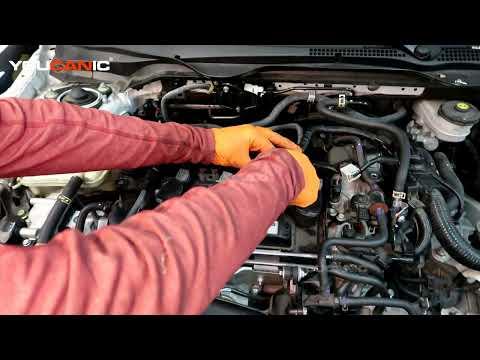







How to Replace Ignition Coils on a 2016-2025 Honda Civic 2.0L Turbo (Trim: Type R | Engine: Inline 4 2.0L | Body: Hatchback)
Step-by-step DIY instructions with required tools, safety tips, and torque specs for 2016, 2017, 2018
How to Replace Ignition Coils on a 2016-2025 Honda Civic 2.0L Turbo (Trim: Type R | Engine: Inline 4 2.0L | Body: Hatchback)
Step-by-step DIY instructions with required tools, safety tips, and torque specs for 2016, 2017, 2018


🔧 Civic - Ignition Coil Replacement
The four ignition coils sit directly above the spark plugs. Replacing a failed coil can correct an engine misfire, rough idle, loss of power, or a flashing check-engine light.
Difficulty Level: Beginner | Estimated Time: 30-45 minutes
Assumption: This procedure applies to the stock turbocharged 2.0L engine.
⚠️ Safety & Precautions
- ⚠️ Let the engine cool completely before touching the coils or valve cover.
- 🔥 Never work near a hot turbocharger or exhaust system.
- 🚫 Do not drive your Civic if the check-engine light is flashing; an active misfire can damage the catalytic converter.
- 🔌 Switch the ignition off and keep the key away from the vehicle while working.
- 🔋 Battery disconnection is not required for this repair.
- 🧼 Keep dirt and loose objects out of the open spark-plug tubes.
🔧 Required Tools
You'll need the following tools for this repair:
- 10mm socket
- 3/8-inch drive ratchet
- 3/8-inch drive 3-inch extension
- 3/8-inch drive torque wrench rated 5-30 Nm
- Plastic trim-removal tool
- Shop vacuum with crevice nozzle
- Nitrile mechanic gloves
- Safety glasses
🔩 Required Parts
HowToo sells all the parts you need for this repair:
- Ignition coil matched to the turbocharged 2.0L engine - Qty: 1 as needed
Replace only the diagnosed failed coil unless testing shows that additional coils are defective. Do not install coils intended for the naturally aspirated 2.0L Civic engine.
📋 Before You Begin
- 🅿️ Park your Civic on level ground, select neutral, apply the parking brake, and switch the ignition off.
- ❄️ Open the hood and allow the engine to become completely cool.
- 🔑 Place the key at least 3 metres away so the ignition cannot be switched on accidentally.
- 🔎 Identify the failed cylinder before replacing a single coil whenever possible. The cylinders are numbered 1 through 4 from the timing-chain end of the engine toward the transmission.
- 📱 No infotainment service mode, battery registration, coding, or scan-tool command is required.
🔨 Step-by-Step Instructions
Follow these steps in order:
Step 1: Remove the Engine Cover
- Put on the safety glasses and nitrile mechanic gloves.
- Lift the engine cover evenly from its mounting points using your hands.
- If a mounting point is tight, use the plastic trim-removal tool beneath the cover near that mounting point. Do not pry against wiring or hoses.
- Set the cover aside where its rubber mounting grommets will not be lost.
- Lift near each mount, not at the edges.
Step 2: Clean Around the Ignition Coils
- Locate the four ignition coils in a row on top of the valve cover.
- Use the shop vacuum with crevice nozzle to remove loose dirt around the coils and spark-plug tubes.
- Do not remove a coil while dirt is sitting around its opening.
Step 3: Disconnect the Coil Connector
- Press the electrical connector's locking tab with a gloved finger, then pull the connector straight back by its plastic housing.
- If necessary, use the plastic trim-removal tool to press the locking tab gently.
- Do not pull on the wires. Stop if the connector does not release and check that the tab is fully depressed.
Step 4: Remove the Coil Retaining Bolt
- Fit the 10mm socket and 3-inch extension to the 3/8-inch drive ratchet.
- Turn the coil retaining bolt counterclockwise and remove it.
- Place the bolt somewhere clean and secure.
Step 5: Remove the Old Ignition Coil
- Grip the coil body with a gloved hand and rotate it slightly from side to side to loosen its rubber boot.
- Pull the coil straight upward from the spark-plug tube.
- Inspect the removed coil for oil, water, cracks, carbon tracking, or a torn boot. Carbon tracking looks like a thin black lightning-shaped line.
- If oil is present inside the spark-plug tube, the valve-cover tube seal requires separate diagnosis and repair.
Step 6: Install the Replacement Coil
- Compare the replacement coil with the removed coil. The connector, boot length, and mounting point must match.
- Inspect the new coil boot for damage using the safety glasses and a clear work area.
- Lower the coil straight into the spark-plug tube by hand.
- Press firmly until the boot seats over the spark plug and the mounting hole aligns.
- Do not apply grease unless the replacement-coil manufacturer specifically supplies and requires it.
Step 7: Tighten the Retaining Bolt
- Start the retaining bolt several turns by hand to prevent cross-threading.
- Use the 10mm socket, 3-inch extension, and 3/8-inch drive torque wrench rated 5-30 Nm to tighten it.
- Torque to 12 Nm (9 ft-lbs).
- Do not overtighten the bolt; the mounting area can be damaged.
Step 8: Reconnect the Electrical Connector
- Push the connector onto the ignition coil by hand until the locking tab clicks.
- Pull gently on the plastic connector housing to verify it is locked.
- Use the plastic trim-removal tool only if the wiring retainer needs to be guided back into position.
Step 9: Reinstall the Engine Cover
- Align the engine cover with its mounting points by hand.
- Press directly above each mounting point until the cover is fully seated.
- Verify that the cover does not trap an electrical wire or hose.
✅ After Repair
- 🚗 Start the engine and let it idle. It should run smoothly without shaking or stumbling.
- 👂 Listen for snapping or ticking near the replacement coil, which could indicate incomplete seating.
- ⚠️ Switch the engine off immediately if the check-engine light flashes or the engine continues to misfire.
- 🔍 Recheck that the coil connector is locked and the retaining bolt is secure.
- 🧰 A stored misfire code may remain until cleared with a compatible scan tool or until the vehicle completes enough successful drive cycles.
- 🛣️ Once idle is smooth, perform a short, gentle road test and verify normal acceleration.
💰 DIY vs Shop Cost
Shop Cost: ₹12,000-₹28,000 (parts + labor)
DIY Cost: ₹7,000-₹20,000 (parts only)
You Save: ₹5,000-₹8,000 by doing it yourself!
Imported Type R parts and local availability can significantly affect pricing. This repair takes a shop approximately 0.5-1.0 hour.
🎯 Ready to get started?
HowToo makes it easy: same-day/2-day shipping on every part, plus all the tools and specialty tools you need! Check out the parts and tools sections below to add everything to your cart.