

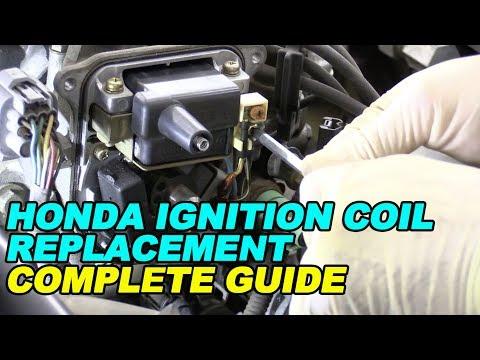







How to Replace Ignition Coils on a 2016-2025 Honda Civic 1.5L Turbo (Trim: Si | Engine: Inline 4 1.5L | Body: Sedan)
Step-by-step DIY instructions with required tools, parts, torque specs, and safety tips for 2016, 2017, 2018
How to Replace Ignition Coils on a 2016-2025 Honda Civic 1.5L Turbo (Trim: Si | Engine: Inline 4 1.5L | Body: Sedan)
Step-by-step DIY instructions with required tools, parts, torque specs, and safety tips for 2016, 2017, 2018


🔧 Civic - Ignition Coil Replacement
This is an easy repair on your Civic. The four coils sit directly on top of the spark plugs, so you only need to remove the engine cover, disconnect each coil, and lift it out.
Difficulty Level: Beginner | Estimated Time: 30-45 minutes
Assumption: These instructions cover the stock 1.5L turbo ignition system.
⚠️ Safety & Precautions
- ⚠️ Let the engine cool completely before touching the coils.
- ⚠️ Switch the ignition off and keep the key away from the vehicle.
- ⚠️ Never start or crank the engine with an ignition coil disconnected.
- ⚠️ Do not pull on the wiring. Press the connector lock and pull the connector body.
- ⚠️ Battery disconnection is not normally required for this repair.
🔧 Required Tools
You'll need the following tools for this repair:
- 10mm shallow socket
- 1/4-inch drive ratchet
- 3-inch socket extension
- 1/4-inch drive inch-pound torque wrench
- Small plastic trim tool
- Compressed-air nozzle or soft detailing brush
- Safety glasses
- Nitrile work gloves
🔩 Required Parts
HowToo sells all the parts you need for this repair:
- Ignition coil - Qty: 1 for a confirmed failed coil
- Ignition coils - Qty: 4 if replacing the complete original set
I'd replace only the confirmed bad coil unless the others are original and have similar high mileage. Use matching OE-quality coils rather than mixing bargain designs. Cheap ignition parts have a remarkable talent for creating expensive-looking problems.
📋 Before You Begin
- 📋 Park your Civic on level ground, select neutral, and apply the parking brake.
- 📋 Allow the engine to cool for at least 30 minutes.
- 📋 Take a photo of the coil connectors and wiring before disassembly.
- 📋 Work on one coil at a time so every connector returns to its original position.
- 📋 No infotainment service mode or scan-tool command is required.
🔨 Step-by-Step Instructions
Follow these steps in order:
Step 1: Remove the engine cover
- Grip the plastic engine cover near its mounting points with both gloved hands.
- Pull upward evenly to release it from its rubber mounting grommets.
- Use a small plastic trim tool only if a grommet sticks. Do not pry against a hose or wiring harness.
- Set the cover aside where its mounting posts cannot be damaged.
Step 2: Clean around the ignition coils
- Use a compressed-air nozzle or soft detailing brush to remove loose dirt around the coils.
- Wear safety glasses and direct compressed air away from your face.
- This prevents debris from falling into the spark-plug wells when a coil is removed.
Step 3: Disconnect the first coil
- Press the locking tab on the electrical connector with your finger.
- Pull the connector straight from the coil by its plastic housing.
- Use the small plastic trim tool to press the lock gently if it is stubborn.
- Do not force a brittle connector. Heat and age can make the lock easy to break.
Step 4: Remove the coil hold-down bolt
- Use the 10mm shallow socket, 3-inch extension, and 1/4-inch drive ratchet to remove the coil's small hold-down bolt.
- Keep the bolt somewhere clean. Do not drop it between the engine and radiator.
Step 5: Remove the old ignition coil
- Grip the coil body and rotate it slightly left and right.
- Pull the coil straight upward from the spark-plug well.
- Inspect the rubber boot for oil, coolant, cracks, white tracking marks, or burn marks.
- Oil inside the well indicates a separate sealing problem that should be repaired before installing another coil.
- Never pry against the valve cover.
Step 6: Install the replacement coil
- Compare the replacement coil with the removed coil before installation.
- Confirm that the connector shape, mounting point, boot length, and spring position match.
- Lower the new coil straight over the spark plug.
- Press down firmly until the rubber boot is fully seated on the plug.
- Do not put dielectric grease on the metal electrical contacts. If the new coil manufacturer supplies grease, use only a very thin film inside the boot opening.
Step 7: Install the hold-down bolt
- Start the bolt by hand for several turns. This protects the aluminum valve-cover threads from cross-threading.
- Use the 1/4-inch drive inch-pound torque wrench and 10mm shallow socket to tighten the bolt.
- Torque to 12 Nm (9 ft-lbs or 106 in-lbs).
- Stop as soon as the torque wrench clicks. This small bolt does not need muscle.
Step 8: Reconnect the coil
- Push the electrical connector straight onto the new coil.
- Confirm that the locking tab clicks into place.
- Pull gently on the connector housing to verify it is locked.
Step 9: Replace any remaining coils
- Repeat Steps 3 through 8 for each additional coil.
- Continue working one cylinder at a time.
- Inspect every connector for broken locks, corrosion, bent terminals, or damaged wiring.
Step 10: Reinstall the engine cover
- Check that all four coil connectors are fully seated and no tools remain in the engine bay.
- Align the engine-cover mounting points with their rubber grommets.
- Press downward directly over each mounting point using both hands.
- Do not strike the cover or force it sideways.
✅ After Repair
- ✅ Start the engine and let it idle for two to three minutes.
- ✅ Listen for a smooth idle and check that the malfunction indicator light is not flashing.
- ✅ If the light flashes or the engine runs worse, switch it off immediately and recheck every coil connector.
- ✅ Use an OBD-II scan tool to clear stored misfire codes only after the underlying fault is repaired.
- ✅ Take a short, gentle test drive and recheck for pending misfire codes afterward.
- ✅ If the same cylinder still misfires, inspect its spark plug, connector, wiring, compression, and fuel injector rather than installing more coils blindly.
💰 DIY vs Shop Cost
Shop Cost: $150-$450 for one to four coils, including parts and labor
DIY Cost: Approximately $28-$275 for one to four coils
You Save: Approximately $75-$175 by doing it yourself!
Shop labor rates vary but typically run $100-$150/hour. This repair takes a shop approximately 0.5-1.0 hour.
🎯 Ready to get started?
HowToo makes it easy: same-day/2-day shipping on every part, plus all the tools and specialty tools you need! Check out the parts and tools sections below to add everything to your cart.