


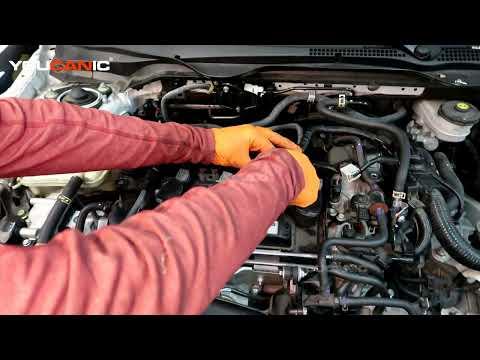







How to Replace Ignition Coils on a 2016-2021 Honda Civic (Engine: Inline 4 2.0L)
Step-by-step DIY guide with tools, parts, torque specs, safety tips, and code clearing for 2016, 2017, 2018, 2019, 2020, 2021
How to Replace Ignition Coils on a 2016-2021 Honda Civic (Engine: Inline 4 2.0L)
Step-by-step DIY guide with tools, parts, torque specs, safety tips, and code clearing for 2016, 2017, 2018, 2019, 2020, 2021
🔧 Civic - Fuel Cap Replacement
Replacing the fuel cap on your Civic is one of the easiest repairs you can do. A bad or loose cap can trigger an EVAP leak code, fuel smell, or a check engine light because the fuel system cannot seal correctly.
Difficulty Level: Beginner | Estimated Time: 5-10 minutes
⚠️ Safety & Precautions
- ⚠️ Work in a well-ventilated area away from flames, cigarettes, sparks, or hot work lights.
- ⚠️ Turn the engine off before opening the fuel door.
- ⚠️ Do not overfill the fuel tank after replacing the cap because it can damage the EVAP system.
- ⚠️ Wipe up any fuel immediately with shop towels.
🔧 Required Tools
You'll need the following tools for this repair:
- Nitrile gloves
- Safety glasses
- Shop towels
- OBD2 scan tool
🔩 Required Parts
HowToo sells all the parts you need for this repair:
- Fuel cap - Qty: 1
📋 Before You Begin
- Park your Civic on level ground and turn the ignition off.
- Set the parking brake.
- Put on nitrile gloves and safety glasses.
- If the check engine light is on, plug the OBD2 scan tool into the port under the driver side dash and record any EVAP-related codes before clearing them.
- An OBD2 scan tool is a small diagnostic tool that reads and clears fault codes from the vehicle computer.
🔨 Step-by-Step Instructions
Follow these steps in order:
Step 1: Open the Fuel Door
- Use your hand to open the fuel door on the left rear side of your Civic.
- Make sure the area around the fuel filler is clean and dry.
- Use shop towels to wipe away dust or fuel residue around the fuel cap area.
Step 2: Remove the Old Fuel Cap
- Use your hand to turn the fuel cap counterclockwise until it comes loose.
- Pull the fuel cap away from the filler neck.
- If your old cap has a tether, use your hand to unclip the tether from the fuel door or filler area.
- A tether is the small plastic strap that keeps the fuel cap attached to the vehicle.
Step 3: Inspect the Filler Neck
- Use a shop towel to gently clean the sealing surface of the filler neck.
- The sealing surface is the smooth lip where the rubber seal on the cap presses against the filler opening.
- Look for cracks, rust, dirt, or damage on the filler neck.
- If the filler neck is damaged, replacing only the cap may not fix an EVAP leak code.
Step 4: Install the New Fuel Cap
- If the new fuel cap has a tether, use your hand to clip it into the same mounting point as the old tether.
- Place the new fuel cap onto the filler neck.
- Use your hand to turn the cap clockwise until it clicks.
- Continue turning until you hear at least one click, then stop.
- One firm click is enough.
Step 5: Close the Fuel Door
- Use your hand to close the fuel door securely.
- Make sure the fuel door sits flush with the body panel.
Step 6: Clear the Check Engine Light
- If the check engine light was on, plug the OBD2 scan tool into the diagnostic port under the driver side dash.
- Use the OBD2 scan tool to clear the EVAP code after installing the new cap.
- If you do not clear the code, the light may turn off by itself after several drive cycles if the system passes its self-test.
- A drive cycle means the vehicle is driven through normal conditions long enough for the computer to retest the fuel vapor system.
✅ After Repair
- ✅ Drive your Civic normally for several trips and watch for the check engine light.
- ✅ If the check engine light returns with an EVAP leak code, inspect the filler neck, purge valve, vent valve, and EVAP hoses.
- ✅ Avoid topping off the tank after the fuel pump clicks off.
💰 DIY vs Shop Cost
Shop Cost: $80-$160 parts + labor/diagnostic time
DIY Cost: $15-$35 parts only
You Save: $65-$125 by doing it yourself!
Shop labor rates vary but typically run $100-$150/hour. This repair takes a shop approximately 0.2-0.5 hours including code check.
🎯 Ready to get started?
HowToo makes it easy: same-day/2-day shipping on every part, plus all the tools and specialty tools you need! Check out the parts and tools sections below to add everything to your cart.

🔧 Civic - Starter Motor Replacement
The starter motor turns the engine over when you press the start button. On your Civic, replacing it requires working from the engine bay and underneath the vehicle, so safe lifting and battery disconnection are very important.
Difficulty Level: Advanced | Estimated Time: 3-5 hours
⚠️ Safety & Precautions
- ⚠️ Disconnect the negative battery cable before touching the starter wiring. The starter main cable is always connected to battery power.
- ⚠️ Support your Civic with jack stands on solid, level ground. Never work under a vehicle supported only by a jack.
- ⚠️ Let the engine, exhaust, and turbocharger area cool completely before starting.
- ⚠️ Keep hands clear of the radiator fans. They can start unexpectedly if the system is powered.
- ⚠️ Label or photograph wiring before removal so the starter terminals go back correctly.
🔧 Required Tools
You'll need the following tools for this repair:
- 10mm socket
- 12mm socket
- 14mm socket
- 17mm socket
- 1/4-inch drive ratchet
- 3/8-inch drive ratchet
- 1/2-inch drive breaker bar
- 3-inch extension
- 6-inch extension
- 10mm wrench
- 12mm wrench
- 14mm wrench
- Flathead screwdriver
- Trim clip removal tool
- Torque wrench rated 10-100 Nm
- Floor jack rated 2-ton minimum
- Jack stands rated 2-ton minimum
- Wheel chocks
- Work light
- Paint marker
- Nitrile gloves
- Safety glasses
🔩 Required Parts
HowToo sells all the parts you need for this repair:
- Starter motor - Qty: 1
- Starter terminal nut - Qty: 1 if damaged or corroded
- Battery terminal protector - Qty: 1 small packet
📋 Before You Begin
- Park your Civic on level ground.
- Set the parking brake and place the manual transmission in neutral.
- Place wheel chocks behind the rear wheels.
- Open the hood and let the engine cool fully.
- Use a 10mm wrench to disconnect the negative battery cable first.
- Wait at least 3 minutes after battery disconnection before working near engine wiring.
- Use your phone to take photos of the starter wiring and bracket layout before removal.
🔨 Step-by-Step Instructions
Follow these steps in order:
Step 1: Disconnect the Battery
- Use a 10mm wrench to loosen the negative battery terminal clamp.
- Lift the negative cable off the battery post and move it away so it cannot spring back.
- Cover the cable end with a shop towel if needed.
- No battery power near starter wires.
Step 2: Raise and Support the Front of the Vehicle
- Place wheel chocks behind the rear wheels.
- Use a floor jack rated 2-ton minimum to lift the front of your Civic at the front center jacking point.
- Place jack stands rated 2-ton minimum under the front side pinch weld support points.
- Lower the vehicle gently onto the jack stands.
- Push the vehicle lightly by hand to confirm it is stable before going underneath.
Step 3: Remove the Lower Engine Splash Shield
- Use a trim clip removal tool to remove the plastic clips from the lower splash shield.
- Use a 10mm socket and 1/4-inch drive ratchet to remove any 10mm splash shield bolts.
- Lower the splash shield and set it aside.
- A trim clip removal tool is a small fork-shaped tool that removes plastic clips without breaking them.
Step 4: Locate the Starter Motor
- Use a work light to look at the transmission side of the engine, near where the engine and transmission meet.
- The starter motor is a small cylindrical electric motor mounted into the transmission bellhousing.
- The bellhousing is the large transmission housing bolted directly to the engine.
- Identify the large battery cable and the smaller signal connector on the starter.
Step 5: Label the Starter Wiring
- Use a paint marker to mark the large starter cable position.
- Take a clear photo of the wiring with your phone before removal.
- This helps prevent installing the cable on the wrong side of the terminal cover.
Step 6: Disconnect the Starter Signal Connector
- Use your fingers to press the lock tab on the small starter signal connector.
- If the tab is tight, use a flathead screwdriver to gently lift the connector lock.
- Pull the connector straight off by the plastic body, not by the wire.
Step 7: Remove the Starter Battery Cable
- Use a flathead screwdriver to open the protective rubber cap over the large starter terminal.
- Use a 12mm socket and 3/8-inch drive ratchet to remove the starter terminal nut.
- Lift the battery cable off the starter terminal and move it aside.
- Keep the nut safe if your replacement starter does not include one.
Step 8: Remove Any Wire Brackets in the Way
- Use a 10mm socket and 1/4-inch drive ratchet to remove nearby harness bracket bolts if they block starter access.
- Use a 12mm socket and 3/8-inch drive ratchet if a larger bracket bolt is present.
- Move brackets gently aside without stretching the wiring.
- Only move what blocks access.
Step 9: Remove the Starter Mounting Bolts
- Support the starter with one hand before removing the final bolt.
- Use a 14mm socket, 6-inch extension, and 3/8-inch drive ratchet to loosen the starter mounting bolts.
- If a bolt is very tight, use a 1/2-inch drive breaker bar with a 14mm socket to break it loose carefully.
- Remove the starter mounting bolts completely.
- The starter is heavy enough to surprise you, so keep one hand on it as the last bolt comes out.
Step 10: Remove the Starter Motor
- Wiggle the starter by hand to free it from the transmission bellhousing.
- Lower or maneuver the starter out through the available opening.
- Do not force it against wiring, hoses, or the radiator fan shroud.
- Compare the old starter to the new starter before installation.
Step 11: Install the New Starter Motor
- Position the new starter into the transmission bellhousing by hand.
- Start both mounting bolts by hand before tightening either one.
- Use a 14mm socket and 3/8-inch drive ratchet to snug the starter mounting bolts evenly.
- Use a torque wrench rated 10-100 Nm with a 14mm socket to tighten the starter mounting bolts to Torque to 44 Nm (33 ft-lbs).
Step 12: Reconnect the Starter Battery Cable
- Place the large battery cable onto the starter terminal exactly as photographed earlier.
- Use a 12mm socket and 3/8-inch drive ratchet to install the terminal nut.
- Use a torque wrench rated 10-100 Nm with a 12mm socket to tighten the terminal nut to Torque to 9 Nm (80 in-lbs).
- Close the protective rubber cap fully over the terminal.
Step 13: Reconnect the Signal Connector
- Push the small starter signal connector onto the starter until it clicks.
- Gently tug the connector body by hand to confirm it is locked.
Step 14: Reinstall Brackets and Splash Shield
- Use a 10mm socket and 1/4-inch drive ratchet to reinstall any removed harness bracket bolts.
- Use a 12mm socket and 3/8-inch drive ratchet for any larger bracket bolts removed earlier.
- Use a 10mm socket and 1/4-inch drive ratchet to reinstall lower splash shield bolts.
- Use a trim clip removal tool or your fingers to reinstall the plastic splash shield clips.
- Tighten splash shield bolts snugly by hand tool only. Do not overtighten plastic-panel fasteners.
Step 15: Lower the Vehicle
- Use the floor jack rated 2-ton minimum to lift the front slightly off the jack stands.
- Remove the jack stands rated 2-ton minimum.
- Lower your Civic slowly to the ground.
- Remove the wheel chocks after the vehicle is fully on the ground.
Step 16: Reconnect the Battery
- Apply a light coat of battery terminal protector to the negative battery post if available.
- Use a 10mm wrench to reconnect the negative battery cable.
- Tighten the clamp until it cannot rotate by hand.
✅ After Repair
- ✅ Press the clutch pedal fully and start your Civic.
- ✅ Listen for a clean crank with no grinding, clicking, or dragging sound.
- ✅ If it does not crank, recheck the negative battery cable, starter signal connector, and large starter cable connection.
- ✅ Let the engine idle for a few minutes and confirm no warning lights remain.
- ✅ The idle may relearn after battery disconnection. Let it idle with accessories off for several minutes if it feels slightly uneven.
💰 DIY vs Shop Cost
Shop Cost: $650-$1,100 parts + labor
DIY Cost: $250-$550 parts only
You Save: $400-$550 by doing it yourself!
Shop labor rates vary but typically run $100-$150/hour. This repair takes a shop approximately 2.5-4.0 hours.
🎯 Ready to get started?
HowToo makes it easy: same-day/2-day shipping on every part, plus all the tools and specialty tools you need! Check out the parts and tools sections below to add everything to your cart.
🔧 Civic - Fuel Cap Replacement
The fuel cap seals the fuel tank so the evaporative emissions system can check for leaks. On your Civic, a loose, cracked, or worn fuel cap can cause a fuel smell or trigger a check engine light for an EVAP leak.
Difficulty Level: Beginner | Estimated Time: 5-10 minutes
⚠️ Safety & Precautions
- ⚠️ Turn the engine off before opening the fuel door.
- ⚠️ Work away from flames, cigarettes, sparks, or hot work lights.
- ⚠️ Fuel vapors are flammable, even if you do not see liquid fuel.
- ⚠️ Do not top off the fuel tank after the pump clicks off. Overfilling can damage the EVAP system.
🔧 Required Tools
You'll need the following tools for this repair:
- Nitrile gloves
- Safety glasses
- Shop towels
- OBD2 scan tool
🔩 Required Parts
HowToo sells all the parts you need for this repair:
- Fuel cap - Qty: 1
📋 Before You Begin
- Park your Civic on level ground.
- Set the parking brake.
- Turn the ignition off.
- Put on nitrile gloves and safety glasses.
- If the check engine light is on, use an OBD2 scan tool to record the stored code before clearing it.
- An OBD2 scan tool is a small diagnostic tool that plugs in under the dash and reads vehicle fault codes.
🔨 Step-by-Step Instructions
Follow these steps in order:
Step 1: Open the Fuel Door
- Use your hand to open the fuel door on the left rear side of your Civic.
- Use shop towels to wipe dirt or fuel residue from around the fuel filler area.
- Keep the area clean so debris does not enter the filler neck.
Step 2: Remove the Old Fuel Cap
- Use your hand to turn the fuel cap counterclockwise until it releases.
- Pull the fuel cap straight away from the filler neck.
- If the cap has a tether, use your hand to unclip it from the fuel door or filler area.
- A tether is the small plastic strap that keeps the cap attached to the vehicle.
Step 3: Inspect the Filler Neck
- Use shop towels to clean the filler neck sealing surface.
- The sealing surface is the smooth lip where the cap gasket presses to make an airtight seal.
- Look for dirt, cracks, rust, dents, or damage.
- If the sealing surface is damaged, a new cap may not fully fix an EVAP leak.
Step 4: Install the New Fuel Cap
- If the new fuel cap has a tether, use your hand to clip it into the same mounting point as the old one.
- Place the new cap squarely on the filler neck.
- Use your hand to turn the cap clockwise until it clicks.
- Stop after one or more firm clicks.
- No torque wrench is used here. The cap is hand-tightened only.
- One firm click seals it.
Step 5: Close the Fuel Door
- Use your hand to close the fuel door.
- Make sure the fuel door sits flush with the body.
Step 6: Clear Any EVAP Code
- If the check engine light was on, plug the OBD2 scan tool into the diagnostic port under the driver side dash.
- Use the OBD2 scan tool to clear the EVAP-related code.
- If you do not clear the code, your Civic may turn the light off after several normal drive cycles if the EVAP test passes.
- A drive cycle means the vehicle is driven long enough for the computer to retest the fuel vapor system.
✅ After Repair
- ✅ Drive your Civic normally for several trips.
- ✅ Recheck the fuel cap if the check engine light returns.
- ✅ If an EVAP leak code returns, the issue may be the filler neck, purge valve, vent valve, charcoal canister, or EVAP hose instead of the cap.
- ✅ Avoid topping off fuel after the pump clicks off.
💰 DIY vs Shop Cost
Shop Cost: $80-$160 parts + diagnostic/labor
DIY Cost: $15-$35 parts only
You Save: $65-$125 by doing it yourself!
Shop labor rates vary but typically run $100-$150/hour. This repair takes a shop approximately 0.2-0.5 hours including code check.
🎯 Ready to get started?
HowToo makes it easy: same-day/2-day shipping on every part, plus all the tools and specialty tools you need! Check out the parts and tools sections below to add everything to your cart.
🔧 Civic - Alternator Replacement
The alternator charges the battery and powers the electrical system while the engine is running. On your Civic, replacing it requires removing the drive belt and working in a tight engine bay, so take your time and keep track of each connector and bolt.
Difficulty Level: Intermediate | Estimated Time: 2-4 hours
⚠️ Safety & Precautions
- ⚠️ Disconnect the negative battery cable before starting. The alternator main wire is connected to battery power.
- ⚠️ Let the engine cool completely before working near the belt, radiator fan, and turbo area.
- ⚠️ Keep fingers away from the serpentine belt path. A belt tensioner can snap back quickly.
- ⚠️ Do not run the engine with tools near the belt or pulleys.
- ⚠️ If the battery warning light stays on after repair, stop driving and recheck connections.
🔧 Required Tools
You'll need the following tools for this repair:
- 10mm socket
- 12mm socket
- 14mm socket
- 17mm socket
- 10mm wrench
- 12mm wrench
- 3/8-inch drive ratchet
- 1/2-inch drive breaker bar
- 3-inch extension
- 6-inch extension
- Serpentine belt tool (specialty)
- Flathead screwdriver
- Trim clip removal tool
- Torque wrench rated 10-100 Nm
- Paint marker
- Work light
- Battery terminal brush
- Nitrile gloves
- Safety glasses
🔩 Required Parts
HowToo sells all the parts you need for this repair:
- Alternator - Qty: 1
- Serpentine belt - Qty: 1 if worn, cracked, glazed, or oil-soaked
- Battery terminal protector - Qty: 1 small packet
📋 Before You Begin
- Park your Civic on level ground.
- Set the parking brake and shift the manual transmission into neutral.
- Turn the ignition off and keep the key/fob away from the vehicle.
- Open the hood and let the engine cool fully.
- Use a 10mm wrench to disconnect the negative battery cable first.
- Use a paint marker or take a clear phone photo of the serpentine belt routing before removing the belt.
- A serpentine belt is the long rubber belt that spins accessories like the alternator and A/C compressor.
🔨 Step-by-Step Instructions
Follow these steps in order:
Step 1: Disconnect the Battery
- Use a 10mm wrench to loosen the negative battery terminal clamp.
- Lift the negative cable off the battery post and move it aside so it cannot touch the post.
- Use a battery terminal brush to clean the terminal if it has white or green corrosion.
- Battery disconnected means safer hands.
Step 2: Remove Upper Access Pieces
- Use a trim clip removal tool to remove any plastic clips holding the upper radiator/air guide panel if it blocks access.
- Use a 10mm socket and 3/8-inch drive ratchet to remove any 10mm bolts from the access panel.
- Set clips and bolts in a cup so they do not get lost.
- A trim clip removal tool is a small fork-shaped tool that lifts plastic clips without breaking them.
Step 3: Record the Belt Routing
- Use a paint marker to mark the belt direction if you plan to reuse it.
- Take a clear photo of how the belt wraps around each pulley.
- A pulley is a grooved wheel that the belt rides on.
- Your photo is your backup diagram.
Step 4: Release Belt Tension
- Place the serpentine belt tool or 1/2-inch drive breaker bar on the belt tensioner.
- The belt tensioner is the spring-loaded arm that keeps the belt tight.
- Rotate the tensioner slowly to release belt tension.
- While holding the tensioner released, slide the belt off the alternator pulley by hand.
- Slowly return the tensioner to its resting position. Do not let it snap back.
Step 5: Move the Belt Aside
- Use your hands to move the serpentine belt away from the alternator pulley.
- If replacing the belt, remove it fully from the engine.
- If reusing the belt, leave it routed around the lower pulleys and keep it clean.
Step 6: Disconnect the Alternator Electrical Connector
- Use your fingers to press the lock tab on the small alternator connector.
- If the tab is stubborn, use a flathead screwdriver to gently lift the lock while pulling the connector body straight back.
- Do not pull on the wires.
Step 7: Remove the Alternator Main Cable
- Use a flathead screwdriver to open the rubber protective cover on the alternator output terminal.
- Use a 12mm socket and 3/8-inch drive ratchet to remove the alternator output terminal nut.
- Lift the cable eyelet off the alternator stud and move it aside.
- An eyelet is the round metal end of the wire that fits over the stud.
Step 8: Remove Brackets Blocking Alternator Removal
- Use a 10mm socket and 3/8-inch drive ratchet to remove any small wiring bracket bolts attached near the alternator.
- Use a 12mm socket and 3/8-inch drive ratchet if a larger bracket bolt is present.
- Move brackets only as far as needed. Do not stretch wiring or hoses.
Step 9: Remove Alternator Mounting Bolts
- Support the alternator with one hand.
- Use a 14mm socket, 6-inch extension, and 3/8-inch drive ratchet to loosen the alternator mounting bolts.
- If a bolt is very tight, use a 1/2-inch drive breaker bar with a 14mm socket to break it loose carefully.
- Remove the upper and lower alternator mounting bolts.
- The alternator is heavier than it looks, so keep one hand on it as the last bolt comes out.
Step 10: Remove the Old Alternator
- Wiggle the alternator by hand to free it from the mounting bracket.
- If it is stuck in the bracket, use a flathead screwdriver gently between the alternator ear and bracket to help loosen it.
- Lift the alternator out through the available space in the engine bay.
- Do not force it against the radiator, wiring, or A/C lines.
Step 11: Compare the New Alternator
- Place the old and new alternators side by side on a bench.
- Confirm the pulley, mounting ears, electrical connector, and output stud are in the same positions.
- Use a 12mm wrench only if you need to transfer a small terminal nut supplied differently with the replacement unit.
Step 12: Install the New Alternator
- Lower the new alternator into position by hand.
- Start the mounting bolts by hand first to avoid cross-threading.
- Use a 14mm socket and 3/8-inch drive ratchet to snug the bolts evenly.
- Use a torque wrench rated 10-100 Nm with a 14mm socket to tighten the alternator mounting bolts to Torque to 44 Nm (33 ft-lbs).
Step 13: Reconnect Alternator Wiring
- Place the main cable eyelet onto the alternator output stud.
- Use a 12mm socket and 3/8-inch drive ratchet to install the output terminal nut.
- Use a torque wrench rated 10-100 Nm with a 12mm socket to tighten the terminal nut to Torque to 9 Nm (80 in-lbs).
- Close the rubber protective cover fully over the terminal.
- Push the small electrical connector into the alternator until it clicks.
Step 14: Reinstall Brackets
- Use a 10mm socket and 3/8-inch drive ratchet to reinstall any small wiring bracket bolts.
- Use a 12mm socket and 3/8-inch drive ratchet for any larger bracket bolts removed earlier.
- Make sure wiring is clipped back into place and away from the belt path.
Step 15: Reinstall the Serpentine Belt
- Use your belt routing photo to place the belt around the lower pulleys first.
- Use the serpentine belt tool or 1/2-inch drive breaker bar to rotate the belt tensioner slowly.
- Slide the belt over the alternator pulley by hand.
- Slowly release the tensioner.
- Use a work light to confirm the belt ribs sit correctly in every pulley groove.
- One rib off can shred the belt.
Step 16: Reinstall Upper Access Pieces
- Use a trim clip removal tool or your fingers to reinstall plastic clips.
- Use a 10mm socket and 3/8-inch drive ratchet to reinstall any 10mm access panel bolts.
- Tighten plastic panel bolts snugly only. Do not overtighten.
Step 17: Reconnect the Battery
- Apply a light coat of battery terminal protector to the negative battery post if available.
- Use a 10mm wrench to reconnect the negative battery cable.
- Tighten the clamp until it cannot rotate by hand.
✅ After Repair
- ✅ Start your Civic and make sure the battery warning light turns off.
- ✅ Listen for belt squeal, scraping, or wobbling pulleys.
- ✅ Turn on headlights, blower fan, and rear defroster, then confirm the engine keeps running normally.
- ✅ If you have a basic voltmeter, check battery voltage while running. Normal charging is usually about 13.5-14.8 volts.
- ✅ If the battery was weak from alternator failure, fully charge or test the battery before relying on the vehicle.
- ✅ Idle may relearn after battery disconnection. Let it idle for a few minutes with accessories off.
💰 DIY vs Shop Cost
Shop Cost: $650-$1,050 parts + labor
DIY Cost: $250-$600 parts only
You Save: $400-$450 by doing it yourself!
Shop labor rates vary but typically run $100-$150/hour. This repair takes a shop approximately 2-3 hours.
🎯 Ready to get started?
HowToo makes it easy: same-day/2-day shipping on every part, plus all the tools and specialty tools you need! Check out the parts and tools sections below to add everything to your cart.


