

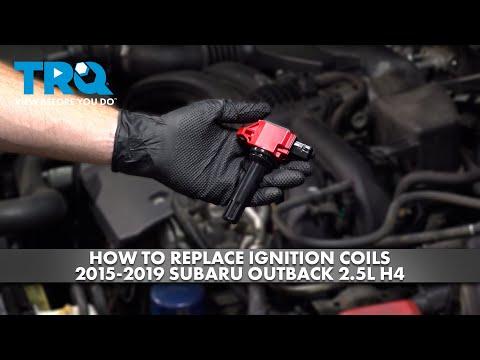







How to Replace Ignition Coils on a 2015 Subaru Legacy (Fix Misfires & Rough Idle)
Step-by-step ignition coil change with tools, parts list, safety tips, and 7.5 Nm (66 in-lbs) torque spec for 2015, 2016, 2017, 2018, 2019
How to Replace Ignition Coils on a 2015 Subaru Legacy (Fix Misfires & Rough Idle)
Step-by-step ignition coil change with tools, parts list, safety tips, and 7.5 Nm (66 in-lbs) torque spec for 2015, 2016, 2017, 2018, 2019


🔧 Legacy - Ignition Coil Replacement
Ignition coils sit on top of the spark plugs and create the high voltage needed to fire each cylinder. Replacing weak or failed coils can fix misfires, rough idle, and flashing check-engine symptoms.
Difficulty Level: Beginner | Estimated Time: 0.5-1.5 hours
⚠️ Safety & Precautions
- ⚠️ Work on a cool engine to avoid burns and damaged connectors.
- ⚠️ Keep the key out of the car so the ignition can’t be turned on.
- ⚠️ Disconnect the negative battery terminal to prevent accidental short circuits.
- ⚠️ Don’t pull on wiring—always pull on the connector body.
🔧 Required Tools
You'll need the following tools for this repair:
- 10mm socket
- 1/4" drive ratchet
- 6" extension (1/4" drive)
- Torque wrench (in-lb or low-range Nm)
- Flat trim tool
- Needle-nose pliers
- Flashlight
- Dielectric grease
- Nitrile gloves
- Safety glasses
🔩 Required Parts
HowToo sells all the parts you need for this repair:
- Ignition coil - Qty: 4 Recommended: replace as a set
📋 Before You Begin
- Park on level ground, shift to Park, and set the parking brake.
- Open the hood and let the engine fully cool.
- Use a 10mm socket to disconnect the negative battery terminal and move it aside so it can’t spring back.
- Assumption: stock intake/engine cover layout.
🔨 Step-by-Step Instructions
Follow these steps in order:
Step 1: Remove the engine cover (if equipped)
- Grip the cover and pull straight up to release the rubber grommets.
- If any clips resist, use a flat trim tool to gently pry near the grommet.
Step 2: Locate the ignition coils
- Each coil sits on top of a spark plug—two on the left side of the engine and two on the right.
- Use a flashlight to see the electrical connectors and the single hold-down bolt on each coil.
Step 3: Unplug the coil connector
- Press the connector lock tab and pull the connector straight back.
- If it’s stuck, gently help the tab with a flat trim tool—don’t force it.
- Pull the connector body, not the wires.
Step 4: Remove the coil hold-down bolt
- Use a 10mm socket, 1/4" drive ratchet, and 6" extension to remove the bolt.
- Set the bolt aside where it won’t fall into the engine bay.
Step 5: Remove the ignition coil
- Twist the coil slightly left-right to break the boot seal, then pull straight out.
- If it’s tight, keep twisting while pulling—don’t pry hard against plastic parts.
Step 6: Prep and install the new coil
- Put a small smear of dielectric grease inside the rubber boot (this helps prevent moisture and makes future removal easier; it’s a non-conductive silicone grease).
- Push the new coil straight down onto the spark plug until it fully seats.
- Reinstall the hold-down bolt by hand first (to avoid cross-threading), then tighten with a 10mm socket.
- Torque to 7.5 Nm (66 in-lbs) using a torque wrench.
Step 7: Reconnect the coil connector
- Push the connector on until you feel/hear the click.
- Give it a gentle tug to confirm it’s locked.
Step 8: Repeat for the other coils
- Repeat Steps 3–7 for the remaining 3 coils.
- Do one coil at a time to stay organized.
Step 9: Reinstall engine cover and reconnect battery
- Reinstall the engine cover by lining up the grommets and pushing down firmly.
- Reconnect the negative battery terminal using a 10mm socket and snug it securely.
✅ After Repair
- Start the engine and let it idle for 1–2 minutes. It should run smooth.
- If the check engine light was on for misfire, it may need to be cleared with a scan tool, or it may clear after several drive cycles if the issue is fixed.
- Test drive for 10–15 minutes and verify there’s no hesitation under acceleration.
- Recheck that all four connectors are fully clicked in if you feel any misfire.
💰 DIY vs Shop Cost
Shop Cost: $350-$750 (parts + labor)
DIY Cost: $180-$500 (parts only)
You Save: $170-$250 by doing it yourself!
Shop labor rates vary but typically run $100-$150/hour. This repair takes a shop approximately 0.7-1.2 hours.
🎯 Ready to get started?
HowToo makes it easy: same-day/2-day shipping on every part, plus all the tools and specialty tools you need! Check out the parts and tools sections below to add everything to your cart.