

![14 - 18 Kia Forte [EASY] 1.8L 1.6L Spark Plugs & Coil Replacement | DIY](/_next/image?url=https%3A%2F%2Fimg.youtube.com%2Fvi%2FP9Np-VO_ZEs%2Fhqdefault.jpg&w=3840&q=75)






How to Replace Ignition Coils on a 2014-2018 Kia Forte 2.0L
Step-by-step DIY instructions with tools, parts, torque specs, diagnostics, and safety tips for 2014, 2015, 2016, 2018
How to Replace Ignition Coils on a 2014-2018 Kia Forte 2.0L
Step-by-step DIY instructions with tools, parts, torque specs, diagnostics, and safety tips for 2014, 2015, 2016, 2018


🔧 Forte - Ignition Coil Replacement
Your Forte uses one ignition coil directly above each spark plug. A failed coil can cause shaking, weak acceleration, poor fuel economy, and a flashing or steady check-engine light.
Difficulty Level: Beginner | Estimated Time: 0.5-1 hour
Assumption: Replace only diagnosed faulty coils unless renewing all four.
⚠️ Safety & Precautions
- ⚠️ Let the engine cool completely before touching the coils.
- ⚠️ Disconnect the negative battery terminal before unplugging the coils.
- ⚠️ Never start the engine while an ignition coil is removed.
- ⚠️ Do not allow dirt or hardware to fall into the spark-plug wells.
- ⚠️ If the check-engine light is flashing, avoid driving because unburned fuel can damage the catalytic converter.
🔧 Required Tools
You'll need the following tools for this repair:
- 10mm socket
- 3/8-inch-drive ratchet
- 3/8-inch-drive 6-inch extension
- 3/8-inch-drive torque wrench rated 5-25 Nm
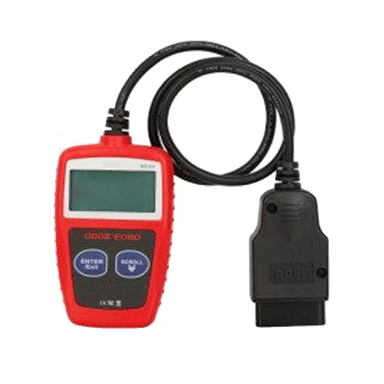
- OBD-II scan tool (specialty)
- Compressed-air nozzle rated 30 psi maximum
- LED work light
- Safety glasses
- Nitrile mechanic gloves
🔩 Required Parts
HowToo sells all the parts you need for this repair:
- Ignition coil for 2.0L engine - Qty: 1 per failed cylinder, up to 4
- Dielectric silicone grease - Qty: 1 small tube
Ignition coils do not have to be replaced in pairs. Replace all four only if testing supports it or you are intentionally renewing a high-mileage set.
📋 Before You Begin
- 📍 Park your Forte on level ground, select Park, apply the parking brake, and switch the ignition off.
- 🧊 Open the hood and wait until the engine is cool.
- 🔎 Use the OBD-II scan tool to record stored codes. Codes P0301 through P0304 identify the misfiring cylinder; cylinder 1 is at the passenger-side end of the engine.
- 🔋 Keep the key away from the vehicle, then disconnect the negative battery terminal.
🔨 Step-by-Step Instructions
Follow these steps in order:
Step 1: Disconnect the Battery
- Wear safety glasses and nitrile mechanic gloves.
- Use the 10mm socket and 3/8-inch-drive ratchet to loosen the negative battery-terminal clamp.
- Lift the clamp from the battery post and position it where it cannot spring back into contact.
- Remove the negative terminal only.
Step 2: Remove the Engine Cover
- Use the LED work light to inspect the top of the engine.
- With nitrile mechanic gloves, grasp the plastic engine cover near its mounting points and pull it straight upward to release the rubber grommets.
- Place the cover somewhere clean so its mounting grommets are not lost.
Step 3: Identify the Coil Being Replaced
- Use the LED work light to locate the four ignition coils arranged in a row on top of the engine.
- If using a stored misfire code, count from the passenger-side end: P0301 is cylinder 1, P0302 is cylinder 2, P0303 is cylinder 3, and P0304 is cylinder 4.
- An ignition coil is the rectangular electrical unit fitted directly over a spark plug.
Step 4: Clean Around the Coil
- Wear safety glasses before using the compressed-air nozzle.
- Use the compressed-air nozzle at no more than 30 psi to blow loose dirt away from the coil and spark-plug well.
- Keep the nozzle pointed away from your face and nearby electrical connectors.
Step 5: Disconnect the Electrical Connector
- Use the LED work light to find the locking tab on the coil connector.
- With nitrile mechanic gloves, press the connector tab and pull the connector straight off by its plastic housing.
- Do not pull on the wires. If the connector resists, press it slightly inward before depressing the tab again.
Step 6: Remove the Old Ignition Coil
- Use the 10mm socket, 6-inch extension, and 3/8-inch-drive ratchet to remove the coil retaining bolt.
- With nitrile mechanic gloves, twist the coil gently from side to side to release its rubber boot.
- Pull the coil straight upward and out of the spark-plug well.
- Use the LED work light to check the well for oil or water. Oil may indicate a leaking valve-cover tube seal that should be repaired separately.
Step 7: Prepare the New Coil
- Use nitrile mechanic gloves to compare the new and old coils. Their connector, mounting tab, boot length, and overall shape must match.
- Apply a very thin film of dielectric silicone grease inside the lower lip of the new coil boot. Dielectric grease is an insulating silicone lubricant that helps prevent moisture entry.
- Do not place grease on the metal electrical contact or coat the spark plug heavily.
Step 8: Install the New Ignition Coil
- With nitrile mechanic gloves, lower the new coil straight into the spark-plug well.
- Press downward until the boot seats firmly over the spark plug and the mounting hole aligns.
- Start the retaining bolt by hand to prevent cross-threading.
- Use the 10mm socket, 6-inch extension, and torque wrench to tighten the bolt to 10.8 Nm (8 ft-lbs).
- Do not overtighten the small coil bolt.
Step 9: Reconnect the Coil
- Use the LED work light to inspect the connector for bent terminals or damaged wiring.
- With nitrile mechanic gloves, push the electrical connector onto the coil until its lock clicks.
- Gently tug the plastic connector housing to verify it is secured.
- Repeat Steps 3 through 9 if replacing additional coils.
Step 10: Reinstall the Engine Cover
- Use the LED work light to verify that no tools or loose hardware remain on the engine.
- With nitrile mechanic gloves, align the engine-cover sockets with their rubber mounting grommets.
- Press directly above each mounting point until the cover is fully seated.
Step 11: Reconnect the Battery
- Use nitrile mechanic gloves to place the negative clamp fully onto the battery post.
- Use the 10mm socket and torque wrench to tighten the negative terminal clamp to 5 Nm (44 in-lbs).
- Do not overtighten or twist the battery terminal.
Step 12: Clear the Fault Codes
- Connect the OBD-II scan tool to the diagnostic port beneath the driver-side dashboard.
- Turn the ignition on without starting the engine.
- Use the OBD-II scan tool to select Diagnostics > Engine > Read Codes, record the results, and then select Clear Codes.
- Switch the ignition off and disconnect the scan tool.
✅ After Repair
- ✅ Start the engine and let it idle for approximately two minutes. It should idle smoothly without severe shaking.
- ✅ Confirm that the check-engine light remains off. A flashing light means the active misfire remains; shut the engine off.
- ✅ Take a gentle 10-minute test drive, then use the OBD-II scan tool to check for pending misfire codes.
- ✅ If the same cylinder still misfires, inspect the spark plug, injector, wiring, and engine compression instead of installing more coils.
- ✅ Recheck that the engine cover and battery terminal are secure.
💰 DIY vs Shop Cost
Shop Cost: ₹5,000-₹22,000 for diagnosis, parts, and labor
DIY Cost: ₹2,500-₹16,000 for one to four coils
You Save: Approximately ₹2,500-₹6,000 by doing it yourself!
Local labor and coil-brand pricing vary. This repair takes a shop approximately 0.5-1 hour.
🎯 Ready to get started?
HowToo makes it easy: same-day/2-day shipping on every part, plus all the tools and specialty tools you need! Check out the parts and tools sections below to add everything to your cart.