

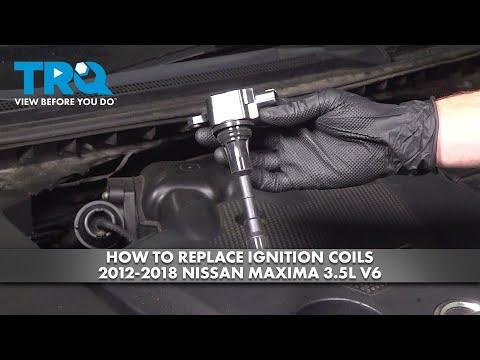




How to Replace Ignition Coils on a 2013-2025 Nissan Pathfinder 3.5L V6 (Trim: SV | Engine: V6 3.5L)
Step-by-step instructions with tools, parts, torque specs, and safety tips for 2013, 2014, 2015, 2016, 2017, 2018, 2019, 2020, 2022, 2023, 2024, 2025
How to Replace Ignition Coils on a 2013-2025 Nissan Pathfinder 3.5L V6 (Trim: SV | Engine: V6 3.5L)
Step-by-step instructions with tools, parts, torque specs, and safety tips for 2013, 2014, 2015, 2016, 2017, 2018, 2019, 2020, 2022, 2023, 2024, 2025


🔧 Pathfinder - Ignition Coil Replacement
Your Pathfinder has six ignition coils, one above each spark plug. The front three coils are easy to reach, but replacing the rear three requires removing the upper intake manifold, also called the intake plenum.
Difficulty Level: Intermediate | Estimated Time: 2-3 hours
⚠️ Safety & Precautions
- ⚠️ Allow the engine to become completely cool before starting.
- ⚠️ Disconnect the negative battery terminal before unplugging ignition or throttle-body wiring.
- ⚠️ Never allow dirt, hardware, or tools to fall into an open intake port.
- ⚠️ Cover every intake opening immediately after removing the upper intake manifold.
- ⚠️ Do not switch the ignition on while the electronic throttle body is disconnected.
- ⚠️ Ignition coils can produce dangerous voltage when the engine is running.
🔧 Required Tools
You'll need the following tools for this repair:
- 8mm socket
- 10mm socket
- 12mm socket
- 1/4-inch drive ratchet
- 3/8-inch drive ratchet
- 3-inch socket extension
- 6-inch socket extension
- Inch-pound torque wrench rated 20-200 in-lbs
- Flat-blade screwdriver, 6-inch
- Long-nose pliers, 8-inch
- Hose-clamp pliers (specialty)
- Plastic trim removal tool
- Magnetic pickup tool, 18-inch
- OBD-II scan tool (specialty)
- Clean shop towels
- Nitrile gloves
- Safety glasses
🔩 Required Parts
HowToo sells all the parts you need for this repair:
- Ignition coils - Qty: 6 if replacing all; otherwise Qty: 1 per failed cylinder
- Upper intake manifold gasket set - Qty: 1
- Throttle-body gasket - Qty: 1
Recommended: If the spark plugs are near their 105,000-mile service interval, replace them while the coils are removed. Use only coils matched specifically to the V6 direct-injection engine.
📋 Before You Begin
- 📍 Park your Pathfinder on level ground, select Park, and apply the parking brake.
- 🔑 Keep the key or intelligent key away from the vehicle so the ignition cannot be switched on accidentally.
- 🧊 Let the engine cool fully. Opening coolant hoses on a hot engine can cause burns.
- 🔎 Use an OBD-II scan tool to record misfire codes before disconnecting the battery. Codes P0301 through P0306 identify individual cylinders.
- 🔋 Open the driver’s window, switch off all accessories, and wait at least three minutes after turning off the ignition.
- 🔋 Use a 10mm socket to loosen the negative battery-terminal nut. Remove the cable and isolate it from the terminal.
- 🧹 Clean loose dirt from the top of the engine before opening the intake system.
🔨 Step-by-Step Instructions
Follow these steps in order:
Step 1: Remove the engine cover
- Use a 10mm socket and ratchet to remove any retaining fasteners fitted to the plastic engine cover.
- Lift the cover straight upward to release its rubber mounting grommets.
- Set the cover and fasteners aside together.
Step 2: Identify the coils being replaced
- The three front-bank ignition coils are visible along the radiator side of the engine.
- The three rear-bank coils are below the upper intake manifold near the windshield.
- If replacing only a front-bank coil, continue to Step 3 and then skip to Step 10.
- If replacing any rear-bank coil or all six coils, complete every step.
Step 3: Remove the accessible front ignition coils
- Press each electrical-connector lock and pull the connector straight off. Use a plastic trim removal tool only if a lock is difficult to release.
- Do not pull on the wiring.
- Use a 10mm socket, extension, and ratchet to remove each coil retaining bolt.
- Twist each coil gently and pull it straight upward from the spark-plug well.
- Inspect each well for oil or water. Oil in a well usually indicates a valve-cover seal problem that should be repaired before installing a new coil.
- Label connectors before removing several coils.
Step 4: Disconnect the intake duct
- Use an 8mm socket or flat-blade screwdriver to loosen the intake-duct clamps.
- Use hose-clamp pliers to release any breather-hose clamp attached to the duct.
- Twist the hose gently to release it. Do not pry against a plastic fitting.
- Remove the intake duct and cover the exposed air-cleaner outlet with a clean shop towel.
Step 5: Disconnect the throttle body and manifold connections
- Verify that the negative battery cable remains disconnected.
- Press the lock and unplug the electronic throttle-body connector.
- Unplug or unclip the electrical connectors and wiring retainers attached to the upper intake manifold.
- Use long-nose pliers or hose-clamp pliers to release the crankcase-ventilation and vacuum-hose clamps.
- Label each hose with its original position before disconnecting it.
- If coolant hoses prevent manifold removal, clamp and disconnect them only when the engine is cold. Keep the hose ends raised to minimize coolant loss.
Step 6: Remove the upper intake manifold
- Use 10mm and 12mm sockets with extensions to remove the upper intake manifold bolts, nuts, and support-bracket fasteners.
- Loosen the manifold fasteners gradually, beginning at the outside and working toward the center.
- Keep track of fastener lengths and installation positions.
- Lift the upper intake manifold carefully. Stop if a hose, connector, or bracket remains attached.
- Remove and discard the old upper intake manifold gaskets.
- Immediately place clean shop towels over every exposed intake port.
- Do not scrape sealing surfaces with a metal screwdriver.
Step 7: Remove the rear ignition coils
- Use a plastic trim removal tool to release each rear coil connector lock, then unplug the connector by its housing.
- Use a 10mm socket, 6-inch extension, and ratchet to remove each coil retaining bolt.
- Use a magnetic pickup tool if a bolt drops into the engine valley.
- Twist each coil gently and pull it straight upward.
- Check the spark-plug wells for oil, moisture, or damaged connector wiring.
Step 8: Install the new ignition coils
- Compare each new coil with the removed coil. The connector, boot length, and mounting tab must match.
- Do not apply anti-seize or grease to the coil boot unless the coil manufacturer specifically requires it.
- Push each coil straight over its spark plug until the boot is fully seated.
- Install each retaining bolt by hand to prevent cross-threading.
- Use the inch-pound torque wrench and 10mm socket to tighten each ignition-coil bolt to 7 Nm (62 in-lbs).
- Reconnect each coil connector until its lock clicks.
Step 9: Reinstall the upper intake manifold
- Remove the shop towels and verify that every intake port is empty and clean.
- Fit new upper intake manifold gaskets. Do not add sealant unless supplied or specifically directed by the gasket manufacturer.
- Lower the upper intake manifold squarely into position without shifting the gaskets.
- Start every manifold bolt and nut by hand.
- Use the inch-pound torque wrench with the correct 10mm or 12mm socket to tighten the manifold fasteners in several passes, working from the center outward, to 25 Nm (18 ft-lbs).
- Reinstall support-bracket fasteners with the appropriate 10mm or 12mm socket and tighten them securely to their original positions.
- Install a new throttle-body gasket if the throttle body was separated from the manifold.
- Use the inch-pound torque wrench and appropriate socket to tighten the throttle-body fasteners evenly to 10 Nm (89 in-lbs).
- Reconnect all vacuum hoses, ventilation hoses, coolant hoses, wiring retainers, and electrical connectors.
- Check every connection before installing the duct.
Step 10: Reinstall the intake duct
- Remove the shop towel from the air-cleaner outlet.
- Fit the intake duct completely over the air-cleaner and throttle-body openings.
- Reconnect the breather hose and position its clamp with hose-clamp pliers.
- Use an 8mm socket or flat-blade screwdriver to tighten both intake-duct clamps until snug without crushing the plastic duct.
Step 11: Reconnect the battery
- Place the negative battery cable fully onto its terminal.
- Use a 10mm socket and torque wrench to tighten the negative terminal nut to 5.4 Nm (48 in-lbs).
- Do not overtighten the terminal.
Step 12: Relearn the electronic throttle system
- Switch the ignition to ON for two seconds without starting the engine.
- Switch the ignition OFF for ten seconds.
- Switch the ignition to ON again for two seconds, then switch it OFF for ten seconds.
- Start the engine without pressing the accelerator and allow it to reach normal operating temperature.
- If idle remains high, low, or unstable, use a Nissan-capable OBD-II scan tool to perform Work Support > Idle Air Volume Learn.
Step 13: Reinstall the engine cover
- Align the engine cover with its mounting points and press it downward into the rubber grommets.
- Use a 10mm socket to reinstall any cover fasteners. Tighten them only until snug.
✅ After Repair
- ✅ Start the engine and listen for smooth, even operation.
- ✅ Check around the upper intake manifold for a hissing sound that could indicate a vacuum leak.
- ✅ Check any disconnected coolant hoses for leakage and correct the coolant level only when the engine is cold.
- ✅ Use the OBD-II scan tool to clear stored misfire codes.
- ✅ Road-test your Pathfinder gently for 10-15 minutes, then scan again for pending codes.
- ✅ A flashing malfunction indicator light means an active misfire. Stop driving and recheck the coil connectors, intake seals, and trouble codes.
- ✅ Reset the clock and saved settings if they were lost during battery disconnection.
💰 DIY vs Shop Cost
Shop Cost: ₹45,000-₹95,000 (parts + labor for all six)
DIY Cost: ₹25,000-₹65,000 (parts only)
You Save: ₹20,000-₹30,000 by doing it yourself!
Labor rates around Sonīpat and the Delhi NCR region vary widely. This repair takes a shop approximately 2-3 hours, and imported-coil pricing can significantly affect the total.
🎯 Ready to get started?
HowToo makes it easy: same-day/2-day shipping on every part, plus all the tools and specialty tools you need! Check out the parts and tools sections below to add everything to your cart.