


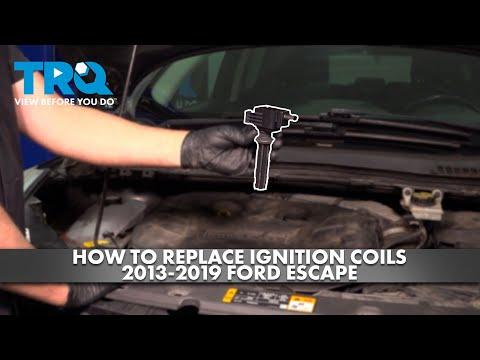






How to Replace Ignition Coils on a 2013-2019 Ford Escape 1.5L EcoBoost (Engine: Inline 4 2.0L)
Step-by-step DIY instructions with required tools, parts, torque specs, and safety tips for 2013, 2014, 2015, 2016, 2017, 2018, 2019
How to Replace Ignition Coils on a 2013-2019 Ford Escape 1.5L EcoBoost (Engine: Inline 4 2.0L)
Step-by-step DIY instructions with required tools, parts, torque specs, and safety tips for 2013, 2014, 2015, 2016, 2017, 2018, 2019


🔧 Escape - Ignition Coil Replacement
This is a straightforward job on your Escape’s 1.5L EcoBoost. Each cylinder has one coil sitting directly over its spark plug, so you’ll remove the engine cover, unplug the coils, remove their small retaining bolts, and pull the coils upward.
Difficulty Level: Beginner | Estimated Time: 30-60 minutes
⚠️ Safety & Precautions
- ⚠️ Let the engine cool completely before starting.
- ⚠️ Keep dirt out of the open spark-plug wells.
- ⚠️ Never pull an electrical connector by its wires.
- ⚠️ Don’t run the engine with a coil removed or disconnected.
- ⚠️ Battery disconnection isn’t normally required with the ignition switched off and the key removed.
🔧 Required Tools
You'll need the following tools for this repair:
- 8mm socket
- 1/4-inch drive ratchet
- 1/4-inch drive 3-inch extension
- Inch-pound torque wrench rated from 20-200 in-lbs
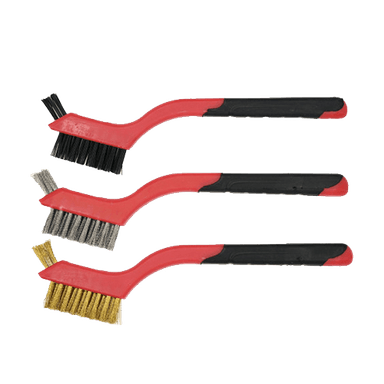
- Compressed-air blow gun or soft detailing brush
- Plastic trim tool
- Mechanic gloves
- Safety glasses
🔩 Required Parts
HowToo sells all the parts you need for this repair:
- Ignition coil - Qty: 1 for a confirmed failed coil
- Ignition coil set - Qty: 1 set of 4 if replacing all coils
- Dielectric silicone grease - Qty: 1 small tube, optional
Replace only the failed coil when the others are working correctly. Replace all four when age, mileage, or repeated failures make a matched set worthwhile. Parts-cannon diagnostics get expensive quickly.
📋 Before You Begin
- Park your Escape on level ground, select Park, and apply the parking brake.
- Switch the ignition off, remove the key, and keep the key fob away from the vehicle.
- Wait until the engine is cool enough to touch comfortably.
- Note which cylinder needs a coil before removing anything.
- If replacing every coil, work on one coil at a time to keep the job organized.
🔨 Step-by-Step Instructions
Follow these steps in order:
Step 1: Remove the engine cover
- Grip the engine cover close to its rubber mounting points.
- Pull it straight upward with both hands. Use a plastic trim tool only if a rubber mount needs gentle assistance.
- Don’t drag the cover sideways because that can damage its mounting grommets.
Step 2: Clean around the ignition coils
- Put on safety glasses.
- Use a compressed-air blow gun or soft detailing brush to clear sand and loose dirt from around each coil.
- Keep the air pressure moderate and direct debris away from your face.
- Clean now, not after opening the wells.
Step 3: Disconnect the coil connector
- Press the locking tab on the electrical connector with your thumb.
- Pull the connector straight from the coil body.
- If it’s stubborn, use a plastic trim tool to press the lock gently. Don’t pry on the wires.
Step 4: Remove the coil hold-down bolt
- Use an 8mm socket, 3-inch extension, and 1/4-inch drive ratchet to remove the retaining bolt.
- Place the bolt somewhere clean so it can’t fall into the engine bay.
Step 5: Remove the ignition coil
- Hold the coil by its solid upper body.
- Twist it gently from side to side to release the rubber boot from the spark plug.
- Pull the coil straight upward.
- Inspect the boot for cracks, tears, oil, coolant, rust-colored marks, or white electrical tracking lines.
Step 6: Inspect the spark-plug well
- Use a flashlight to look down the well without removing the spark plug.
- The well should be dry and clean.
- Stop if you find standing oil or coolant. A wet well needs diagnosis before installing the new coil.
- If the old boot stayed on the spark plug, remove it carefully before continuing.
Step 7: Prepare the replacement coil
- Compare the electrical connector, mounting tab, boot length, and overall shape with the removed coil.
- If using dielectric grease, place only a thin film inside the very end of the rubber boot. Dielectric grease is insulating silicone grease that helps seal out moisture.
- Don’t coat the metal electrical terminals or fill the boot with grease.
Step 8: Install the replacement coil
- Lower the coil straight into the spark-plug well.
- Push downward until the boot seats firmly over the spark plug.
- Align the coil’s mounting hole without forcing or twisting the coil body.
Step 9: Install and tighten the hold-down bolt
- Start the bolt several turns by hand to prevent cross-threading.
- Use the 8mm socket and inch-pound torque wrench to tighten the bolt.
- Torque to 8 Nm (71 in-lbs). This is inch-pounds, not foot-pounds. openlaborproject.com)
- Don’t overtighten it. The small bolt threads into aluminum.
Step 10: Reconnect the electrical connector
- Push the connector onto the coil until its locking tab clicks.
- Pull back lightly on the connector body to confirm it’s locked.
- Repeat Steps 3 through 10 for any remaining coils.
Step 11: Reinstall the engine cover
- Check that no tools or loose bolts remain on the engine.
- Align the cover’s mounting points with their rubber grommets.
- Press straight downward over each mounting point until fully seated.
✅ After Repair
- Start the engine and let it idle for two to three minutes.
- Confirm that it idles smoothly and that no warning lights flash.
- Take a short, gentle test drive and check acceleration without immediately using full throttle.
- If the check-engine light remains on, read and clear the stored code with an OBD-II scan tool only after confirming the misfire is repaired.
- If a misfire remains on the same cylinder, inspect the spark plug, connector, wiring, compression, and possible fluid intrusion instead of installing more coils.
- Ford specifies a coil-on-plug ignition arrangement for this engine, with one coil serving each spark plug. fordservicecontent.com)
💰 DIY vs Shop Cost
Shop Cost: $140-$450, approximately ₹12,000-₹39,000 depending on coil quantity and local parts availability
DIY Cost: $25-$315, approximately ₹2,200-₹27,000 for parts only
You Save: $75-$180 by doing it yourself!
Shop labor rates vary by region. This repair typically takes a shop approximately 0.5-1.0 hour.
🎯 Ready to get started?
HowToo makes it easy: same-day/2-day shipping on every part, plus all the tools and specialty tools you need! Check out the parts and tools sections below to add everything to your cart.
