

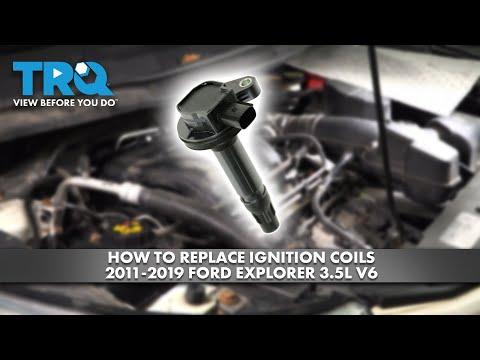





How to Replace Ignition Coils on a 2011-2017 Ford Explorer (Trim: XLT | Engine: V6 3.5L)
Step-by-step guide with required tools, intake manifold removal, torque specs, and safety tips for 2011, 2012, 2013, 2014, 2015, 2016, 2017
How to Replace Ignition Coils on a 2011-2017 Ford Explorer (Trim: XLT | Engine: V6 3.5L)
Step-by-step guide with required tools, intake manifold removal, torque specs, and safety tips for 2011, 2012, 2013, 2014, 2015, 2016, 2017


🔧 Explorer - Ignition Coil Replacement
Your Explorer uses six coil-on-plug ignition coils, meaning each spark plug has its own coil. The three front coils are easy to reach, but replacing the three rear coils requires removing the upper intake manifold.
Difficulty Level: Intermediate | Estimated Time: 2-3 hours
⚠️ Safety & Precautions
- ⚠️ Allow the engine to cool completely before starting.
- ⚠️ Disconnect the negative battery cable to prevent electrical shorts.
- ⚠️ Keep dirt and hardware out of the exposed intake ports.
- ⚠️ Do not pull an ignition coil out by its wiring.
- ⚠️ Do not use power tools to install the plastic intake manifold.
🔧 Required Tools
You'll need the following tools for this repair:
- 8mm socket
- 10mm socket
- 7mm socket
- 1/4-inch drive ratchet
- 1/4-inch drive 6-inch extension
- Inch-pound torque wrench rated 20-200 in-lbs
- Flat-blade screwdriver
- 90-degree pick tool
- Plastic trim removal tool
- Clean shop vacuum
- Clean lint-free shop towels
- Nitrile mechanic gloves
- Safety glasses
🔩 Required Parts
HowToo sells all the parts you need for this repair:
- Ignition coils - Qty: 6
- Upper intake manifold gasket set - Qty: 1
Replace all six coils only if age or multiple failures justify it. If diagnosis identified one failed coil, replacing only that coil is acceptable.
📋 Before You Begin
- 📍 Park your Explorer on level ground, shift into Park, apply the parking brake, and open the hood.
- 🔑 Remove the key and keep it away from the vehicle.
- 🧊 Wait until the intake manifold and cylinder heads feel cool.
- 📷 Take pictures of each hose and connector before disconnecting it.
- 🔌 Use a 10mm socket to disconnect the negative battery terminal. Move the cable aside so it cannot touch the terminal.
- 🧹 Clean loose dirt from the top of the engine with a shop vacuum before opening the intake system.
🔨 Step-by-Step Instructions
Follow these steps in order:
Step 1: Remove the Engine Appearance Cover
- Lift the engine cover upward by hand to release its rubber mounting points.
- Set the cover where it will not be stepped on or damaged.
Step 2: Remove the Air Intake Tube
- Use a 7mm socket to loosen the clamps at the air-filter housing and throttle body.
- Disconnect the attached breather hose by releasing its locking tab by hand.
- Disconnect any electrical connector attached to the intake tube by pressing its lock and pulling on the connector body.
- Use a flat-blade screwdriver only if needed to gently loosen the rubber tube from its fittings.
- Remove the air intake tube and place a clean lint-free shop towel over the throttle-body opening.
Step 3: Disconnect Upper Intake Manifold Connections
- Remove the shop towel temporarily so the upper intake assembly is accessible.
- Disconnect the throttle-body electrical connector by releasing its lock by hand or with a plastic trim removal tool.
- Disconnect the manifold pressure and other visible electrical connectors from the upper intake manifold.
- Release the evaporative-emissions vapor line and PCV connections by pressing their locking tabs. Use a 90-degree pick tool only to lift a stubborn lock; do not puncture a hose.
- Release the brake-booster vacuum hose connector from the intake manifold.
- Move the wiring harness and hoses aside without sharply bending them.
- Tip: Label matching connectors with numbered tape.
Step 4: Remove the Upper Intake Manifold
- Use an 8mm socket, 1/4-inch drive ratchet, and 6-inch extension to loosen the upper intake manifold bolts gradually.
- Keep the bolts organized. Some may remain captured in the manifold.
- Check all sides of the manifold for any hose, connector, or harness still attached.
- Lift the upper intake manifold straight upward and remove it from the engine.
- Immediately place clean lint-free shop towels into all six lower intake openings. An intake port is the opening through which air enters the engine.
- Remove the old upper intake manifold gaskets by hand or with a plastic trim removal tool.
- Do not scrape the sealing surfaces with a metal screwdriver.
Step 5: Disconnect the Ignition Coils
- Work on one coil at a time to avoid mixing connectors.
- Press the locking tab and unplug each ignition-coil electrical connector by hand.
- Use an 8mm socket, ratchet, and extension to remove each coil hold-down bolt.
- Keep the bolts in a clean container.
Step 6: Remove the Old Ignition Coils
- Twist each coil gently by hand to loosen its rubber boot from the spark plug.
- Pull the coil straight upward. Do not pry against the cylinder-head cover.
- Inspect each spark-plug well for oil, coolant, or water.
- If fluid is present, use a clean shop vacuum to remove it before continuing. Oil in a plug well indicates a sealing problem that should be repaired.
Step 7: Install the New Ignition Coils
- Compare each new coil with the removed coil. The connector, mounting ear, boot length, and overall shape must match.
- Push each coil straight down by hand until its boot seats firmly over the spark plug.
- Start every hold-down bolt by hand to prevent cross-threading.
- Use an inch-pound torque wrench with an 8mm socket to tighten each coil bolt to 7 Nm (62 in-lbs).
- Reconnect each coil electrical connector by hand until its lock clicks.
- Tip: A gentle tug confirms each connector is locked.
Step 8: Install the Intake Manifold Gaskets
- Verify that all intake openings remain covered by clean shop towels.
- Use a clean lint-free shop towel to wipe the intake manifold sealing surfaces.
- Install the new upper intake manifold gaskets into their molded grooves by hand.
- Remove every shop towel from the intake openings and count them before installing the manifold.
- Do not apply RTV silicone or gasket sealer to the molded intake gaskets.
Step 9: Reinstall the Upper Intake Manifold
- Lower the manifold straight into position without dislodging the gaskets.
- Start all manifold bolts by hand.
- Use an 8mm socket and inch-pound torque wrench to tighten the bolts gradually, beginning with the center bolts and working outward in an alternating pattern.
- Tighten the intake manifold bolts to 10 Nm (89 in-lbs).
- Do not exceed the specification because the composite manifold can crack.
Step 10: Reconnect the Manifold Connections
- Reconnect the brake-booster vacuum hose, PCV connection, and evaporative-emissions vapor line by hand until each fitting locks.
- Reconnect the throttle-body and manifold electrical connectors by hand until they click.
- Return the wiring harness to its original clips and routing.
- Check carefully for a disconnected hose behind the manifold.
Step 11: Reinstall the Air Intake Tube
- Remove the protective shop towel from the throttle-body opening.
- Install the air intake tube onto the throttle body and air-filter housing by hand.
- Reconnect the breather hose and electrical connector by hand.
- Use a 7mm socket and ratchet to tighten both intake-tube clamps until snug. Do not crush the plastic fittings.
Step 12: Reconnect the Battery
- Use a 10mm socket and ratchet to reconnect the negative battery terminal.
- Tighten the terminal until it cannot rotate by hand. Do not overtighten it.
- Reinstall the engine appearance cover by aligning its mounts and pressing downward by hand.
✅ After Repair
- ✅ Turn the ignition on for several seconds, then start the engine.
- ✅ The engine may take slightly longer to start on the first attempt after the battery has been disconnected.
- ✅ Let the engine idle and listen for hissing, whistling, or an unusually high idle, which may indicate an intake leak or disconnected vacuum hose.
- ✅ Confirm that the engine runs smoothly and that no fuel odor is present.
- ✅ If a scan tool is available, check for misfire or intake-related trouble codes after the road test.
- ✅ Drive gently for 10-15 minutes. Recheck the intake tube, electrical connectors, and vacuum hoses afterward.
- ✅ The clock and saved audio settings may need to be restored after the battery disconnect.
💰 DIY vs Shop Cost
Shop Cost: ₹45,000-₹90,000 (imported parts + labor)
DIY Cost: ₹24,000-₹60,000 (parts only)
You Save: ₹15,000-₹35,000 by doing it yourself!
Local labor and imported-part pricing in Sonīpat can vary considerably. This repair takes a shop approximately 1.5-2.5 hours.
🎯 Ready to get started?
HowToo makes it easy: same-day/2-day shipping on every part, plus all the tools and specialty tools you need! Check out the parts and tools sections below to add everything to your cart.