





How to Replace Ignition Coils on a 2009-2024 Nissan Murano 3.5L V6 (Trim: Platinum | Engine: V6 3.5L)
Step-by-step instructions for all six coils, intake removal, tools, parts, and torque specs for 2009, 2010, 2011, 2012, 2013, 2014
How to Replace Ignition Coils on a 2009-2024 Nissan Murano 3.5L V6 (Trim: Platinum | Engine: V6 3.5L)
Step-by-step instructions for all six coils, intake removal, tools, parts, and torque specs for 2009, 2010, 2011, 2012, 2013, 2014


🔧 Murano - Ignition Coil Replacement
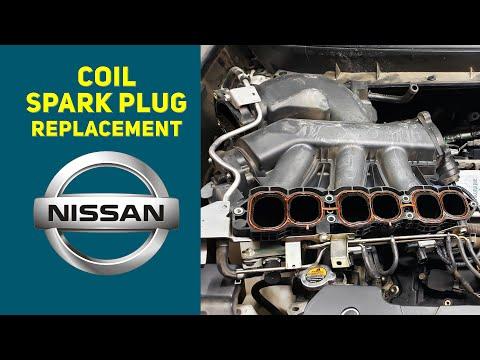
Your Murano has six individual ignition coils, one above each spark plug. The three front coils are easy to reach, but replacing the three rear coils requires removing the upper intake manifold, also called the intake plenum.
Difficulty Level: Intermediate | Estimated Time: 2-3 hours
Assumption: This procedure replaces all six coils on the stock 3.5L V6.
⚠️ Safety & Precautions
- ⚠️ Let the engine cool completely before working around the intake manifold.
- ⚠️ Disconnect the negative battery cable before unplugging coils or the electronic throttle connector.
- ⚠️ Never allow dirt, hardware, or tools to fall into an open intake port.
- ⚠️ Do not force the electronic throttle plate open by hand.
- ⚠️ Keep ignition coils away from oil, coolant, and cleaning solvents.
- ⚠️ Do not start the engine while the intake manifold is removed.
🔧 Required Tools
You'll need the following tools for this repair:
- 8mm socket
- 10mm socket
- 12mm socket
- 1/4-inch drive ratchet
- 3/8-inch drive ratchet
- 3-inch socket extension
- 6-inch socket extension
- Inch-pound torque wrench rated 20-200 in-lbs
- Foot-pound torque wrench rated 10-80 ft-lbs
- Flat-blade screwdriver 6-inch
- Long-nose pliers 6-inch
- Hose-clamp pliers 8-inch
- Plastic trim removal tool
- Magnetic pickup tool 18-inch
- Masking tape 1-inch
- Shop vacuum with crevice nozzle
- Clean lint-free shop towels
- Nitrile mechanic gloves
- Safety glasses
🔩 Required Parts
HowToo sells all the parts you need for this repair:
- Ignition coils - Qty: 6
- Upper intake manifold gasket set - Qty: 1
- Throttle-body gasket - Qty: 1
Replace all six coils only when age or testing supports it.
📋 Before You Begin
- 📋 Park your Murano on level ground, select Park, apply the parking brake, and switch the ignition off.
- 📋 Open the hood and allow the engine to become completely cold.
- 📋 Use masking tape to label every hose and connector before disconnecting it.
- 📋 Disconnect the negative battery cable with a 10mm socket. Wait at least three minutes before unplugging the electronic throttle connector.
- 📋 The intake plenum is the large aluminum chamber above the engine that supplies air to the cylinders.
- 📋 Photograph the hose routing before disassembly. This makes reassembly much easier.
🔨 Step-by-Step Instructions
Follow these steps in order:
Step 1: Remove the Engine Cover
- Use a 10mm socket and ratchet to remove the engine-cover fasteners.
- Lift the cover straight upward and place it aside.
- Use the shop vacuum with crevice nozzle to remove loose dirt around the intake and coils.
Step 2: Remove the Air-Intake Duct
- Unplug the mass-airflow sensor connector by pressing its locking tab. Do not pull on the wires.
- Use an 8mm socket or flat-blade screwdriver to loosen the air-duct clamps.
- Use hose-clamp pliers to release any breather-hose clamp attached to the duct.
- Remove the air duct between the air-filter housing and throttle body.
- Cover the exposed throttle opening with a clean lint-free shop towel.
Step 3: Remove the Three Front Ignition Coils
- Use a plastic trim removal tool to press each coil-connector lock, then unplug the three front coils.
- Use a 10mm socket with the 3-inch extension to remove each coil retaining bolt.
- Twist each coil gently, then pull it straight upward.
- Check each coil well for engine oil or water. Oil indicates a valve-cover tube-seal leak that should be repaired.
- Do not install the new coils yet if the intake manifold still needs to be removed.
Step 4: Disconnect Intake-Manifold Connections
- Use masking tape to label the electronic throttle connector, vacuum hoses, breather hoses, and evaporative-emissions hose.
- Press the locking tabs by hand or with the plastic trim removal tool, then disconnect the electrical connectors.
- Use hose-clamp pliers or long-nose pliers to release spring clamps, then disconnect the attached hoses.
- Use a 10mm socket and extension to remove wiring-harness brackets attached to the intake manifold.
- Move the harness and hoses aside without stretching them.
Step 5: Remove the Throttle Body
- Confirm the negative battery cable remains disconnected.
- Use a 10mm socket and extension to remove the four throttle-body bolts.
- Support the throttle body while removing the final bolt. Do not pull on its wiring.
- Carefully move it aside without forcing the throttle plate.
- Remove and discard the old throttle-body gasket.
- On installation, tighten the throttle-body bolts evenly in a crossing pattern to 10 Nm (89 in-lbs).
Step 6: Remove the Upper Intake Manifold
- Use a 12mm socket and extension to remove the intake-manifold support bracket bolts.
- Use a 12mm socket and extension to loosen the upper intake-manifold bolts gradually, working from the outer bolts toward the center.
- Lift the manifold carefully while checking for any hose, connector, or bracket that remains attached.
- Remove the old intake-manifold gaskets.
- Immediately cover every exposed intake opening with clean lint-free shop towels.
- Count every tool before uncovering the intake ports.
Step 7: Remove the Three Rear Ignition Coils
- Use the plastic trim removal tool to release the rear coil connectors.
- Use a 10mm socket with the 6-inch extension to remove the three retaining bolts.
- Twist each coil gently and pull it straight out of its spark-plug well.
- Inspect the wells using a flashlight. Remove only loose surface dirt with the shop vacuum.
Step 8: Install All Six Ignition Coils
- Compare every new coil with the removed coil. The connector, boot length, and mounting tab must match.
- Push each rear coil straight onto its spark plug until the boot is fully seated.
- Start each retaining bolt by hand to prevent crossed threads.
- Use the inch-pound torque wrench and 10mm socket to tighten each coil bolt to 7 Nm (62 in-lbs).
- Reconnect each rear coil connector until its lock clicks.
- Repeat the same installation procedure for the three front coils.
- Do not apply grease inside the coil terminals unless the coil manufacturer specifically instructs it.
Step 9: Reinstall the Upper Intake Manifold
- Use clean lint-free shop towels to wipe the gasket-contact surfaces. Do not scrape aluminum with a metal tool.
- Use the shop vacuum to remove nearby debris, then count and remove all towels from the intake ports.
- Install the new upper intake-manifold gaskets in their correct grooves. Do not add sealant unless supplied gasket instructions require it.
- Lower the manifold into position without disturbing the gaskets.
- Start all manifold bolts by hand.
- Use the torque wrench and 12mm socket to tighten the bolts in stages, beginning at the center and working outward, to 25 Nm (18 ft-lbs).
- Use the 12mm socket to reinstall the support bracket fasteners, returning each bracket to its original position.
Step 10: Reconnect the Throttle Body, Hoses, and Wiring
- Fit the new throttle-body gasket and position the throttle body.
- Use the torque wrench and 10mm socket to tighten its bolts evenly to 10 Nm (89 in-lbs).
- Reconnect every labeled vacuum hose, breather hose, electrical connector, and wiring bracket.
- Use hose-clamp pliers to return each spring clamp to its original position.
- Gently tug each connector to confirm its lock is engaged.
Step 11: Reinstall the Air Duct and Engine Cover
- Remove the shop towel from the throttle opening.
- Install the air-intake duct fully over the throttle body and air-filter housing.
- Use the 8mm socket or flat-blade screwdriver to tighten the duct clamps until secure without crushing the duct.
- Reconnect the mass-airflow sensor and breather hose.
- Position the engine cover and use the 10mm socket to reinstall its fasteners snugly.
Step 12: Reconnect the Battery
- Use a 10mm socket to reconnect and secure the negative battery terminal.
- Confirm no tools or towels remain in the engine compartment.
- Switch the ignition on for five seconds without starting, then switch it off for ten seconds.
✅ After Repair
- ✅ Start the engine without pressing the accelerator. It may crank slightly longer on the first start.
- ✅ Listen for a smooth idle and verify that the malfunction indicator light is not flashing.
- ✅ A high, unstable, or surging idle can indicate an intake hose leak, displaced manifold gasket, or required idle-air-volume relearn.
- ✅ If idle relearn is required, use a Nissan-capable scan tool and select Engine Control Module > Work Support > Idle Air Volume Learn.
- ✅ If the warning light remains on, read and clear stored misfire codes only after confirming all six coil connectors are secure.
- ✅ Recheck the intake duct, vacuum hoses, and manifold area for air leaks after the engine warms up.
- ✅ Road-test your Murano gently for 10-15 minutes and confirm there is no hesitation or flashing warning light.
💰 DIY vs Shop Cost
Shop Cost: $750-$1,300 (parts + labor)
DIY Cost: $300-$700 (parts only)
You Save: $450-$600 by doing it yourself!
Shop labor rates vary but typically run $100-$150/hour. This repair takes a shop approximately 2-3 hours.
🎯 Ready to get started?
HowToo makes it easy: same-day/2-day shipping on every part, plus all the tools and specialty tools you need! Check out the parts and tools sections below to add everything to your cart.