


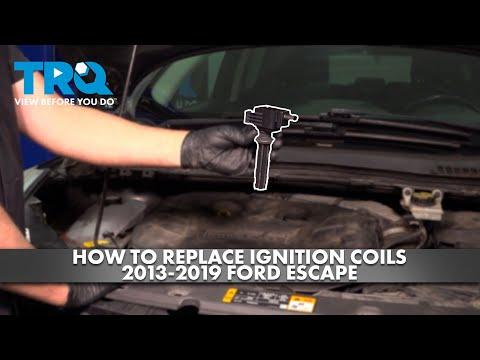







How to Replace Ignition Coils on a 2009-2019 Ford Escape (Engine: Inline 4 2.5L)
Step-by-step DIY instructions with tools, parts, torque specs, and safety tips for 2009, 2010, 2011, 2012, 2013, 2014, 2015, 2016, 2017, 2018, 2019
How to Replace Ignition Coils on a 2009-2019 Ford Escape (Engine: Inline 4 2.5L)
Step-by-step DIY instructions with tools, parts, torque specs, and safety tips for 2009, 2010, 2011, 2012, 2013, 2014, 2015, 2016, 2017, 2018, 2019


🔧 Escape - Ignition Coil Replacement
This is a straightforward beginner repair. Your Escape uses four coil-on-plug ignition coils, with one coil sitting directly over each spark plug. Replace the failed coil, or replace all four if they’re similarly aged and you want a matched set.
Difficulty Level: Beginner | Estimated Time: 20-45 minutes
⚠️ Safety & Precautions
- ⚠️ Let the engine cool completely before touching the coils.
- ⚠️ Keep dirt out of the spark-plug wells. Debris can fall into the engine if the plugs are later removed.
- ⚠️ Switch the ignition off and keep the key away from the vehicle.
- ⚠️ Never start or crank the engine with a coil removed.
- ⚠️ Battery disconnection isn’t normally required for this repair.
🔧 Required Tools
You'll need the following tools for this repair:
- 8mm socket
- 1/4-inch-drive ratchet
- 3-inch socket extension
- Inch-pound torque wrench, 20-150 lb-in range
- Plastic trim removal tool
- Compressed-air nozzle with regulated air supply
- Soft nylon cleaning brush
- Nitrile mechanic gloves
- Safety glasses
🔩 Required Parts
HowToo sells all the parts you need for this repair, and the matching ignition-coil aisle is open in the parts sidebar:
- Ignition coil - Qty: 1 for a confirmed failed coil
- Ignition coil set - Qty: 1 if replacing all four
- Dielectric grease - Qty: 1 small tube
- Ignition coil connector - Qty: As needed only if a connector is damaged
Don’t replace all four automatically for one misfire unless testing supports it. Coils aren’t bananas. They don’t have to leave in the same bunch.
📋 Before You Begin
- 📋 Park your Escape on level ground, select Park, and apply the parking brake.
- 📋 Allow the engine to become completely cool.
- 📋 If replacing only one coil, identify its cylinder before disconnecting anything.
- 📋 Take a clear photo of the connectors and wire routing for reference.
- 📋 No infotainment service mode, scan-tool command, or battery registration is required.
🔨 Step-by-Step Instructions
Follow these steps in order:
Step 1: Open the Engine Compartment
- Raise the hood and support it securely.
- Put on the safety glasses and nitrile mechanic gloves.
- Locate the four ignition coils in a straight row on top of the engine.
Step 2: Remove the Engine Cover if Equipped
- Use the plastic trim removal tool only if needed to release any wiring retainers obstructing the cover.
- Grip the engine cover near its mounting points and pull it straight upward from the rubber grommets.
- Don’t force the cover sideways because its mounting points can crack.
Step 3: Clean Around the Coils
- Use the soft nylon cleaning brush to loosen dirt around each coil.
- Use the compressed-air nozzle to blow debris away from the coil openings.
- Keep your face away from the debris and wear safety glasses.
Step 4: Disconnect the Electrical Connector
- Press the locking tab on the selected coil connector with your fingers.
- Pull on the connector housing, not the wires.
- If it’s stuck, gently work the housing while holding the release tab. Don’t pry hard against the plastic.
Step 5: Remove the Coil Retaining Bolt
- Fit the 8mm socket and 3-inch socket extension to the 1/4-inch-drive ratchet.
- Turn the retaining bolt counterclockwise and remove it.
- Place the bolt somewhere clean so it can’t fall into the engine compartment.
Step 6: Remove the Old Ignition Coil
- Grip the body of the coil and gently twist it back and forth.
- Pull the coil straight upward once its rubber boot releases from the spark plug.
- Don’t pull the coil by its connector or wiring.
- A slight twist breaks the boot seal.
Step 7: Inspect the Coil and Spark-Plug Well
- Check the old coil boot for cracks, burns, carbon tracking, or torn rubber.
- Carbon tracking looks like a thin black lightning-shaped line along the boot.
- Look inside the spark-plug well for engine oil, coolant, water, or corrosion.
- If liquid is present, stop and correct the leak before installing the new coil.
Step 8: Prepare the Replacement Coil
- Confirm the new and old coils have matching connector positions, mounting points, and boot lengths.
- Apply a very small film of dielectric grease inside the opening at the bottom of the rubber boot.
- Dielectric grease is an insulating silicone grease that helps seal moisture out of the boot.
- Don’t place grease on the electrical connector pins or coat the spark plug heavily.
Step 9: Install the New Coil
- Lower the coil straight into the spark-plug well.
- Push firmly until the boot seats over the spark plug.
- Align the retaining-bolt hole without twisting the coil against the wiring.
Step 10: Install and Torque the Retaining Bolt
- Start the bolt by hand for several turns to prevent cross-threading.
- Use the 8mm socket and inch-pound torque wrench to tighten the bolt.
- Torque to 8 Nm (71 lb-in). Ford service information lists this light torque for the coil-on-plug retainer. charm.li)
- Don’t convert this to 71 ft-lbs. That would break the bolt or damage the valve cover.
Step 11: Reconnect the Coil
- Push the electrical connector straight onto the new coil.
- Continue until the locking tab clicks into place.
- Gently tug the housing to confirm it’s locked.
- Repeat Steps 4 through 11 if replacing the remaining coils.
Step 12: Reinstall the Engine Cover
- Align the cover with its rubber mounting grommets.
- Press straight downward over each mounting point using your hands.
- Use the plastic trim removal tool to reinstall any wiring retainers removed earlier.
✅ After Repair
- ✅ Check that every serviced electrical connector is fully locked.
- ✅ Remove all tools and loose hardware from the engine compartment.
- ✅ Start the engine and let it idle for two to three minutes.
- ✅ Confirm that the engine runs smoothly without shaking, popping, or a flashing check-engine light.
- ✅ Use a compatible scan tool to clear stored misfire codes if available.
- ✅ Take a short test drive, then recheck for warning lights or rough running.
- ✅ If the misfire remains, inspect the spark plug and connector before replacing additional coils.
- ✅ Stop driving if the check-engine light flashes. A continuing misfire can overheat the catalytic converter.
💰 DIY vs Shop Cost
Shop Cost: $150-$450 USD equivalent, depending on coil quantity and local labor
DIY Cost: Approximately $24-$320 USD for one coil or a complete set
You Save: Approximately $100-$250 by doing it yourself!
Labor prices in Sonīpat vary. The actual replacement usually takes a shop approximately 0.3-0.8 hour.
🎯 Ready to get started?
HowToo makes it easy: same-day/2-day shipping on every part, plus all the tools and specialty tools you need! Check out the parts and tools sections below to add everything to your cart.
