

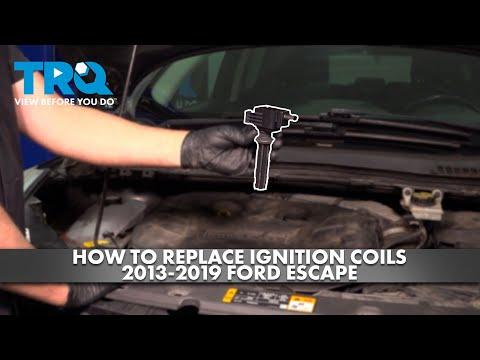






How to Replace Ignition Coils on a 2009-2019 Ford Escape 2.5L (Engine: Inline 4 2.5L)
Step-by-step DIY instructions with required tools, parts, torque specs, and safety tips for 2009, 2010, 2011, 2012, 2013, 2014, 2015, 2016, 2017, 2018, 2019
How to Replace Ignition Coils on a 2009-2019 Ford Escape 2.5L (Engine: Inline 4 2.5L)
Step-by-step DIY instructions with required tools, parts, torque specs, and safety tips for 2009, 2010, 2011, 2012, 2013, 2014, 2015, 2016, 2017, 2018, 2019


🔧 Escape - Ignition Coil Replacement
Your Escape uses one ignition coil directly above each spark plug. Replacing a failed coil involves disconnecting its electrical connector, removing one retaining bolt, and lifting the coil from the spark-plug well.
Difficulty Level: Beginner | Estimated Time: 0.5-1 hour
⚠️ Safety & Precautions
- ⚠️ Let the engine cool completely before working around it.
- 🔑 Switch the ignition off and keep the key away from the vehicle.
- 🔋 Disconnect the negative battery cable before unplugging the ignition coils.
- 🧤 Never pull a coil out by its wiring or electrical connector.
- 💧 Keep dirt, moisture, and tools out of the open spark-plug wells.
🔧 Required Tools
You'll need the following tools for this repair:
- 8mm socket
- 10mm socket
- 1/4-inch-drive ratchet
- 1/4-inch-drive 6-inch extension
- Inch-pound torque wrench, 20-200 in-lb range
- Small flat-blade screwdriver
- Soft nylon detailing brush
- Safety glasses
- Nitrile mechanic gloves
🔩 Required Parts
HowToo sells all the parts you need for this repair:
- Ignition coil compatible with the 2.5L engine - Qty: 1 per failed cylinder, up to 4
- Silicone dielectric grease - Qty: 1 small tube
Ignition coils do not have to be replaced as a set. Replace only the confirmed failed coil unless all four are old or damaged.
📋 Before You Begin
- 🅿️ Park your Escape on level ground, select Park, and apply the parking brake.
- 🌡️ Open the hood and wait until the engine is cool enough to touch.
- 📸 Photograph the coil wiring before disassembly so every connector returns to its original coil.
- 🔌 No infotainment menu, scan-tool command, coding, or battery registration is required.
🔨 Step-by-Step Instructions
Follow these steps in order:
Step 1: Disconnect the Battery
- Put on the safety glasses and nitrile mechanic gloves.
- Use a 10mm socket and 1/4-inch-drive ratchet to loosen the negative battery-terminal clamp.
- Lift the negative cable from the battery post and position it where it cannot spring back onto the terminal.
Step 2: Locate the Ignition Coils
- Locate the four ignition coils in a straight row on top of the engine. Each coil sits directly over one spark plug.
- If debris surrounds the coils, loosen it with a soft nylon detailing brush and move it away from the spark-plug wells.
- Do not allow debris to fall into a well after a coil is removed.
Step 3: Disconnect the Coil Connector
- Press the locking tab on the failed coil's electrical connector and pull the connector straight back by its plastic housing.
- If the tab is difficult to press, gently depress it with a small flat-blade screwdriver. Do not pry hard because the plastic can break.
- Work on one coil at a time.
Step 4: Remove the Retaining Bolt
- Use an 8mm socket, 1/4-inch-drive 6-inch extension, and 1/4-inch-drive ratchet to remove the coil retaining bolt.
- Place the bolt somewhere clean so it cannot fall into the engine compartment.
Step 5: Remove the Old Coil
- Grip the coil body, twist it gently from side to side, and pull it straight upward.
- The long rubber section is the coil boot. It seals around the top of the spark plug.
- Inspect the boot and spark-plug well for oil, coolant, water, burn marks, or white electrical tracking lines.
- If the well contains liquid, correct the leak and dry the well before installing the new coil.
Step 6: Prepare the New Coil
- Compare the new and old coils. Their connector, bolt location, boot length, and overall shape must match.
- Place a very thin film of silicone dielectric grease just inside the lower lip of the new rubber boot using a gloved fingertip.
- Do not put grease on the coil's electrical connector or fill the boot with grease.
Step 7: Install the New Coil
- Lower the new coil straight into the spark-plug well.
- Press firmly until the boot seats over the spark plug and the bolt hole aligns.
- Start the retaining bolt by hand to prevent cross-threading.
- Use the 8mm socket, 1/4-inch-drive 6-inch extension, and in-lb torque wrench to tighten the bolt to 8 Nm (71 in-lb).
- Do not overtighten the bolt; the mounting point can be damaged.
Step 8: Reconnect the Coil
- Push the electrical connector onto the new coil until its lock clicks.
- Pull back gently on the connector housing to verify that it is secured.
- Repeat Steps 3-8 for any additional coils being replaced.
Step 9: Reconnect the Battery
- Place the negative battery clamp fully onto the negative battery post.
- Use the 10mm socket and in-lb torque wrench to tighten the negative terminal clamp to 5 Nm (44 in-lb).
- Verify that the terminal cannot rotate by hand. Do not overtighten it.
✅ After Repair
- 🚗 Start your Escape and let it idle for several minutes.
- 👂 Confirm that the engine runs smoothly without shaking, hesitation, or snapping sounds around the coils.
- 🔍 Check that every coil connector is fully locked and no tools remain in the engine compartment.
- 💡 If the check-engine light flashes or the engine still misfires, shut it off. A worn spark plug, wiring fault, injector problem, or internal engine issue may also be present.
- 🧠 A stored misfire code may remain until it is cleared with a scan tool or completes enough successful drive cycles. No coil programming is required.
- 🛣️ Take a short, gentle test drive and verify smooth acceleration before using heavy throttle.
💰 DIY vs Shop Cost
Shop Cost: ₹7,000-₹30,000 for one to four coils, including parts and labor
DIY Cost: ₹4,500-₹24,000 for one to four quality coils
You Save: Approximately ₹2,500-₹6,000 by doing it yourself!
Independent labor rates around Panipat vary by parts source and workshop. This repair normally takes a shop approximately 0.5-1 hour.
🎯 Ready to get started?
HowToo makes it easy: same-day/2-day shipping on every part, plus all the tools and specialty tools you need! Check out the parts and tools sections below to add everything to your cart.