






How to Replace Ignition Coils on a 2005-2019 Nissan Frontier 4.0L V6 (Engine: V6 4.0L)
Step-by-step coil replacement guide with tools, parts, torque specs, and misfire tips for 2005, 2006, 2007, 2008, 2009, 2011, 2012, 2013, 2014, 2015, 2016, 2017, 2018, 2019
How to Replace Ignition Coils on a 2005-2019 Nissan Frontier 4.0L V6 (Engine: V6 4.0L)
Step-by-step coil replacement guide with tools, parts, torque specs, and misfire tips for 2005, 2006, 2007, 2008, 2009, 2011, 2012, 2013, 2014, 2015, 2016, 2017, 2018, 2019


🔧 Frontier - Ignition Coil Replacement
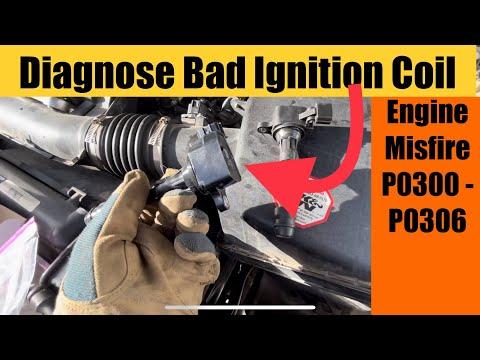
Replacing the ignition coils on your Frontier can fix a misfire, rough idle, poor acceleration, or a check engine light caused by weak spark. The 4.0L V6 uses six coil-on-plug ignition coils, meaning each spark plug has its own coil mounted directly above it.
Difficulty Level: Intermediate | Estimated Time: 1.5-3 hours
⚠️ Safety & Precautions
- ⚠️ Let the engine cool completely before starting. The intake manifold and valve covers can stay hot after driving.
- ⚠️ Disconnect the negative battery cable before unplugging ignition coils.
- ⚠️ Do not pull on wiring. Always pull on the plastic connector body.
- ⚠️ Keep bolts, dirt, and tools out of the intake openings if the upper intake manifold is removed.
- ⚠️ If the check engine light is flashing, avoid driving except for a short test after repair. A flashing light means the catalytic converters can be damaged by misfires.
🔧 Required Tools
You'll need the following tools for this repair:
- 10mm socket
- 12mm socket
- 1/4-inch drive ratchet
- 3/8-inch drive ratchet
- 3-inch extension
- 6-inch extension
- 10mm wrench
- Flathead screwdriver
- Needle-nose pliers
- Torque wrench inch-pound range
- Torque wrench foot-pound range
- Compressed air nozzle
- OBD2 scan tool
- Painter's tape
- Shop towels
- Mechanic gloves
- Safety glasses
🔩 Required Parts
HowToo sells all the parts you need for this repair:
- Ignition coil - Qty: 1-6
- Upper intake manifold gasket set - Qty: 1
- Throttle body gasket - Qty: 1
- Dielectric grease - Qty: 1
- Electrical connector cleaner - Qty: 1
Tip: Replace all six if the originals are old.
📋 Before You Begin
- Park your Frontier on level ground and set the parking brake.
- Let the engine cool until you can comfortably touch the plastic intake tube.
- Use an OBD2 scan tool to read misfire codes if replacing only one coil. P0301-P0306 points to cylinders 1-6.
- Cylinder layout on the 4.0L V6: passenger side is 1, 3, 5 from front to rear. Driver side is 2, 4, 6 from front to rear.
- Use a 10mm wrench to disconnect the negative battery cable. Move the cable aside so it cannot spring back onto the battery post.
- The upper intake manifold is the large aluminum/plastic air chamber on top of the engine. Removing it gives proper access to the rear coils.
🔨 Step-by-Step Instructions
Follow these steps in order:
Step 1: Remove the Engine Cover
- Use a 10mm socket and 1/4-inch drive ratchet to remove the engine cover bolts.
- Lift the cover off and place it somewhere safe.
- Put bolts in a cup.
Step 2: Remove the Air Intake Tube
- Use a flathead screwdriver to loosen the hose clamp at the throttle body.
- Use a flathead screwdriver to loosen the hose clamp at the air filter box.
- Use needle-nose pliers to release any small breather hose clamps attached to the tube.
- Lift the air intake tube out of the engine bay.
Step 3: Unplug the Throttle Body
- Use your fingers or a flathead screwdriver to press the connector lock tab.
- Pull the connector straight off the throttle body.
- The throttle body is the round air valve at the front of the upper intake manifold.
Step 4: Remove the Throttle Body
- Use a 10mm socket, 3-inch extension, and ratchet to remove the throttle body bolts.
- Pull the throttle body straight away from the intake manifold.
- Remove the old throttle body gasket and discard it.
- Do not push the throttle plate open by hand.
- On reassembly, use a torque wrench to tighten the throttle body bolts: Torque to 9 Nm (80 in-lbs).
Step 5: Label and Remove Vacuum Hoses
- Use painter's tape to label each hose before removal.
- Use needle-nose pliers to release spring clamps.
- Pull hoses off by twisting gently with your fingers.
- A vacuum hose is a small rubber hose that carries engine vacuum for sensors and controls.
Step 6: Remove Upper Intake Manifold Brackets
- Use a 10mm socket and 3/8-inch drive ratchet to remove any brackets attached to the upper intake manifold.
- Move brackets and wiring gently aside without stretching the harness.
Step 7: Remove the Upper Intake Manifold
- Use a 12mm socket, 6-inch extension, and 3/8-inch drive ratchet to loosen the upper intake manifold bolts.
- Remove the bolts and lift the manifold straight up.
- Place clean shop towels into or over the intake openings immediately.
- This keeps bolts and dirt from falling into the engine.
- On reassembly, tighten the manifold bolts evenly in a crisscross pattern: Torque to 25 Nm (18 ft-lbs).
Step 8: Clean Around the Ignition Coils
- Put on safety glasses.
- Use a compressed air nozzle to blow dust away from the coil and spark plug well area.
- A spark plug well is the deep hole where the coil boot reaches the spark plug.
Step 9: Unplug the Ignition Coil Connector
- Use your fingers or a flathead screwdriver to press the connector release tab.
- Pull the connector straight back from the ignition coil.
- If it sticks, gently wiggle the plastic connector body.
Step 10: Remove the Ignition Coil Bolt
- Use a 10mm socket, 3-inch extension, and 1/4-inch drive ratchet to remove the ignition coil hold-down bolt.
- Set the bolt aside in a safe spot.
Step 11: Pull Out the Old Ignition Coil
- Twist the ignition coil gently by hand to loosen the rubber boot.
- Pull the coil straight upward.
- If the rubber boot separates and stays in the spark plug well, use needle-nose pliers to remove it carefully.
- Pull straight to avoid tearing.
Step 12: Prepare the New Ignition Coil
- Spray electrical connector cleaner on the vehicle-side coil connector if dirty or oily.
- Let the connector dry fully.
- Apply a tiny amount of dielectric grease inside the end of the new coil boot.
- Dielectric grease is silicone grease that helps seal out moisture but does not conduct electricity.
Step 13: Install the New Ignition Coil
- Push the new ignition coil straight down into the spark plug well by hand.
- Press until you feel the boot seat on the spark plug.
- Use a 10mm socket and inch-pound torque wrench to install the coil bolt: Torque to 5 Nm (44 in-lbs).
- Plug in the coil connector until it clicks.
Step 14: Repeat for Other Ignition Coils
- Use the same 10mm socket, 3-inch extension, ratchet, and torque wrench for each remaining coil.
- Replace the failed coil only, or replace all six while the intake manifold is off.
- Confirm every connector is fully seated.
Step 15: Install New Upper Intake Manifold Gaskets
- Use your fingers to remove the old upper intake manifold gaskets.
- Wipe the sealing surfaces with a clean shop towel.
- Install the new gaskets by hand into their grooves.
- Remove all shop towels from the intake openings before installing the manifold.
Step 16: Reinstall the Upper Intake Manifold
- Lower the upper intake manifold into position by hand.
- Start all bolts by hand first to avoid cross-threading.
- Use a 12mm socket, 6-inch extension, and foot-pound torque wrench to tighten the bolts evenly: Torque to 25 Nm (18 ft-lbs).
Step 17: Reconnect Brackets and Vacuum Hoses
- Use a 10mm socket and ratchet to reinstall intake brackets.
- Use needle-nose pliers to reinstall hose clamps.
- Match each hose to the painter's tape labels you made earlier.
Step 18: Reinstall the Throttle Body
- Install the new throttle body gasket by hand.
- Set the throttle body onto the intake manifold.
- Use a 10mm socket, 3-inch extension, and inch-pound torque wrench to tighten the bolts: Torque to 9 Nm (80 in-lbs).
- Reconnect the throttle body connector until it clicks.
Step 19: Reinstall the Air Intake Tube
- Slide the air intake tube onto the throttle body and air filter box.
- Use a flathead screwdriver to tighten both hose clamps snugly.
- Use needle-nose pliers to reconnect any small breather hose clamps.
Step 20: Reinstall the Engine Cover and Battery Cable
- Use a 10mm socket and ratchet to reinstall the engine cover.
- Use a 10mm wrench to reconnect the negative battery cable.
- Make sure the battery terminal is snug and does not rotate by hand.
Step 21: Start the Engine
- Start your Frontier and let it idle.
- Listen for hissing noises that could mean a loose vacuum hose or intake leak.
- Use an OBD2 scan tool to clear stored misfire codes.
- If the idle is unstable after throttle body removal, use a capable scan tool to perform Nissan idle air volume relearn.
✅ After Repair
- ✅ Let your Frontier idle for 5 minutes with the headlights, A/C, and radio off.
- ✅ Take a gentle 10-15 minute test drive.
- ✅ Confirm there is no hesitation, shaking, flashing check engine light, or fuel smell.
- ✅ Recheck the air intake tube clamps and vacuum hoses after the test drive.
- ✅ If a misfire code returns on the same cylinder, inspect the spark plug, coil connector, wiring, compression, and injector for that cylinder.
💰 DIY vs Shop Cost
Shop Cost: $350-$1,050 depending on replacing one coil or all six
DIY Cost: $45-$450 for coils, gaskets, and supplies
You Save: $250-$600 by doing it yourself!
Shop labor rates vary but typically run $100-$150/hour. This repair takes a shop approximately 1.5-3 hours.
🎯 Ready to get started?
HowToo makes it easy: same-day/2-day shipping on every part, plus all the tools and specialty tools you need! Check out the parts and tools sections below to add everything to your cart.