

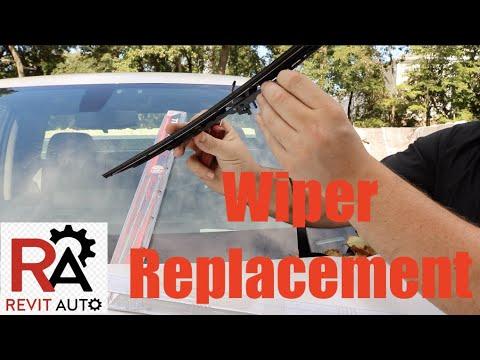






How to Replace Front Wiper Blades on a 1999-2024 Chevrolet Silverado 1500
Step-by-step J-hook installation guide with blade sizes, tools, and safety tips for 1999, 2000, 2001, 2002, 2003, 2004, 2005, 2006, 2007, 2019, 2020, 2021, 2022, 2023, 2024
How to Replace Front Wiper Blades on a 1999-2024 Chevrolet Silverado 1500
Step-by-step J-hook installation guide with blade sizes, tools, and safety tips for 1999, 2000, 2001, 2002, 2003, 2004, 2005, 2006, 2007, 2019, 2020, 2021, 2022, 2023, 2024


🔧 Silverado 1500 - Front Windshield Wiper Blade Replacement
Replace both front blades together. Your Silverado 1500 uses two 22-inch blades, and the beam-style pair selected in the parts list has beginner-friendly J-hook adapters.
No wiper service mode, battery disconnect, or programming is required. This is one of the easiest jobs on the truck.
Difficulty Level: Beginner | Estimated Time: 10-15 minutes
⚠️ Safety & Precautions
- ⚠️ Switch the ignition off before touching the wipers.
- 🛡️ Place a folded microfiber towel on the windshield below each arm.
- ✋ Never release a raised wiper arm without a blade attached. The spring-loaded metal arm can crack the glass.
- 🔋 Battery disconnection is not required.
🔧 Required Tools
You'll need the following tools for this repair:
- Microfiber towel
- Nitrile work gloves
- Safety glasses
- Automotive glass cleaner
🔩 Required Parts
HowToo sells all the parts you need for this repair:
- 22-inch front J-hook windshield wiper blades - Qty: 2
Replace them as a matching pair. One fresh blade and one tired blade usually means one clear side and one streaky side. Windshields deserve better teamwork than that.
📋 Before You Begin
- Park your Silverado 1500 on level ground and switch off the ignition.
- Make sure the wiper switch is in the off position.
- Remove any protective covers from the new blades.
- Compare each new 22-inch blade with the old blade before installation.
- Keep the adapter instructions from the blade package nearby.
🔨 Step-by-Step Instructions
Follow these steps in order:
Step 1: Protect the windshield
- Put on the nitrile work gloves and safety glasses.
- Place the folded microfiber towel on the glass directly below the driver-side wiper arm.
- This cheap cushion can save expensive glass.
Step 2: Raise the first wiper arm
- Use both gloved hands to lift the driver-side arm away from the windshield.
- Stop when the arm remains raised without being forced.
- Do not bend or twist the metal arm.
Step 3: Rotate the old blade
- Use your gloved hand to rotate the blade until it sits roughly perpendicular to the arm.
- Find the small locking tab where the blade adapter meets the curved J-hook.
- A J-hook is the curved end of the metal wiper arm that holds the blade.
Step 4: Remove the old blade
- Use your thumb to press the adapter's locking tab.
- While holding the tab, slide the blade downward toward the open end of the J-hook.
- Turn the blade slightly and guide the hook through the adapter opening.
- Lower the bare arm carefully onto the microfiber towel. Never leave it standing unattended.
Step 5: Install the new blade
- Use your gloved hands to hold the new blade with its rubber edge facing the windshield.
- Guide the J-hook through the adapter opening.
- Slide the blade upward into the hook until the lock clicks into place.
- Pull gently downward on the blade to confirm the adapter is locked.
- No fasteners are used, so there is no torque specification.
Step 6: Lower the arm
- Use both gloved hands to support the metal arm.
- Lower the blade gently until the rubber edge rests on the windshield.
- Remove the microfiber towel from beneath the arm.
Step 7: Replace the passenger-side blade
- Move the microfiber towel below the passenger-side arm.
- Repeat Steps 2 through 6 using the second 22-inch blade.
- Confirm both adapters are fully seated and both blades face the same direction.
Step 8: Clean the windshield
- Apply automotive glass cleaner to the microfiber towel, not directly over the truck.
- Wipe the blade-contact area until dirt, dust, and oily film are removed.
- Wipe the new rubber edges once with a clean section of the towel.
✅ After Repair
- Pour or spray clean water onto the windshield before testing. Don't run new blades across dry, dusty glass.
- Switch on the ignition and operate the washer and wipers at low speed.
- Confirm both blades sweep smoothly without chatter, streaking, or striking the windshield trim.
- If a blade moves loosely, switch the wipers off and reseat its adapter until it clicks.
- No reset, calibration, or infotainment procedure is needed.
💰 DIY vs Shop Cost
Shop Cost: $40-$80 (parts + labor)
DIY Cost: $14-$50 (two blades)
You Save: $20-$45 by doing it yourself!
Shop labor rates vary but typically run $100-$150/hour. This repair takes a shop approximately 0.1-0.3 hours.
🎯 Ready to get started?
HowToo makes it easy: same-day/2-day shipping on every part, plus all the tools and specialty tools you need! Check out the parts and tools sections below to add everything to your cart.