

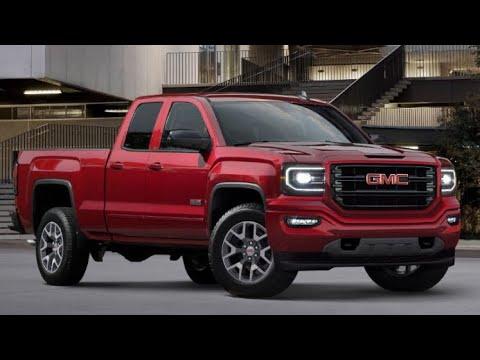




How to Replace Front Windshield Wipers on a 1999-2026 GMC Sierra 1500
Step-by-step blade installation guide with 22-inch parts, tools, safety tips, and testing for 1999, 2000, 2001, 2002, 2003, 2004, 2005, 2006, 2007, 2008, 2009, 2010, 2011, 2012, 2013, 2014, 2015, 2016, 2017, 2018, 2019, 2020, 2021, 2022, 2023, 2024, 2025, 2026
How to Replace Front Windshield Wipers on a 1999-2026 GMC Sierra 1500
Step-by-step blade installation guide with 22-inch parts, tools, safety tips, and testing for 1999, 2000, 2001, 2002, 2003, 2004, 2005, 2006, 2007, 2008, 2009, 2010, 2011, 2012, 2013, 2014, 2015, 2016, 2017, 2018, 2019, 2020, 2021, 2022, 2023, 2024, 2025, 2026


🔧 Sierra 1500 - Front Windshield Wiper Blade Replacement
Replacing the front windshield wiper blades on your Sierra 1500 is a quick beginner-friendly job. Fresh blades help prevent streaking, improve visibility, and protect the windshield from scratched rubber or damaged blade frames.
Difficulty Level: Beginner | Estimated Time: 10-15 minutes
⚠️ Safety & Precautions
- ⚠️ Do not let the bare metal wiper arm snap back onto the windshield; it can crack the glass.
- ⚠️ Turn the ignition fully off before starting so the wipers cannot move unexpectedly.
- ⚠️ Replace both front blades together for even wiping performance.
- ⚠️ Battery disconnect is not required for this repair.
🔧 Required Tools
You'll need the following tools for this repair:
- Safety glasses
- Clean microfiber towel
🔩 Required Parts
HowToo sells all the parts you need for this repair:
- Front wiper blades - Driver: 22", Passenger: 22" - Qty: 2
📋 Before You Begin
- Park your Sierra 1500 on level ground.
- Turn the ignition off and remove the key.
- Make sure the wiper switch is in the OFF position.
- Place a clean microfiber towel on the windshield under the wiper arm area. This protects the glass if the arm slips.
- Your Sierra 1500 uses a common hook-style wiper arm. The “hook” is the curved end of the metal wiper arm that locks into the blade.
🔨 Step-by-Step Instructions
Follow these steps in order:
Step 1: Lift the Driver-Side Wiper Arm
- Use your hands to gently lift the driver-side wiper arm away from the windshield.
- Stop when the arm stays raised on its own.
- Place the clean microfiber towel under the raised arm area as a backup cushion.
- Keep one hand on the arm.
Step 2: Rotate the Old Blade
- Use your hands to rotate the old wiper blade so it forms a “T” shape with the wiper arm.
- Look for the small release tab near the center of the blade connector.
- The connector is the plastic piece where the blade attaches to the metal arm.
Step 3: Release the Old Blade
- Use your thumb to press the release tab on the blade connector.
- While holding the tab, slide the blade downward toward the windshield end of the wiper arm.
- The blade will slide out of the hook-shaped end of the arm.
- Do not use pliers or a screwdriver. Use only your hands so the plastic connector does not break.
Step 4: Protect the Windshield
- Use your hand to carefully lower the bare metal wiper arm onto the clean microfiber towel.
- Do not let the wiper arm touch the windshield directly.
- Metal arms can crack glass.
Step 5: Install the New Driver-Side Blade
- Use your hands to hold the new 22" wiper blade with the rubber edge facing the windshield.
- Slide the new blade connector into the hook end of the wiper arm.
- Pull the blade upward into the hook until you hear or feel a click.
- Gently tug the blade by hand to confirm it is locked in place.
Step 6: Lower the Driver-Side Wiper Arm
- Use your hand to slowly lower the driver-side wiper arm back onto the windshield.
- Make sure the rubber blade sits flat against the glass.
- Remove the microfiber towel once the blade is safely resting on the windshield.
Step 7: Replace the Passenger-Side Blade
- Use your hands to lift the passenger-side wiper arm away from the windshield.
- Place the clean microfiber towel under the passenger-side arm area.
- Rotate the old blade into a “T” shape.
- Use your thumb to press the release tab.
- Slide the old blade downward and out of the hook.
- Use your hands to slide the new 22" blade into the hook until it clicks.
- Gently tug the blade by hand to confirm it is locked.
- Slowly lower the wiper arm back onto the windshield.
Step 8: Check Blade Position
- Use your eyes to confirm both blades are seated evenly on the windshield.
- Make sure neither blade is twisted, loose, or sitting off the edge of the glass.
- No torque specs apply because this repair uses clip-on wiper blades with no bolts.
✅ After Repair
- Turn the ignition on.
- Spray washer fluid onto the windshield.
- Run the wipers on low speed for a few passes.
- Check for smooth movement, no chatter, no streaks, and no blade skipping.
- If a blade streaks, wipe the rubber edge with a clean damp microfiber towel.
- If a blade chatters, confirm the connector is fully clicked into the hook.
💰 DIY vs Shop Cost
Shop Cost: $40-$90 parts + labor
DIY Cost: $20-$45 parts only
You Save: $20-$45 by doing it yourself!
Shop labor rates vary but typically run $100-$150/hour. This repair takes a shop approximately 0.1-0.2 hours.
🎯 Ready to get started?
HowToo makes it easy: same-day/2-day shipping on every part, plus all the tools and specialty tools you need! Check out the parts and tools sections below to add everything to your cart.