






How to Replace Front Windshield Wiper Blades on a 2010-2022 Honda Insight
A beginner-friendly, step-by-step guide covering parts, tools, safety tips, and testing for 2010, 2011, 2012, 2013, 2014, 2019, 2020, 2021, 2022
How to Replace Front Windshield Wiper Blades on a 2010-2022 Honda Insight
A beginner-friendly, step-by-step guide covering parts, tools, safety tips, and testing for 2010, 2011, 2012, 2013, 2014, 2019, 2020, 2021, 2022


🔧 Insight - Front Windshield Wiper Replacement
Easy job. Replace both front blades together for even clearing, especially before Haryana’s heavy monsoon rain. Your Insight uses separate driver-side and passenger-side blades, and the parts sidebar is now showing matching choices.
Difficulty Level: Beginner | Estimated Time: 10-15 minutes
⚠️ Safety & Precautions
- ⚠️ Switch the Insight completely off before touching the wipers.
- ⚠️ Never let a raised wiper arm snap against the glass. The bare metal arm can crack the windshield.
- ⚠️ Don’t open the hood while the wiper arms are raised.
- ⚠️ Keep your fingers clear of the spring-loaded arm hinge.
- ⚠️ Battery disconnection isn’t required.
🔧 Required Tools
You'll need the following tools for this repair:
- Clean microfiber towel
- Nitrile work gloves
- Safety glasses
🔩 Required Parts
HowToo sells all the parts you need for this repair:
- Front driver-side windshield wiper blade - Qty: 1
- Front passenger-side windshield wiper blade - Qty: 1
Replace both blades as a pair. Keep the two blades separated during installation because they aren’t interchangeable.
📋 Before You Begin
- 📍 Park on level ground and set the parking brake.
- 🔌 Set the power mode to VEHICLE OFF.
- 🧼 Clean the lower windshield with the microfiber towel so grit doesn’t scratch the glass.
- 📏 Compare each new blade with the blade being removed from that side before installation.
🔨 Step-by-Step Instructions
Follow these steps in order:
Step 1: Protect the windshield
- Place the clean microfiber towel on the windshield beneath the driver-side wiper arm.
- The towel adds protection if the arm slips. Windshields and spring-loaded metal arms aren’t good friends.
Step 2: Raise the wiper arms
- Put on the nitrile work gloves and safety glasses.
- Carefully lift the driver-side wiper arm first.
- Lift the passenger-side wiper arm second.
- Hold each arm by its metal section rather than pulling on the rubber blade.
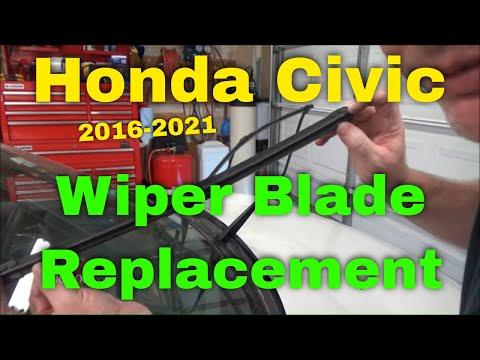
Step 3: Release the old driver-side blade
- Find the small locking tab where the blade holder connects to the metal wiper arm.
- A locking tab is the small plastic catch that prevents the blade from sliding off.
- Press and hold the tab with your thumb.
- While holding the tab, slide the blade holder toward the base of the wiper arm until it releases.
- Remove the blade carefully while keeping control of the metal arm.
Step 4: Install the new driver-side blade
- Compare the new blade’s length and connector with the removed blade.
- Align the new blade holder with the end of the metal wiper arm.
- Slide the holder onto the arm until the locking tab clicks securely into place.
- Pull gently on the blade to confirm it’s locked.
- Trust the click, then verify it.
Step 5: Replace the passenger-side blade
- Move the clean microfiber towel beneath the passenger-side arm.
- Press and hold its locking tab, then slide the old blade holder off the arm.
- Slide the new passenger-side holder onto the arm until it clicks.
- Pull gently on the blade to confirm the lock is engaged.
Step 6: Lower the arms correctly
- Lower the passenger-side wiper arm first.
- Lower the driver-side wiper arm second.
- Guide each blade gently onto the glass. Don’t release the arm from the raised position.
- No fasteners are removed, so there are no torque specifications for this repair.
✅ After Repair
- 💧 Start the Insight and spray windshield-washer fluid onto the glass.
- 👀 Run the wipers through several cycles and check for streaking, chatter or missed areas.
- 🔒 Stop immediately if either blade shifts or looks loose, then switch the vehicle off and reseat its connector.
- 🧽 Wipe the new rubber edges with a damp microfiber towel if they leave a light film during the first test.
💰 DIY vs Shop Cost
Shop Cost: $40-$100 USD equivalent (parts + labor)
DIY Cost: $15-$50 USD equivalent (parts only)
You Save: $25-$50 USD equivalent by doing it yourself!
Local labor rates vary. This repair takes a shop approximately 0.1-0.3 hours.
🎯 Ready to get started?
HowToo makes it easy: same-day/2-day shipping on every part, plus all the tools and specialty tools you need! Check out the parts and tools sections below to add everything to your cart.