

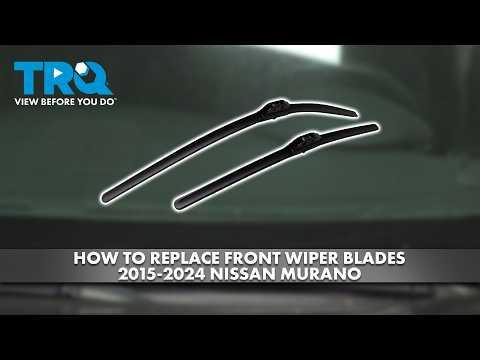





How to Replace Front Windshield Wiper Blades on a 2003-2024 Nissan Murano
Step-by-step guide with blade sizes, service position instructions, tools, and safety tips for 2003, 2004, 2005, 2006, 2007, 2015, 2016, 2017, 2018, 2019, 2020, 2021, 2022, 2023, 2024
How to Replace Front Windshield Wiper Blades on a 2003-2024 Nissan Murano
Step-by-step guide with blade sizes, service position instructions, tools, and safety tips for 2003, 2004, 2005, 2006, 2007, 2015, 2016, 2017, 2018, 2019, 2020, 2021, 2022, 2023, 2024


🔧 Murano - Front Windshield Wiper Blade Replacement
Replace both front wiper blades when they streak, chatter, split, or leave unwiped areas. Your Murano uses a 26-inch driver-side blade and an 18-inch passenger-side blade, and the arms must first be moved to the service position.
Difficulty Level: Beginner | Estimated Time: 10-20 minutes
⚠️ Safety & Precautions
- ⚠️ Do not force the wiper arms upward from their normal parked position; they can contact the hood edge.
- 🛡️ Protect the windshield with a folded microfiber towel. A bare spring-loaded arm can crack the glass if released.
- ✋ Replace one blade at a time so the other blade remains available as an installation reference.
- 🔋 Battery disconnection is not required.
- 🌧️ Do not operate the wipers while either arm is raised from the windshield.
🔧 Required Tools
You'll need the following tools for this repair:
- 24-inch by 16-inch microfiber towel
- Powder-free nitrile gloves
- ANSI Z87.1 safety glasses
🔩 Required Parts
HowToo sells all the parts you need for this repair:
- 26-inch driver-side front wiper blade - Qty: 1
- 18-inch passenger-side front wiper blade - Qty: 1
📋 Before You Begin
- 🅿️ Park your Murano on level ground, select Park, and apply the parking brake.
- 🚘 Close the hood before moving the wipers into service position.
- 📏 Compare each new blade with the corresponding old blade. Verify that its supplied adapter matches the original arm connection.
- 🧼 Clean loose dirt from the lower windshield before beginning.
🔨 Step-by-Step Instructions
Follow these steps in order:
Step 1: Move the Wipers to Service Position
- 🚘 Switch the ignition on without starting the engine, then switch it off.
- Within one minute, move the wiper stalk upward to the MIST position twice quickly.
- The wiper arms should move upward and stop where they can safely be lifted away from the glass.
- If they do not move, repeat the sequence with two quick stalk movements immediately after switching the ignition off.
Step 2: Protect the Windshield
- 🛡️ Put on the ANSI Z87.1 safety glasses and powder-free nitrile gloves.
- Use the 24-inch by 16-inch microfiber towel to cover the windshield beneath the driver-side wiper arm.
- Raise the driver-side arm carefully until it remains upright.
- Keep one hand on the raised arm.
Step 3: Remove the Driver-Side Blade
- 🔓 Rotate the blade slightly away from the arm so you can reach its connector.
- Use your gloved thumb to press or lift the locking tab on the blade’s center adapter.
- While holding the lock released, slide the blade toward the open end of the arm connection and remove it.
- Lower the bare arm gently onto the microfiber towel while preparing the new blade.
- No threaded fasteners are removed, so no torque specification applies.
Step 4: Install the Driver-Side Blade
- 🔧 Use your gloved fingers to fit the supplied adapter specified for the original Nissan arm, if it is not already installed on the new 26-inch blade.
- Raise the arm from the microfiber towel and align the adapter with the arm connection in the same direction as the original blade.
- Slide the blade into the connection until the locking tab clicks securely.
- Pull gently on the blade to confirm it is locked.
- Rotate the blade parallel with the arm, then lower it gently onto the windshield.
Step 5: Replace the Passenger-Side Blade
- 🛡️ Move the 24-inch by 16-inch microfiber towel beneath the passenger-side wiper arm.
- Raise the arm, then use your gloved thumb to release the old blade’s locking tab.
- Slide the old 18-inch blade out of the arm connection and remove it.
- Use your gloved fingers to install the correct supplied adapter on the new blade if required.
- Slide the new blade into the arm connection until it clicks, then pull gently to verify that it is locked.
- Lower the arm gently onto the windshield.
- No threaded fasteners are removed, so no torque specification applies.
Step 6: Return the Wipers to Park
- ✅ Confirm both arms are resting fully against the windshield and remove the microfiber towel.
- Switch the ignition on.
- Move the wiper stalk upward once to MIST; the wipers should sweep and return to their normal parked position.
- Switch the ignition off after confirming both blades are properly parked.
✅ After Repair
- 💧 Apply windshield-washer fluid and operate the wipers for several cycles.
- 🔍 Confirm both blades wipe smoothly without streaking, chattering, contacting each other, or touching the windshield trim.
- 🔒 Stop immediately if a blade shifts on its arm; switch the ignition off and reseat its adapter until it clicks.
- ♻️ Recycle the old blades where rubber-and-metal automotive parts are accepted.
💰 DIY vs Shop Cost
Shop Cost: ₹2,500-₹6,000 (parts + labor)
DIY Cost: ₹1,500-₹4,500 (parts only)
You Save: ₹1,000-₹1,500 by doing it yourself!
Local labor rates and imported blade prices vary. This repair takes a shop approximately 0.2-0.3 hours.
🎯 Ready to get started?
HowToo makes it easy: same-day/2-day shipping on every part, plus all the tools and specialty tools you need! Check out the parts and tools sections below to add everything to your cart.