

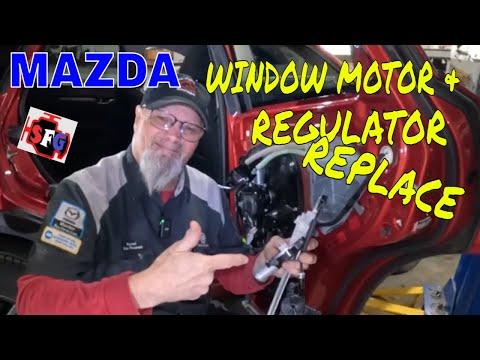






How to Replace Front Window Regulators on a 2017-2025 Mazda CX-5
Step-by-step instructions with required tools, parts, torque specs, and safety tips for 2017, 2018, 2019, 2020, 2021, 2022, 2023, 2024, 2025
How to Replace Front Window Regulators on a 2017-2025 Mazda CX-5
Step-by-step instructions with required tools, parts, torque specs, and safety tips for 2017, 2018, 2019, 2020, 2021, 2022, 2023, 2024, 2025


🔧 CX-5 - Front Window Regulator Replacement
This is an intermediate repair, and replacing the regulator-and-motor assembly is the beginner-friendly route. Each front door is serviced separately. You’ll remove the door trim and speaker, support and remove the glass, then extract the regulator through the speaker opening. Mazda’s procedure uses this same sequence. mcx5.org)
The parts sidebar now shows separate vehicle-specific front-left and front-right regulator-and-motor assemblies. Don’t order two of the same side. Door regulators are mirror images, and they’re remarkably unforgiving about being introduced to the wrong door.
Assumption: These instructions cover the original power-window system and undamaged door glass.
Difficulty Level: Intermediate | Estimated Time: 2-3 hours per door
⚠️ Safety & Precautions
- ⚠️ Wear safety glasses and cut-resistant gloves whenever handling the glass.
- ⚠️ Support the glass before loosening its mounting bolts. It can drop into the door and shatter.
- ⚠️ Disconnect the negative battery terminal after positioning the window. This prevents accidental motor movement.
- ⚠️ Protect the painted door edge and speaker opening with painter’s tape.
- ⚠️ Keep fingers clear of the regulator cables and tracks. A damaged cable can release suddenly.
- ⚠️ Never power the replacement regulator while your hands are inside the door.
- ⚠️ If the glass is cracked, have an automotive-glass professional remove it.
🔧 Required Tools
You’ll need the following tools for this repair:
- 10mm socket
- 8mm socket
- 1/4-inch drive ratchet
- 1/4-inch drive 150mm extension
- Phillips No. 2 screwdriver
- Plastic interior trim removal tool set
- Small flat-blade screwdriver
- Plastic clip removal pliers
- 3/8-inch drive inch-pound torque wrench
- 50mm painter’s tape
- Permanent marker
- Magnetic parts tray
- Cut-resistant work gloves
- Safety glasses
A trim removal tool is a broad plastic lever that releases interior clips without scratching the panel.
🔩 Required Parts
HowToo sells all the parts you need for this repair:
- Front-left window regulator and motor assembly - Qty: 1 if replacing the driver side
- Front-right window regulator and motor assembly - Qty: 1 if replacing the passenger side
- Front door trim clips - Qty: 4-8 per door as needed
- Door vapor-barrier sealing tape - Qty: 1 roll if the original seal will not reseal
If you’re replacing both sides, order one left assembly and one right assembly. The complete motor-and-regulator version avoids transferring the old motor and reduces the chance of cable-drum trouble.
📋 Before You Begin
- Park your CX-5 on level ground, switch the ignition off and open the door being repaired.
- Lower the affected glass until its upper edge is approximately 90mm below the upper beltline. Mazda specifies this preparation position to make the glass fasteners accessible. mcx5.org
- If the regulator won’t move, remove the trim first and manually position the regulator or glass when access permits.
- Photograph every connector and cable-routing point before disconnecting anything.
- Mark the glass-clamp positions with a permanent marker before loosening them.
- After positioning the glass, disconnect the negative battery terminal using a 10mm socket.
- Wait at least one minute before unplugging door electrical connectors.
🔨 Step-by-Step Instructions
Follow these steps in order:
Step 1: Remove the mirror-corner garnish
- Use a plastic trim removal tool to release the triangular inner garnish at the upper front corner of the door.
- Pull gently and evenly so its locating tabs don’t snap.
- Disconnect the tweeter connector if the garnish contains a speaker.
Step 2: Remove the door-panel fasteners
- Use a plastic trim removal tool to remove the small cover behind the interior door handle.
- Remove the exposed screw with a Phillips No. 2 screwdriver.
- Lift the cover inside the door-pull pocket with the plastic tool.
- Remove the screw beneath it with a Phillips No. 2 screwdriver.
Step 3: Release the door trim
- Insert a plastic trim removal tool between the lower trim panel and metal door.
- Release the retaining clips across the bottom and both sides.
- Pull the panel away following its clip-release direction rather than simply yanking it upward. Mazda warns that incorrect removal can damage the clips, hooks and locating pin. mcx5.org
- Support the panel while disconnecting the window-switch and courtesy-light connectors.
- Release the interior-handle cables or handle assembly using a small flat-blade screwdriver.
- Place the trim panel on a clean padded surface.
Step 4: Remove the front speaker
- Disconnect the speaker connector by pressing its locking tab.
- Use an 8mm socket or the matching factory-fastener socket to remove the speaker fasteners.
- Lift the speaker away without pulling on its wiring.
- Protect the metal speaker-opening edge with 50mm painter’s tape.
Step 5: Open the glass access covers
- Use a plastic trim removal tool to peel back only the portions of the vapor barrier needed for access.
- Do not stretch, tear or contaminate the sticky sealing material.
- Open the regulator’s glass-fastener access covers.
Step 6: Secure the window glass
- Reconnect the battery and window switch temporarily only if the regulator still operates and needs minor repositioning.
- Move the glass until both glass fasteners are accessible, then switch the ignition off and disconnect the negative terminal again with a 10mm socket.
- Run at least three long strips of 50mm painter’s tape from the outside of the glass, over the door frame and onto the inside of the glass.
- Use additional tape to hold the glass firmly before loosening anything.
- More tape is cheaper than door glass.
Step 7: Disconnect and remove the glass
- Support the bottom of the glass through the speaker opening with one hand.
- Use a 10mm socket to remove the two glass-to-regulator bolts through the access openings.
- Carefully lift the glass upward by hand.
- Tilt the glass as needed and lift it out through the top of the door, following Mazda’s removal sequence. mcx5.org
- Set the glass upright on a thick folded blanket, away from foot traffic.
Step 8: Disconnect the window motor
- Press the connector lock with a small flat-blade screwdriver and unplug the motor.
- Inspect the connector for overheated terminals, green corrosion or damaged wiring.
- Use a permanent marker to mark the old regulator’s mounting positions on the door.
Step 9: Remove the old regulator
- Use a 10mm socket and extension to remove the regulator mounting bolt and nuts.
- Support the regulator through the speaker opening while removing its final fastener.
- Detach the regulator drum housing tabs from the door module panel.
- Rotate and guide the regulator out through the speaker opening.
- Keep the assembly away from the opening’s sharp edge. Mazda specifically warns that contact here can damage both the regulator and the door’s protective coating. mcx5.org
Step 10: Install the replacement assembly
- Compare the new assembly with the removed unit. Confirm the connector, tracks, mounting points and cable routing match.
- Guide the new assembly through the speaker opening without bending its tracks.
- Engage the regulator drum housing tabs fully in the door module panel.
- Start every mounting nut and bolt by hand before tightening them.
- Use a 10mm socket and inch-pound torque wrench to tighten the regulator mounting hardware to 8-10Nm (71-89in-lbs).
- Plug in the window-motor connector until its lock clicks.
Step 11: Reinstall and align the glass
- Lower the glass carefully into both front and rear guide channels.
- Confirm it sits fully inside both guides before attaching it to the regulator.
- Align the glass with the marks made before removal.
- Install the glass bolts by hand, then tighten evenly using a 10mm socket and inch-pound torque wrench.
- Torque to 8-10Nm (71-89in-lbs).
- Do not overtighten. Excess force can damage the glass mounting points.
Step 12: Test before closing the door
- Keep hands and tools outside the door cavity.
- Reconnect the negative battery terminal using a 10mm socket.
- Reconnect the window switch temporarily.
- Switch the ignition on and operate the glass through one slow up-and-down cycle.
- Stop immediately if the glass tilts, binds, clicks or leaves either guide channel.
- If adjustment is required, disconnect the battery before reaching back inside.
Step 13: Reseal the door
- Disconnect the negative battery terminal again using a 10mm socket.
- Press the vapor barrier completely into its original seal.
- Use fresh door vapor-barrier sealing tape where the original adhesive no longer holds.
- Make sure the lower edge is sealed. Water passing the outer glass seal must remain inside the door and drain through its drain holes.
Step 14: Reinstall the speaker and door trim
- Reconnect and position the speaker.
- Install its fasteners using an 8mm socket, tightening them evenly until snug.
- Reconnect the handle cables, courtesy light and window-switch connectors.
- Align every trim clip before pressing the panel into the door.
- Replace any bent or broken clips with plastic clip removal pliers.
- Install the door-pull and handle screws using a Phillips No. 2 screwdriver.
- Reinstall the covers and mirror-corner garnish using the plastic trim removal tool.
Step 15: Complete final battery connection
- Reconnect the negative battery terminal using a 10mm socket.
- Confirm the terminal is fully seated and cannot rotate by hand.
- Switch the ignition on without starting the engine.
✅ After Repair
- ✅ Close the window completely using the affected door’s switch.
- ✅ Continue holding the switch in the upward position for approximately two seconds.
- ✅ Lower the window completely and continue holding the switch downward for approximately two seconds.
- ✅ Raise the window completely and hold the switch upward again for approximately two seconds.
- ✅ Test normal, one-touch and anti-pinch operation. Initialization may be necessary after battery disconnection or power-window service.
- ✅ Confirm the glass reaches the top evenly and does not wind-noise, rattle or reverse unexpectedly.
- ✅ Check the door lock, mirror, speaker, courtesy light and every window-switch function.
- ✅ Pour a small amount of clean water along the outside beltline and check that no water enters behind the interior trim.
- ✅ Repeat the entire procedure separately on the other front door if both regulators are being replaced.
💰 DIY vs Shop Cost
Shop Cost: ₹18,000-₹35,000 per door, depending on parts and local labor
DIY Cost: ₹5,000-₹12,000 per door for the regulator assembly and consumables
You Save: Approximately ₹10,000-₹23,000 per door by doing it yourself!
Local labor rates and imported-parts pricing vary. This repair normally takes a shop approximately 1.5-2.5 hours per door.
🎯 Ready to get started?
HowToo makes it easy: same-day/2-day shipping on every part, plus all the tools and specialty tools you need! Check out the parts and tools sections below to add everything to your cart.