

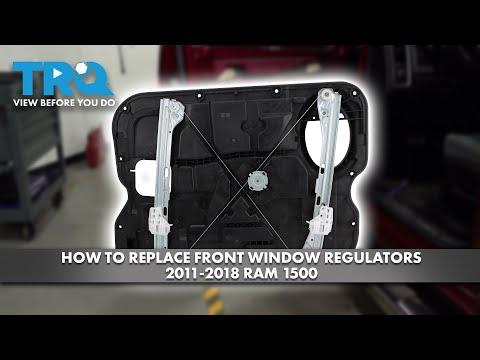






How to Replace Front Window Regulators on a 2015 Ram 1500
Step-by-step repair guide with tools, parts, torque specs, safety tips, and testing for 2013, 2014, 2015, 2016, 2017, 2018
How to Replace Front Window Regulators on a 2015 Ram 1500
Step-by-step repair guide with tools, parts, torque specs, safety tips, and testing for 2013, 2014, 2015, 2016, 2017, 2018


🔧 1500 - Front Window Regulator Replacement
Replacing both front window regulators requires removing each door trim panel, supporting the glass, and extracting the regulator through the inner-door opening. The driver and passenger regulators are different parts, but the procedure is essentially the same.
Assumption: The original window motors will be transferred if the replacement regulators do not include motors.
Difficulty Level: Intermediate | Estimated Time: 1.5-2.5 hours per door
⚠️ Safety & Precautions
- Wear gloves and safety glasses because the inner door has sharp metal edges.
- Disconnect the negative battery cable before unplugging door wiring.
- Support the glass before disconnecting it from the regulator. Unsupported glass can fall and shatter.
- Do not operate the regulator while your fingers are inside the door.
- Do not use the regulator to correct glass that is outside its front or rear guide channel.
- Avoid disturbing yellow connectors or wiring, which identify supplemental-restraint circuits.
🔧 Required Tools
You'll need the following tools for this repair:
- 10mm wrench
- 8mm socket
- 10mm socket
- 1/4-inch drive ratchet
- 1/4-inch drive 6-inch extension
- Torx T20 screwdriver
- Phillips No. 2 screwdriver
- Plastic trim removal tool set (specialty)
- Small flat-blade screwdriver
- Plastic razor scraper
- 1/4-inch drive inch-pound torque wrench
- Painter's tape rated for glass
- Mechanic gloves
- Safety glasses
🔩 Required Parts
HowToo sells all the parts you need for this repair:
- Left-front window regulator - Qty: 1
- Right-front window regulator - Qty: 1
- Front door trim-panel retainer set - Qty: 2 sets
- Butyl vapor-barrier sealing cord - Qty: 1 roll
- Front window motor - Qty: 1 per side only if not included or the original motor is faulty
📋 Before You Begin
- Park your 1500 on level ground, shift into Park, and apply the parking brake.
- If a window still operates, lower it until its glass attachment points align with the door access openings.
- Switch the ignition off and keep the key away from the truck.
- Use a 10mm wrench to disconnect and isolate the negative battery cable.
- Work on one door at a time so the opposite door remains available as an assembly reference.
- The vapor barrier is the flexible sheet sealing the inner door against water. It must be resealed completely during assembly.
🔨 Step-by-Step Instructions
Follow these steps in order:
Step 1: Remove the switch-panel trim
- Use a plastic trim removal tool to lift the window-switch panel without scratching the door.
- Press each connector lock with a small flat-blade screwdriver, then unplug the switch-panel connectors.
- Never pull a connector loose by its wires.
Step 2: Remove the door-panel fasteners
- Use a plastic trim removal tool to remove the small covers behind the interior handle and inside the pull-handle area.
- Use a Torx T20 screwdriver, Phillips No. 2 screwdriver, and 8mm socket as applicable to remove all exposed trim-panel screws.
- Keep each screw with its cover so it returns to the same location.
Step 3: Detach the door trim panel
- Insert a plastic trim removal tool between the panel and door at a lower corner.
- Release the retainers one at a time around the bottom and sides.
- Lift the panel straight upward to disengage it from the beltline beside the glass.
- Unhook the interior-handle cable and unplug the remaining connectors by hand.
- Place the panel face-up on a clean padded surface.
Step 4: Expose the regulator
- Remove the speaker fasteners with the applicable 8mm socket or Phillips No. 2 screwdriver, unplug the speaker, and remove it if it blocks an access opening.
- Use a plastic razor scraper to separate the vapor barrier from its butyl adhesive.
- Peel the barrier back slowly without tearing it or stretching the wiring openings.
- Keep the adhesive clean for easier resealing.
Step 5: Position and secure the glass
- If necessary, reconnect the battery with a 10mm wrench, temporarily reconnect the switch, and move the glass attachment points into the access openings.
- Switch the ignition off, disconnect the switch, and use the 10mm wrench to disconnect the negative battery cable again.
- Use an 8mm or 10mm socket, according to the installed fastener head, to loosen the two glass-to-regulator clamp fasteners.
- Raise the glass fully by hand and secure it to the top of the door frame with several long strips of painter's tape.
- Pull gently downward on the glass to confirm that the tape holds it securely.
Step 6: Remove the old regulator
- Unplug the window-motor connector by hand after releasing its locking tab.
- Use a 10mm socket, 1/4-inch drive ratchet, and 6-inch extension to remove the regulator rail and motor mounting fasteners.
- Support the regulator while removing its final fastener.
- Collapse and rotate the regulator carefully, then guide it through the largest door service opening.
- Do not bend the glass channels or pull on the wiring harness.
Step 7: Transfer the motor when required
- Skip this step if the new regulator includes the correct motor.
- Place the old regulator flat and keep hands away from its cable and spring-loaded sections.
- Use the applicable Torx T20 screwdriver or 8mm socket to remove the motor fasteners.
- Install the motor on the new regulator in the same orientation.
- Tighten the motor fasteners evenly with the inch-pound torque wrench to the specification supplied with the replacement regulator; do not overtighten its plastic housing.
Step 8: Install the new regulator
- Guide the new assembly through the service opening without twisting its cables.
- Start every mounting fastener by hand before tightening any one fastener.
- Use a 10mm socket and inch-pound torque wrench to tighten the regulator and motor mounting fasteners to 9 Nm (80 in-lbs).
- Plug in the window-motor connector until its lock clicks.
Step 9: Attach and align the glass
- Remove the painter's tape while supporting the glass with one hand.
- Lower the glass squarely into the regulator clamps and confirm it remains inside both guide channels.
- Use the applicable 8mm or 10mm socket and inch-pound torque wrench to tighten the glass clamp fasteners evenly to 9 Nm (80 in-lbs).
- Do not exceed the specified torque because excessive force can damage the glass or clamps.
Step 10: Test operation before closing the door
- Reconnect the switch panel and negative battery cable using the 10mm wrench.
- Keep hands and tools outside the door, then run the window slowly through one complete cycle.
- Confirm the glass stays level, enters the upper seal evenly, and does not click or bind.
- If adjustment is needed, disconnect the battery with the 10mm wrench before reaching inside the door.
Step 11: Reseal the inner door
- Use a plastic razor scraper to remove contaminated or loose sealing material.
- Apply fresh butyl sealing cord around any open section, then press the vapor barrier firmly into place by hand.
- Seal around every wiring opening to prevent water from reaching the carpet or electrical connectors.
- Reinstall the speaker using the applicable 8mm socket or Phillips No. 2 screwdriver.
Step 12: Reinstall the door trim panel
- Replace damaged panel retainers by hand before installing the panel.
- Reconnect the interior-handle cable and all electrical connectors.
- Hook the panel over the upper beltline, align each retainer, and press around the perimeter by hand.
- Reinstall the trim screws with the applicable Torx T20 screwdriver, Phillips No. 2 screwdriver, or 8mm socket.
- Tighten the small trim fasteners to 2 Nm (18 in-lbs); stop when the panel is snug.
- Reconnect the switch panel and press it into place with your hands.
Step 13: Repeat on the opposite front door
- Use the same tools and procedure on the opposite door.
- Keep the left-front and right-front regulators separate because they are not interchangeable.
✅ After Repair
- Reconnect and tighten the negative battery terminal securely with a 10mm wrench.
- Close each door and test its window from both the local switch and driver master switch.
- To restore one-touch operation, close the window fully and hold the switch upward for two seconds. Open it fully and hold the switch downward for two seconds, then repeat if needed.
- Verify that the lock, mirror, speaker, courtesy light, and interior handle work on each repaired door.
- Spray water over the outside glass and confirm no water reaches the cabin or lower edge of the trim panel.
💰 DIY vs Shop Cost
Shop Cost: ₹45,000-₹85,000 for both front doors (parts + labor)
DIY Cost: ₹18,000-₹42,000 for both regulators (parts only)
You Save: ₹27,000-₹43,000 by doing it yourself!
Panipat parts pricing varies considerably because this U.S.-market truck may require imported components. This repair takes a shop approximately 3-5 hours for both doors.
🎯 Ready to get started?
HowToo makes it easy: same-day/2-day shipping on every part, plus all the tools and specialty tools you need! Check out the parts and tools sections below to add everything to your cart.