

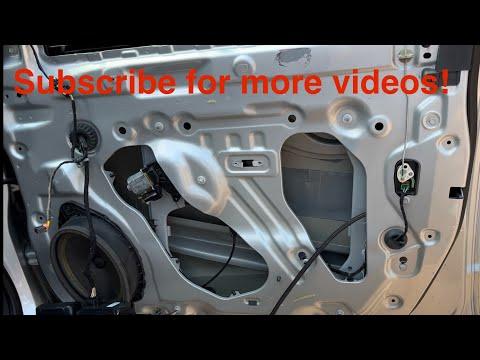






How to Replace Front Window Regulators on a 2015-2022 GMC Canyon (Engine: Inline 4 2.5L)
Step-by-step DIY guide with tools, parts, torque specs, safety tips, and testing for 2015, 2016, 2017, 2018, 2019, 2020, 2021, 2022
How to Replace Front Window Regulators on a 2015-2022 GMC Canyon (Engine: Inline 4 2.5L)
Step-by-step DIY guide with tools, parts, torque specs, safety tips, and testing for 2015, 2016, 2017, 2018, 2019, 2020, 2021, 2022


🔧 Canyon - Front Window Regulator Replacement
Replacing the front window regulator means removing the door trim panel, disconnecting the glass from the regulator, and swapping the regulator assembly inside the door. The regulator is the metal cable-and-rail mechanism that raises and lowers the window glass.
Difficulty Level: Intermediate | Estimated Time: 1.5-2.5 hours per door
Assumption: This procedure covers the front driver or front passenger manual-style door service on your Canyon; repeat the same general process for the opposite front door.
⚠️ Safety & Precautions
- ⚠️ Disconnect the negative battery cable before unplugging door electrical connectors to reduce the risk of shorts.
- ⚠️ Support the window glass before removing the regulator. The glass can drop suddenly and break.
- ⚠️ Wear safety glasses and cut-resistant gloves. Door panels have sharp stamped-metal edges.
- ⚠️ Do not slam the door while the regulator or glass is loose.
- ⚠️ If equipped with a door side-impact sensor or airbag-related wiring, do not probe yellow connectors with a test light or meter.
🔧 Required Tools
You'll need the following tools for this repair:
- 10mm socket
- 7mm socket
- Ratchet with 3/8-inch drive
- 6-inch extension with 3/8-inch drive
- Trim panel removal tool
- Small flathead screwdriver
- Phillips #2 screwdriver
- Painter’s tape 2-inch wide
- Pick tool set
- Needle-nose pliers
- Torque wrench inch-pound 1/4-inch drive
- Torque wrench foot-pound 3/8-inch drive
- Plastic scraper
- Work light
- Cut-resistant gloves
- Safety glasses
🔩 Required Parts
HowToo sells all the parts you need for this repair:
- Front window regulator assembly - Qty: 1 per door
- Front door trim panel clips - Qty: As needed
- Butyl sealing tape - Qty: 1 roll
- Door water shield adhesive patch material - Qty: As needed
📋 Before You Begin
- 🅿️ Park your Canyon on level ground and set the parking brake.
- 🔋 Use a 10mm socket to disconnect the negative battery cable. Move the cable aside so it cannot touch the battery post.
- 🪟 If the window still moves, raise or lower it until the glass mounting bolts are visible through the inner door access openings.
- 🧰 A trim panel removal tool is a wide plastic pry tool that helps pop clips loose without gouging the door panel.
- 🧲 Keep screws and bolts grouped by location. Door screws can look similar but may be different lengths.
🔨 Step-by-Step Instructions
Follow these steps in order:
Step 1: Remove the Door Switch Trim
- Use a trim panel removal tool to gently lift the power window switch trim from the armrest area.
- Use a small flathead screwdriver to release the locking tabs on the electrical connectors.
- Unplug the connectors and set the switch trim aside.
- Lift slowly to avoid breaking clips.
Step 2: Remove Door Handle and Pull Trim Covers
- Use a small flathead screwdriver or pick tool to remove the small trim cover behind the inside door handle.
- Use the same tool to remove the screw cover inside the door pull handle area.
- Work gently. These plastic covers can mark easily.
Step 3: Remove the Door Panel Fasteners
- Use a 7mm socket and ratchet to remove the visible door trim screws from the pull handle and lower trim panel areas.
- Use a 10mm socket if your door pull fastener uses a larger bolt style.
- Place all screws in order on a clean surface.
Step 4: Release the Door Trim Panel
- Use a trim panel removal tool at the lower edge of the door panel.
- Pry outward near each clip until the clips pop free.
- Once the clips are loose, lift the door panel straight upward to unhook it from the window ledge.
- Use needle-nose pliers to disconnect any remaining cable or connector if equipped.
- Do not yank the panel outward.
Step 5: Remove the Water Shield
- Use a plastic scraper to gently peel back the plastic water shield from the door.
- Keep the butyl adhesive as clean as possible. Butyl is the sticky black sealing material around the door shield.
- Do not tear the shield. It keeps rainwater away from the trim panel and wiring.
Step 6: Secure the Window Glass
- Use painter’s tape 2-inch wide to tape the glass to the upper door frame.
- Run two or three long strips from the outside glass, over the top of the door frame, and onto the inside glass.
- Press the tape firmly so the glass cannot drop.
- More tape is better here.
Step 7: Loosen the Glass Clamp Bolts
- Use a work light to find the glass clamp or sash bolts through the door access holes.
- Use a 10mm socket with a 6-inch extension to loosen the glass-to-regulator bolts.
- Do not remove the bolts completely unless the replacement design requires it.
- Lift the glass fully upward by hand if needed, then add more painter’s tape to hold it in the full-up position.
Step 8: Disconnect the Window Motor Connector
- Use a small flathead screwdriver to release the window motor connector lock tab.
- Unplug the connector from the regulator motor.
- Move the harness aside so it does not snag during removal.
Step 9: Remove the Regulator Assembly
- Use a 10mm socket and ratchet to remove the regulator mounting bolts from the inner door.
- Support the regulator with one hand while removing the final bolt.
- Guide the regulator assembly out through the largest door opening.
- If the cable is broken and tangled, use needle-nose pliers to move loose cable away from the door openings.
Step 10: Install the New Regulator
- Feed the new front window regulator assembly into the door through the main access opening.
- Align the regulator studs or bolt holes with the door mounting holes.
- Use a 10mm socket to install the mounting bolts finger-tight first.
- Use a torque wrench with 10mm socket to tighten the regulator mounting bolts to Torque to 10 Nm (89 in-lbs).
Step 11: Connect the Window Motor
- Plug the electrical connector into the window motor until the lock clicks.
- Use your fingers to gently tug the connector and confirm it is seated.
- Keep the harness routed away from the regulator cables and moving arms.
Step 12: Reattach the Glass to the Regulator
- Carefully remove enough painter’s tape to lower the glass by hand into the regulator clamps.
- Use both hands on the glass and lower it slowly until it sits fully in the clamps.
- Use a 10mm socket to snug the glass clamp bolts.
- Use a torque wrench with 10mm socket to tighten the glass clamp bolts to Torque to 9 Nm (80 in-lbs).
- Reapply painter’s tape loosely until testing is complete.
Step 13: Test the Regulator Before Reassembly
- Use a 10mm socket to temporarily reconnect the negative battery cable.
- Reconnect the window switch connector by hand.
- Turn the ignition on without starting the engine.
- Run the window down and up slowly while watching the glass track.
- If the glass binds, stop immediately and use a 10mm socket to slightly loosen and realign the glass clamps.
- Use a 10mm socket to disconnect the negative battery cable again after testing.
Step 14: Reinstall the Water Shield
- Use a plastic scraper to press the water shield back into the butyl sealing tape.
- Add butyl sealing tape anywhere the original adhesive no longer seals.
- Make sure the shield is sealed around the lower edge so water cannot reach the trim panel.
Step 15: Reinstall the Door Trim Panel
- Lift the door panel onto the upper window ledge by hand.
- Align the trim clips with the door holes.
- Press around the door panel edges by hand until each clip snaps in.
- Use a 7mm socket to reinstall the door panel screws.
- Use a torque wrench with 7mm socket to tighten trim screws to Torque to 2 Nm (18 in-lbs).
Step 16: Reinstall Switch Trim and Covers
- Plug the window switch connectors in by hand until they click.
- Snap the switch trim back into the armrest by pressing evenly with your hands.
- Use your hands to reinstall the door handle and pull trim covers.
- Use a 10mm socket to reconnect the negative battery cable.
- Use a torque wrench with 10mm socket to tighten the battery terminal to Torque to 6 Nm (53 in-lbs).
✅ After Repair
- ✅ Cycle the window fully down and fully up at least five times.
- ✅ Listen for grinding, popping, or cable noise. Stop if you hear anything harsh.
- ✅ Check that the glass seals evenly against the upper weatherstrip.
- ✅ Confirm the door lock, mirror switch, speaker, and window switch all work.
- ✅ If auto-up/down is equipped and loses its memory, hold the switch down for 2 seconds after the glass reaches the bottom, then hold up for 2 seconds after it reaches the top.
- ✅ Spray water on the outside of the window and check inside the lower door trim area for leaks.
💰 DIY vs Shop Cost
Shop Cost: $350-$650 per front door (parts + labor)
DIY Cost: $90-$220 per front door (parts only)
You Save: $260-$430 per door by doing it yourself!
Shop labor rates vary but typically run $100-$150/hour. This repair takes a shop approximately 1.0-1.8 hours per door.
🎯 Ready to get started?
HowToo makes it easy: same-day/2-day shipping on every part, plus all the tools and specialty tools you need! Check out the parts and tools sections below to add everything to your cart.