


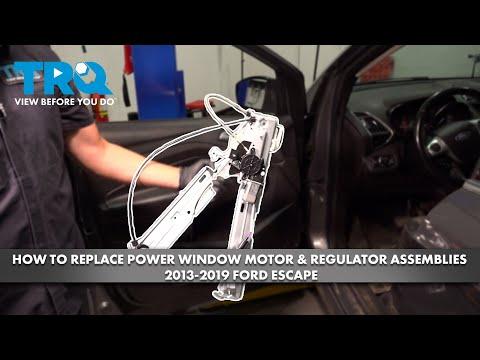




How to Replace Front Window Regulators on a 2013-2019 Ford Escape
Step-by-step guide for both front doors with tools, parts, torque specs, and safety tips for 2013, 2014, 2015, 2016, 2017, 2018, 2019
How to Replace Front Window Regulators on a 2013-2019 Ford Escape
Step-by-step guide for both front doors with tools, parts, torque specs, and safety tips for 2013, 2014, 2015, 2016, 2017, 2018, 2019


🔧 Escape - Front Window Regulator Replacement
Replace each front regulator one door at a time. The door trim comes off, the glass is released and secured, then the regulator and motor assembly is removed through the inner door opening.
Difficulty Level: Intermediate | Estimated Time: 2-3 hours per door
Assumption: These instructions cover complete regulator-and-motor assemblies. Fastener appearance can differ slightly between the left and right doors.
⚠️ Safety & Precautions
- ⚠️ Wear gloves. Door openings and regulator rails have sharp edges.
- ⚠️ Never work inside the door while the window motor is connected.
- ⚠️ Support the glass with several strong tape strips before releasing it.
- ⚠️ Disconnect the battery before unplugging the door-mounted side-impact sensor wiring.
- ⚠️ After disconnecting the battery, wait at least 10 minutes before touching side-impact sensor connectors.
- ⚠️ Don’t switch the ignition on while restraint-system connectors are disconnected.
- ⚠️ Don’t allow the unsupported glass to fall into the door.
🔧 Required Tools
You'll need the following tools for this repair:
- 7mm socket
- 8mm socket
- 10mm socket
- 17mm socket
- 1/4-inch ratchet
- 1/4-inch extension set
- Inch-pound torque wrench
- Plastic trim-removal tool set
- Small hooked pick
- Small flat-blade screwdriver
- Telescoping magnetic pickup tool
- Painter’s tape
- Permanent marker
- Work gloves
- Safety glasses
A trim-removal tool is a plastic pry tool designed to release clips without scratching the door panel.
🔩 Required Parts
HowToo sells all the parts you need for this repair:
- Front-left window regulator with motor - Qty: 1
- Front-right window regulator with motor - Qty: 1
- Front door trim-panel clips - Qty: 4-8 as needed
- Automotive butyl sealing tape - Qty: 1 roll if needed
Match each regulator to its door. Left and right assemblies aren’t interchangeable. Replacing the complete motor-and-regulator assembly is usually the cleanest repair. Nobody wants to reopen a door for an old motor next month.
📋 Before You Begin
- 🚙 Park your Escape on level ground and switch the ignition off.
- 📱 Lower the window until its glass fasteners or retaining points line up with the door’s access openings.
- 🔒 If the regulator is broken and the glass won’t move, carefully raise the glass by hand after removing the panel.
- 🔋 Open the hood and disconnect the negative battery terminal with a 10mm socket.
- ⏱️ Wait at least 10 minutes before disconnecting wiring inside the door.
- 📦 Keep the left- and right-side hardware separated.
🔨 Step-by-Step Instructions
Follow these steps in order:
Step 1: Remove the window-switch panel
- Use a plastic trim-removal tool to lift the window-switch panel from the armrest.
- Lift from an edge rather than pulling on the switches.
- Press the connector locks and unplug the switch wiring.
- Set the switch panel on a clean towel.
Step 2: Remove the hidden door-panel fasteners
- Use a small hooked pick to remove the cover behind the interior door handle.
- Use a plastic trim-removal tool to lift the armrest or door-pull cover.
- Remove the exposed fasteners with the appropriate 7mm or 8mm socket.
- Remove the lower and outer-edge fasteners with the same socket.
- Store every fastener by location because their lengths may differ.
Step 3: Release the door trim panel
- Insert a plastic trim-removal tool between the panel and metal door at a lower corner.
- Release the retaining clips along the bottom and both sides.
- Lift the entire panel upward to unhook it from the window ledge.
- Don’t pull the panel away sharply because cables and wiring remain attached.
Step 4: Disconnect the handle cable and wiring
- Support the panel while releasing the interior handle cable housing by hand.
- Rotate the cable end out of the handle lever.
- Disconnect the lock-switch, courtesy-light and speaker connectors as equipped.
- Place the trim panel on a padded surface.
Step 5: Expose the window regulator
- Use a plastic trim-removal tool to release any foam pad or access covers.
- Carefully peel the moisture barrier away without touching or contaminating its adhesive.
- Use a permanent marker to mark the barrier’s original position.
- Don’t cut the barrier. It prevents rainwater from reaching the interior.
Step 6: Secure the window glass
- Temporarily reconnect the window switch only if the regulator still operates.
- Reconnect the battery temporarily and move the glass until its clamps or fasteners appear through the access openings.
- Switch the ignition off, disconnect the negative terminal with a 10mm socket and wait 10 minutes again.
- Loosen the glass-clamp fasteners with a 10mm or 17mm socket, depending on the installed regulator design.
- Don’t completely remove a clamp nut unless the replacement instructions require it.
- Raise the glass fully by hand.
- Run at least three long strips of painter’s tape over the top of the door frame to hold the glass.
- Pull downward gently on the glass to confirm it can’t slip.
Step 7: Disconnect the door wiring
- Disconnect the regulator motor and speaker connectors by pressing their locking tabs.
- Release the wiring-harness clips with a plastic trim-removal tool.
- Disconnect the side-impact sensor connector only after the battery waiting period.
- Move the wiring aside without pulling on individual wires.
Step 8: Remove the old regulator
- Use a permanent marker to mark the regulator’s installed position around its mounting points.
- Use a 10mm socket to loosen or remove the regulator mounting nuts and bolts.
- Support the assembly while removing the final fastener.
- Release any retaining clips and maneuver the regulator through the largest service opening.
- Guide the handle and lock cables through the assembly if they pass across its carrier.
- Don’t force the cables or bend the new regulator rails.
Step 9: Transfer attached components
- Place the old and new assemblies side by side on a clean surface.
- Use the appropriate socket to transfer the speaker, impact sensor, wiring clips or motor only when they aren’t included with the replacement.
- Install each transferred component in its original orientation.
- Never drop or strike the side-impact sensor.
Step 10: Install the new regulator
- Feed the new regulator into the door through the large service opening.
- Route the handle cable, lock cable and wiring exactly as they were originally positioned.
- Start every mounting fastener by hand before tightening anything.
- Align the assembly with the marks made before removal.
- Tighten the regulator retaining clips or small retainers to 4.8 Nm (42 lb-in) when this fastener design is present.
- Tighten the regulator mounting nuts to 8 Nm (71 lb-in) when this fastener design is present.
- If the replacement assembly supplies its own torque specification, use that specification instead.
Step 11: Reattach the glass
- Lower the glass carefully into the regulator clamps or mounting saddles.
- Confirm that the glass sits evenly and fully in both attachment points.
- Tighten both sides gradually with the appropriate socket.
- Don’t overtighten the glass clamps. Excess force can damage the glass or distort its carriers.
- Remove the painter’s tape only after the glass is securely attached.
Step 12: Test before closing the door
- Reconnect the regulator motor, switch and necessary door wiring.
- Reconnect the negative battery terminal temporarily with a 10mm socket.
- Keep fingers, wiring and tools clear of the mechanism.
- Cycle the glass slowly while watching the rails, cables and wiring.
- Confirm that the glass enters both upper channels evenly and doesn’t tilt.
- If it binds, stop immediately and correct the glass alignment.
Step 13: Reseal the inner door
- Switch the ignition off and disconnect the negative battery terminal again with a 10mm socket.
- Reconnect every electrical connector, including the side-impact sensor connector.
- Press the moisture barrier firmly into its original adhesive.
- Use automotive butyl sealing tape where the original seal no longer sticks.
- Keep drain holes at the bottom of the door unobstructed.
Step 14: Reinstall the door panel
- Reconnect the interior handle cable and confirm its housing locks into place.
- Reconnect all trim-panel electrical connectors.
- Hang the upper edge of the panel over the window ledge.
- Align each retaining clip with its hole before pressing the panel inward.
- Use the palm of your hand to seat the clips. Don’t strike the switches.
- Install the fasteners with the 7mm or 8mm socket until snug.
- Reinstall the handle cover, armrest cover and window-switch panel.
Step 15: Repeat on the opposite front door
- Repeat Steps 1 through 14 for the other regulator.
- Keep the opposite door’s regulator and fasteners separate because the assemblies are side-specific.
✅ After Repair
- 🔋 Reconnect the negative battery terminal with a 10mm socket and tighten it securely.
- 🪟 Close each front window completely, then hold its switch in the up position for 2-3 seconds.
- 🪟 Lower each window completely, hold the switch down for 2-3 seconds, then raise it and hold the switch up again for 2-3 seconds.
- ✅ Test normal operation, one-touch operation and obstacle reversal if equipped.
- ✅ Test the door lock, interior handle, mirror control, speaker and courtesy light.
- ✅ Confirm the airbag warning lamp turns off normally after starting the engine.
- ⚠️ If the airbag lamp remains illuminated, don’t ignore it. Recheck the side-impact sensor connector with the battery disconnected.
- 💧 After the first rain or wash, inspect the lower edge of the trim panel for moisture that could indicate an improperly sealed barrier.
💰 DIY vs Shop Cost
Shop Cost: $600-$1,200 for both front doors, depending on part quality and local labor
DIY Cost: $110-$350 for two complete assemblies and replacement clips
You Save: Approximately $300-$850 by doing it yourself!
Labor prices around Sonīpat vary considerably. This repair normally takes a professional approximately 1.5-2 hours per door.
🎯 Ready to get started?
HowToo has opened the regulator aisle for your Escape. Confirm that you have one left-front and one right-front assembly before ordering, then add fresh trim clips and butyl sealing tape so each door only has to come apart once.
