


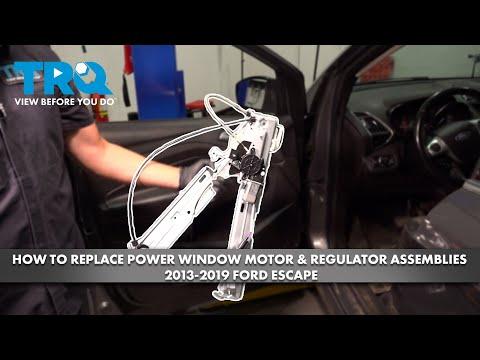





How to Replace Front Window Regulators on a 2013-2016 Ford Escape
Step-by-step DIY instructions with tools, parts, torque specs, testing, and safety tips for 2013, 2014, 2015, 2016
How to Replace Front Window Regulators on a 2013-2016 Ford Escape
Step-by-step DIY instructions with tools, parts, torque specs, testing, and safety tips for 2013, 2014, 2015, 2016


🔧 Escape - Front Window Regulator Replacement
This is a solid intermediate DIY job. Replace each front regulator separately, starting with the failed side. The glass must be taped securely before releasing its clamps. Otherwise it can drop inside the door and break.
Difficulty Level: Intermediate | Estimated Time: 1.5-2.5 hours per door, 3-5 hours for both
Assumption: These instructions cover power regulators with electric motors. Driver and passenger procedures are nearly identical, but the parts are side-specific.
⚠️ Safety & Precautions
- ⚠️ Wear safety glasses and cut-resistant gloves. Door sheet metal has extremely sharp edges.
- ⚠️ Never work beneath unsecured glass. Use several long strips of painter’s tape over the upper door frame.
- ⚠️ Disconnect the negative battery terminal after positioning the window. Wait at least five minutes before unplugging door wiring.
- ⚠️ Don’t switch the ignition on while door connectors are unplugged. This can store electrical or restraint-system fault codes.
- ⚠️ Keep hands clear of the regulator cables and tracks whenever power is connected.
🔧 Required Tools
You'll need the following tools for this repair:
- 7mm socket
- 8mm socket
- 10mm socket
- 1/4-inch drive ratchet
- 6-inch socket extension
- Torx T20 screwdriver
- Torx T25 screwdriver
- Plastic trim removal tool set
- Small plastic pick tool
- Plastic scraper
- Torque wrench rated 2-20 Nm
- 2-inch painter’s tape
- Magnetic parts tray
- LED work light
- Cut-resistant work gloves
- Safety glasses
🔩 Required Parts
HowToo sells all the parts you need for this repair:
- Driver-side front window regulator assembly - Qty: 1 if replacing driver side
- Passenger-side front window regulator assembly - Qty: 1 if replacing passenger side
- Door trim panel clips - Qty: 1 set per door
- Vapor-barrier butyl sealing tape - Qty: 1 roll
A regulator-and-motor assembly is the easiest beginner choice. If you buy a regulator without the motor, you’ll need to transfer the old motor. Nobody wants to reopen a door because a tired motor quit next month.
📋 Before You Begin
- 📋 Park your Escape on level ground, shift into Park and engage the parking brake.
- 📋 Work on one door at a time so the opposite door remains assembled as a reference.
- 📋 If the window still moves, lower it until the two glass-clamp fasteners line up with the door’s access openings.
- 📋 Turn the ignition off. Use a 10mm socket to disconnect the negative battery terminal, then wait five minutes.
- 📋 If the regulator has failed with the glass down, carefully lift the glass by hand and tape it closed before removing the regulator.
🔨 Step-by-Step Instructions
Follow these steps in order:
Step 1: Remove the switch panel and hidden trim
- Use a plastic trim removal tool to lift the window-switch panel without scratching the door.
- Use a small plastic pick tool to release the connector locks. Pull connectors by their housings, not their wires.
- Use the plastic trim tool to remove the small covers around the interior handle and door pull.
- Photograph every connector before unplugging it.
Step 2: Remove the door-panel fasteners
- Use a 7mm socket and 6-inch extension to remove the exposed door-panel screws.
- Check behind the handle cover, beneath the switch panel and along the lower edge.
- If a fastener uses a Torx head, remove it with the Torx T20 screwdriver. Don’t force a socket onto it.
- Store the screws by location in a magnetic parts tray.
Step 3: Release and remove the trim panel
- Insert the plastic trim removal tool between the panel and metal door near a lower corner.
- Release the perimeter clips one at a time. Move the tool close to each clip before applying pressure.
- Lift the panel straight upward to unhook it from the window ledge.
- Use the small plastic pick tool to disconnect remaining electrical plugs.
- Release the interior handle cable from its lever, then place the panel somewhere safe.
Step 4: Remove the speaker and open the vapor barrier
- Use the appropriate 7mm socket or Torx T20 screwdriver to remove the speaker fasteners.
- Use the small plastic pick tool to release the speaker connector.
- Use a plastic scraper to separate the vapor barrier from its butyl adhesive. A vapor barrier is the plastic moisture sheet behind the door panel.
- Fold the barrier back without tearing it or contaminating the sticky sealing surface.
Step 5: Disconnect the glass from the regulator
- If the clamp fasteners aren’t visible, temporarily reconnect the battery and window switch while keeping your hands outside the door.
- Move the regulator until both glass fasteners appear through the access holes. Turn the ignition off and disconnect the negative terminal again with a 10mm socket.
- Wait five minutes, then unplug the switch.
- Use an 8mm socket to loosen both glass-clamp fasteners. Don’t remove them completely.
- Lift the glass fully upward by hand. Apply at least three long strips of 2-inch painter’s tape over the door frame to hold it.
- Ford’s workshop procedure for this Escape generation specifies regulator fasteners at approximately 10.5 Nm (93 lb-in). scribd.com
Step 6: Remove the old regulator
- Use the small plastic pick tool to unlock and disconnect the window-motor connector.
- Use a 10mm socket and extension to remove the regulator mounting bolt and nuts.
- Support the regulator with one hand while removing the final fastener.
- Rotate and fold the regulator carefully, then guide it through the largest door opening.
- If reusing the motor, use a Torx T25 screwdriver to remove its screws and transfer it to the replacement regulator.
Step 7: Install the replacement regulator
- Compare the new and old assemblies before installation. Confirm the mounting points, connector and glass-clamp positions match.
- Guide the new regulator through the large door opening without bending its tracks or cables.
- Start every regulator fastener by hand, then tighten them evenly with a 10mm socket.
- Torque the regulator mounting fasteners to 10.5 Nm (93 lb-in). This specification is listed in the workshop information for the 2013 Escape platform used by your Escape. scribd.com
- If transferring the motor, tighten its screws evenly with the Torx T25 screwdriver. Don’t use an impact driver on these small screws.
Step 8: Reconnect the glass
- Use a 10mm socket to reconnect the negative battery terminal temporarily.
- Reconnect the window switch and motor connector.
- Turn the ignition on and move the new regulator until both clamps align with the access openings.
- Turn the ignition off. Use a 10mm socket to disconnect the negative battery terminal again.
- Remove the painter’s tape while supporting the glass with both hands.
- Lower the glass squarely into both clamps. Make sure it sits evenly rather than leaning forward or backward.
- Use an 8mm socket and torque wrench to tighten the glass clamps to 5 Nm (44 lb-in).
- Uneven glass causes binding and wind noise.
Step 9: Perform an operation test
- Keep the vapor barrier and trim panel off during this first test.
- Reconnect the motor, switch and negative battery terminal using the small plastic pick tool and 10mm socket.
- Turn the ignition on and run the glass slowly through one complete cycle.
- Watch the tracks with the LED work light. Stop immediately if the glass tilts, binds or makes cable-popping noises.
- Check that wiring stays clear of the glass, regulator tracks and moving cables.
Step 10: Reseal and reinstall the door panel
- Turn the ignition off before final assembly.
- Use the plastic scraper and fresh butyl sealing tape to reseal the vapor barrier completely.
- Reconnect the speaker and install its fasteners using the 7mm socket or Torx T20 screwdriver.
- Reconnect the interior-handle cable and every electrical connector.
- Hook the trim panel over the upper window ledge, align the clips and press each clip directly into place.
- Reinstall the panel screws with the 7mm socket. Tighten them gently until seated. The plastic mounting points crack easily.
- Snap the trim covers and switch panel back into position using hand pressure.
Step 11: Repeat on the opposite front door
- Use the same procedure for the other side.
- Install the correctly handed regulator. Driver and passenger regulators cannot be interchanged.
- Secure that door’s glass independently before loosening its regulator.
✅ After Repair
- ✅ Reconnect the negative battery terminal using the 10mm socket.
- ✅ Test both front windows from their individual switches and the driver’s master switch.
- ✅ Check one-touch-down operation on the driver’s window.
- ✅ If automatic operation is lost, close the window fully and hold the switch upward for two to five seconds. Lower it completely and hold downward for two to five seconds, then retest.
- ✅ Confirm the glass seals evenly at the roof, front channel and rear channel.
- ✅ Spray water around the outside of each repaired door and check the cabin for leaks.
- ✅ Check the speakers, mirrors, locks and interior handles before considering the job complete.
💰 DIY vs Shop Cost
Shop Cost: Approximately ₹18,000-₹36,000 for both front doors, depending on part quality and local labor
DIY Cost: Approximately ₹9,000-₹20,000 for two regulator assemblies and supplies
You Save: Approximately ₹8,000-₹18,000 by doing it yourself!
Sonīpat labor and imported-part pricing vary widely. A shop typically needs about 1-1.5 hours per door.
🎯 Ready to get started?
HowToo has opened the window-regulator aisle for your Escape. Match each assembly to the correct front side and strongly consider units that include their motors. Same-day and 2-day shipping options depend on your delivery location, and the sidebar also shows the available tools and supplies.
