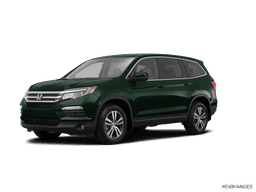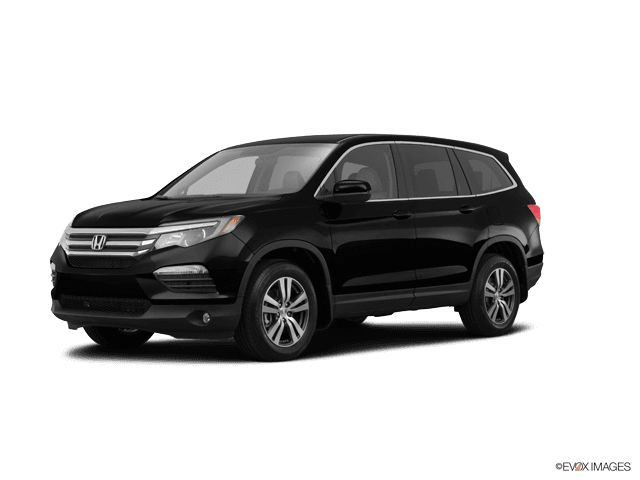

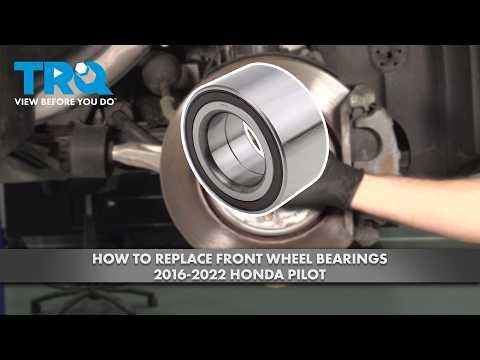





How to Replace Front Wheel Bearings on a 2016-2022 Honda Pilot (Engine: V6 3.5L)
Step-by-step DIY guide with required tools, parts, torque specs, and safety tips for 2016, 2017, 2018, 2019, 2020, 2021, 2022
How to Replace Front Wheel Bearings on a 2016-2022 Honda Pilot (Engine: V6 3.5L)
Step-by-step DIY guide with required tools, parts, torque specs, and safety tips for 2016, 2017, 2018, 2019, 2020, 2021, 2022


🔧 Pilot - Front Wheel Bearing Replacement
This repair replaces a noisy or loose front wheel bearing on your Pilot. The front wheel bearing is pressed into the steering knuckle, so the hub/knuckle must be removed and the old bearing pressed out with a hydraulic press or wheel bearing press kit.
Difficulty Level: Advanced | Estimated Time: 3-5 hours per side
Assumption: This guide covers the front wheel bearing. Rear bearing replacement is a different hub assembly procedure.
⚠️ Safety & Precautions
- ⚠️ Support your Pilot only with jack stands on solid, level ground. Never rely on a jack alone.
- ⚠️ The axle nut is very tight. Loosen it before lifting the vehicle.
- ⚠️ Do not let the brake caliper hang by the rubber brake hose.
- ⚠️ Your Pilot has ABS wheel speed sensors. Handle the sensor and wiring gently to avoid ABS warning lights.
- ⚠️ A hydraulic press can cause serious injury if parts are not supported squarely.
- ⚠️ Disconnecting the battery is not required for this repair.
🔧 Required Tools
You'll need the following tools for this repair:
- 19mm lug nut socket
- 36mm axle nut socket
- 1/2-inch breaker bar
- 1/2-inch torque wrench rated to 250 ft-lbs
- 3/8-inch torque wrench rated to 100 ft-lbs
- Ratchet set 3/8-inch and 1/2-inch drive
- 10mm socket
- 12mm socket
- 14mm socket
- 17mm socket
- 19mm socket
- 22mm socket
- 17mm wrench
- 19mm wrench
- Ball joint separator (specialty)
- Tie rod end puller (specialty)
- Hub puller kit (specialty)
- Hydraulic press 12-ton minimum (specialty)
- Wheel bearing press adapters (specialty)
- Snap ring pliers (specialty)
- Hammer 2-lb
- Brass punch
- Flathead screwdriver
- Pry bar 18-inch
- Needle nose pliers
- Floor jack rated 3-ton minimum
- Jack stands rated 3-ton minimum
- Wheel chocks
- Bungee cord
- Paint marker
- Brake cleaner spray
- Shop towels
- Mechanic gloves
- Safety glasses
A hydraulic press uses force to push the bearing in and out straight.
🔩 Required Parts
HowToo sells all the parts you need for this repair:
- Front wheel bearing - Qty: 1 per side
- Front axle nut - Qty: 1 per side
- Front hub snap ring - Qty: 1 per side
- Lower ball joint cotter pin - Qty: 1 per side
- Outer tie rod cotter pin - Qty: 1 per side
Replace in pairs if both sides are noisy or have similar mileage.
📋 Before You Begin
- 🅿️ Park your Pilot on flat ground and set the parking brake.
- 🧱 Place wheel chocks behind the rear wheels.
- 🔎 If possible, test the bearing first. A bad front wheel bearing often growls louder as speed increases and may change tone when steering left or right.
- 🖊️ Use a paint marker to mark strut and knuckle positions before removal. This helps keep alignment close until you get it checked.
- 📐 Plan for a wheel alignment afterward if the strut-to-knuckle bolts are removed.
🔨 Step-by-Step Instructions
Follow these steps in order:
Step 1: Loosen the Wheel and Axle Nut
- Use a 19mm lug nut socket and breaker bar to loosen the front lug nuts one turn while the tire is still on the ground.
- Use a flathead screwdriver or brass punch to unstake the axle nut if the nut is crimped into the axle groove.
- Use a 36mm axle nut socket and 1/2-inch breaker bar to loosen the axle nut.
- Loosen only. Do not remove it yet.
Step 2: Raise and Support the Vehicle
- Use a floor jack rated 3-ton minimum to lift the front of your Pilot at the front jacking point.
- Place jack stands rated 3-ton minimum under the proper front support points.
- Use the floor jack to lower the vehicle gently onto the stands.
- Use a 19mm lug nut socket to remove the lug nuts and wheel.
Step 3: Remove the Brake Caliper and Rotor
- Use a 14mm socket to remove the brake caliper slide pin bolts.
- Lift the caliper off the rotor and hang it from the suspension with a bungee cord.
- Use a 17mm socket to remove the caliper bracket bolts.
- Remove the caliper bracket and set it aside.
- Use a flathead screwdriver if needed to remove the rotor retaining screws or clips if present.
- Pull the brake rotor off the hub.
- During reassembly, tighten the caliper bracket bolts to Torque to 108 Nm (80 ft-lbs).
- During reassembly, tighten the caliper slide pin bolts to Torque to 34 Nm (25 ft-lbs).
Step 4: Remove the ABS Wheel Speed Sensor
- Use a 10mm socket to remove the ABS sensor retaining bolt from the steering knuckle.
- Gently twist and pull the sensor out by hand.
- If stuck, use a flathead screwdriver carefully around the edge. Do not pry on the wire.
- Use a 10mm socket or 12mm socket to remove any wire bracket bolts attached to the knuckle.
- Move the sensor safely away from the press area.
Step 5: Remove the Axle Nut
- Use a 36mm axle nut socket and breaker bar to remove the axle nut fully.
- Push the axle inward slightly by hand.
- If it is stuck, thread the old axle nut on flush with the axle end and tap it with a hammer 2-lb and brass punch.
- Do not mushroom or damage the axle threads.
Step 6: Disconnect the Outer Tie Rod End
- Use needle nose pliers to remove the tie rod cotter pin.
- Use a 17mm socket or 17mm wrench to remove the tie rod castle nut.
- Use a tie rod end puller to separate the tie rod from the steering knuckle.
- During reassembly, tighten the tie rod castle nut to Torque to 54 Nm (40 ft-lbs), then install a new cotter pin.
Step 7: Disconnect the Lower Ball Joint
- Use needle nose pliers to remove the lower ball joint cotter pin.
- Use a 19mm socket or 19mm wrench to remove the lower ball joint castle nut.
- Use a ball joint separator to separate the lower ball joint from the steering knuckle.
- A ball joint separator pushes the tapered joint apart without hammering on the steering knuckle.
- During reassembly, tighten the lower ball joint castle nut to Torque to 69 Nm (51 ft-lbs), then install a new cotter pin.
Step 8: Remove the Strut-to-Knuckle Bolts
- Use a paint marker to mark the position of the strut against the steering knuckle.
- Use a 22mm socket and 22mm wrench to remove the two strut-to-knuckle nuts and bolts.
- Support the knuckle by hand as the last bolt comes out.
- Slide the axle out of the hub while removing the knuckle from the vehicle.
- During reassembly, tighten the strut-to-knuckle bolts to Torque to 157 Nm (116 ft-lbs).
Step 9: Press the Hub Out of the Bearing
- Place the steering knuckle in a hydraulic press 12-ton minimum with proper wheel bearing press adapters.
- Support the knuckle squarely so the hub can press out safely.
- Use the hydraulic press to press the wheel hub out of the old bearing.
- If the inner bearing race stays on the hub, remove it with a bearing separator from the hub puller kit.
- Press only on solid metal surfaces.
Step 10: Remove the Snap Ring and Old Bearing
- Use snap ring pliers to remove the snap ring from the knuckle.
- A snap ring is a spring steel retaining clip that holds the bearing in place.
- Use brake cleaner spray and shop towels to clean the snap ring groove.
- Use the hydraulic press and wheel bearing press adapters to press the old bearing out of the knuckle.
Step 11: Press In the New Bearing
- Clean the bore in the knuckle using brake cleaner spray and shop towels.
- Position the new front wheel bearing squarely in the knuckle.
- Use the hydraulic press and wheel bearing press adapters to press the new bearing into the knuckle.
- Press only on the outer race of the bearing when installing it into the knuckle.
- Use snap ring pliers to install the new snap ring fully into the groove.
- The snap ring must seat completely.
Step 12: Press the Hub Into the New Bearing
- Support the inner race of the new bearing with the correct wheel bearing press adapter.
- Use the hydraulic press to press the hub into the bearing.
- Do not press against the knuckle only. That can damage the new bearing.
- Spin the hub by hand. It should rotate smoothly with no grinding.
Step 13: Reinstall the Knuckle
- Guide the axle through the hub by hand while positioning the knuckle.
- Install the strut-to-knuckle bolts by hand first.
- Use a 22mm socket, 22mm wrench, and torque wrench to tighten the strut-to-knuckle bolts to Torque to 157 Nm (116 ft-lbs).
- Use a 19mm socket or 19mm wrench to install the lower ball joint nut and tighten to Torque to 69 Nm (51 ft-lbs).
- Install a new lower ball joint cotter pin using needle nose pliers.
- Use a 17mm socket or 17mm wrench to install the tie rod nut and tighten to Torque to 54 Nm (40 ft-lbs).
- Install a new tie rod cotter pin using needle nose pliers.
Step 14: Reinstall the ABS Sensor, Rotor, and Caliper
- Install the ABS sensor by hand into the knuckle.
- Use a 10mm socket to tighten the ABS sensor bolt snugly to Torque to 9 Nm (80 in-lbs).
- Install the brake rotor onto the hub by hand.
- Use a 17mm socket and torque wrench to install the caliper bracket bolts to Torque to 108 Nm (80 ft-lbs).
- Place the caliper over the bracket.
- Use a 14mm socket and torque wrench to tighten the caliper slide pin bolts to Torque to 34 Nm (25 ft-lbs).
Step 15: Install the New Axle Nut and Wheel
- Thread the new axle nut on by hand.
- Install the wheel and lug nuts by hand.
- Use a 19mm lug nut socket to snug the lug nuts in a star pattern.
- Use the floor jack to raise the vehicle slightly, remove the jack stands, and lower the tire to the ground.
- Use a 36mm axle nut socket and high-range torque wrench to tighten the axle nut to Torque to 329 Nm (242 ft-lbs).
- Use a brass punch and hammer 2-lb to stake the axle nut if the replacement nut is staked-style.
- Use a 19mm lug nut socket and torque wrench to tighten the lug nuts to Torque to 127 Nm (94 ft-lbs).
✅ After Repair
- ✅ Pump the brake pedal several times before moving your Pilot. This seats the caliper back against the rotor.
- ✅ Start with a slow test drive in a safe area. Listen for grinding, clicking, or humming.
- ✅ Make sure the ABS light stays off.
- ✅ Recheck lug nut torque after the first short drive: Torque to 127 Nm (94 ft-lbs).
- ✅ Schedule a front wheel alignment if the strut-to-knuckle bolts were removed or the steering wheel is off-center.
💰 DIY vs Shop Cost
Shop Cost: $450-$750 per front side (parts + labor)
DIY Cost: $80-$180 per front side (parts only)
You Save: $370-$570 by doing it yourself!
Shop labor rates vary but typically run $100-$150/hour. This repair takes a shop approximately 2-3 hours per side.
🎯 Ready to get started?
HowToo makes it easy: same-day/2-day shipping on every part, plus all the tools and specialty tools you need! Check out the parts and tools sections below to add everything to your cart.