
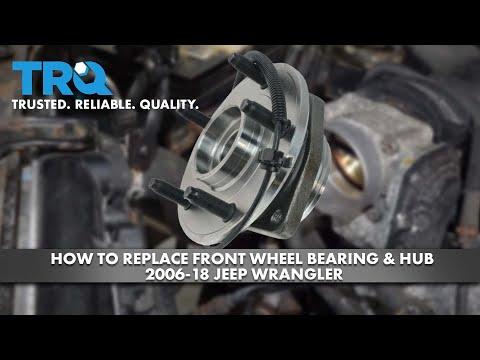







How to Replace Front Wheel Bearing Hub Assembly on a 2011-2017 Jeep Wrangler
Step-by-step DIY guide with tools, parts, torque specs, ABS tips, and safety checks for 2011, 2012, 2013, 2014, 2015, 2016, 2017
How to Replace Front Wheel Bearing Hub Assembly on a 2011-2017 Jeep Wrangler
Step-by-step DIY guide with tools, parts, torque specs, ABS tips, and safety checks for 2011, 2012, 2013, 2014, 2015, 2016, 2017


🔧 Wrangler - Front Wheel Bearing Hub Assembly Replacement
This guide covers replacing the front wheel bearing on your Wrangler. On your Wrangler, the front wheel bearing is serviced as a complete bolt-on hub assembly, not as a loose bearing.
Assumption: This procedure is for one front wheel bearing hub assembly. Repeat the same steps on the opposite side if needed.
Difficulty Level: Intermediate | Estimated Time: 2-3 hours per side
⚠️ Safety & Precautions
- ⚠️ Work on level ground and support your Wrangler with jack stands before removing the wheel.
- ⚠️ Never rely on a floor jack alone. A floor jack lifts the vehicle; jack stands hold it safely.
- ⚠️ The axle nut is very tight. Use a long breaker bar and keep your body balanced.
- ⚠️ Do not let the brake caliper hang by the brake hose. Support it with wire or a bungee cord.
- ⚠️ If your Wrangler has ABS, handle the wheel speed sensor wire gently to avoid damaging it.
- ⚠️ Battery disconnect is not required for this repair.
🔧 Required Tools
You'll need the following tools for this repair:
- Floor jack rated 3-ton minimum
- Jack stands rated 3-ton minimum
- Wheel chocks
- Safety glasses
- Mechanic gloves
- 1/2-inch drive breaker bar
- 1/2-inch drive torque wrench rated to 200 ft-lbs
- 1/2-inch drive ratchet
- 19mm socket
- 13mm 12-point socket
- 21mm socket
- 36mm axle nut socket
- 6-inch socket extension
- Flathead screwdriver
- Needle-nose pliers
- Dead blow hammer
- Hub puller kit (specialty)
- Wire brush
- Bungee cord
- Anti-seize brush
🔩 Required Parts
HowToo sells all the parts you need for this repair:
- Front wheel bearing hub assembly with ABS provision - Qty: 1 per side
- Front axle nut - Qty: 1 per side
- Brake cleaner - Qty: 1 can
- Anti-seize compound - Qty: 1 small tube
📋 Before You Begin
- Park your Wrangler on level ground.
- Shift into Park for automatic transmission, or 1st gear for manual transmission.
- Set the parking brake.
- Place wheel chocks behind the rear tires.
- Loosen the front wheel lug nuts slightly before lifting the vehicle.
- No infotainment menu steps, scan tool commands, EPB service mode, or battery registration are required.
🔨 Step-by-Step Instructions
Follow these steps in order:
Step 1: Loosen the Front Wheel Lug Nuts
- Use a 19mm socket and 1/2-inch drive breaker bar to loosen the lug nuts about half a turn.
- Do not remove the lug nuts yet.
- Loosen before lifting for stability.
Step 2: Lift and Support the Front of the Wrangler
- Use a floor jack rated 3-ton minimum to lift the front axle near the side you are repairing.
- Place a jack stand rated 3-ton minimum under the front axle tube.
- Lower the Wrangler gently onto the jack stand.
- Keep the floor jack lightly touching the axle as a backup support.
Step 3: Remove the Wheel
- Use a 19mm socket to remove the lug nuts fully.
- Remove the wheel and set it flat under the frame as an extra safety backup.
Step 4: Remove the Brake Caliper
- Use a 21mm socket and 1/2-inch drive ratchet to remove the two front brake caliper bracket bolts.
- Slide the caliper and bracket assembly off the brake rotor together.
- Support the caliper with a bungee cord.
- Do not stretch, twist, or hang the caliper by the brake hose.
- During reassembly, tighten the caliper bracket bolts to Torque to 169 Nm (125 ft-lbs).
Step 5: Remove the Brake Rotor
- Pull the brake rotor straight off by hand.
- If it is stuck, tap around the rotor hat gently with a dead blow hammer.
- A dead blow hammer is a soft-faced hammer that reduces bounce and helps avoid damage.
- If rust is heavy, spray brake cleaner and clean the hub face with a wire brush.
Step 6: Remove the Axle Nut Retainer
- Use needle-nose pliers to remove the cotter pin, if equipped.
- Use a flathead screwdriver to remove the axle nut retainer cap, if equipped.
- Set the retainer aside if it will be reused.
Step 7: Remove the Axle Nut
- Use a 36mm axle nut socket and 1/2-inch drive breaker bar to loosen the axle nut.
- Remove the axle nut from the axle shaft.
- The axle shaft is the splined shaft that passes through the center of the wheel hub.
- During reassembly, install a new axle nut and tighten to Torque to 135 Nm (100 ft-lbs).
Step 8: Disconnect the ABS Wheel Speed Sensor Wire
- Follow the ABS wire from the back of the hub to its connector on the steering knuckle area.
- Use a flathead screwdriver gently to release any plastic retaining clips.
- Disconnect the electrical connector by pressing the lock tab and pulling the connector apart.
- The ABS wheel speed sensor tells the brake system how fast that wheel is spinning.
- Do not pull on the wire.
Step 9: Remove the Three Hub Bolts
- Turn the steering wheel slightly to give yourself better access behind the knuckle.
- Use a 13mm 12-point socket, 6-inch socket extension, and 1/2-inch drive ratchet to remove the three wheel hub mounting bolts from the back side of the steering knuckle.
- A 12-point socket has more contact points than a regular 6-point socket and is required for these bolts.
- During reassembly, tighten the three hub mounting bolts to Torque to 102 Nm (75 ft-lbs).
Step 10: Remove the Old Hub Assembly
- Pull the hub assembly straight off the axle shaft by hand.
- If the hub is rusted in place, install a hub puller kit (specialty) and tighten it evenly until the hub releases.
- You may also tap the hub flange gently with a dead blow hammer.
- Do not strike the axle threads directly.
- Rust can make this step slow.
Step 11: Clean the Mounting Surface
- Use a wire brush to clean rust and dirt from the steering knuckle mounting surface.
- Use brake cleaner to clean the area after brushing.
- Use an anti-seize brush to apply a very thin coat of anti-seize compound to the hub-to-knuckle contact surface.
- Do not get anti-seize on the brake rotor or wheel studs.
Step 12: Install the New Hub Assembly
- Slide the new front wheel bearing hub assembly with ABS provision onto the axle shaft splines.
- Make sure the ABS wire is routed the same way as the original.
- Start the three hub bolts by hand to avoid cross-threading.
- Use a 13mm 12-point socket, 6-inch socket extension, and 1/2-inch drive torque wrench to tighten the hub bolts to Torque to 102 Nm (75 ft-lbs).
Step 13: Reconnect the ABS Sensor Wire
- Plug the ABS connector together until it clicks.
- Use your hands and a flathead screwdriver gently to secure the wire clips back into their original positions.
- Make sure the wire cannot rub the tire, brake rotor, or axle shaft.
Step 14: Install the New Axle Nut
- Thread the new front axle nut onto the axle shaft by hand.
- Use a 36mm axle nut socket and 1/2-inch drive torque wrench to tighten the axle nut to Torque to 135 Nm (100 ft-lbs).
- Reinstall the axle nut retainer and cotter pin if equipped using needle-nose pliers.
Step 15: Reinstall the Brake Rotor
- Slide the brake rotor back onto the wheel studs by hand.
- If needed, use brake cleaner to clean fingerprints or grease from the rotor braking surface.
Step 16: Reinstall the Brake Caliper Assembly
- Remove the caliper from the bungee cord.
- Slide the caliper and bracket assembly over the brake rotor.
- Install the two caliper bracket bolts by hand first.
- Use a 21mm socket and 1/2-inch drive torque wrench to tighten the bolts to Torque to 169 Nm (125 ft-lbs).
Step 17: Reinstall the Wheel
- Install the wheel onto the studs.
- Start all lug nuts by hand.
- Use a 19mm socket and 1/2-inch drive ratchet to snug the lug nuts in a star pattern.
Step 18: Lower the Wrangler and Torque the Lug Nuts
- Use the floor jack rated 3-ton minimum to lift slightly off the jack stand.
- Remove the jack stand rated 3-ton minimum.
- Lower the Wrangler until the tire touches the ground.
- Use a 19mm socket and 1/2-inch drive torque wrench to tighten the lug nuts in a star pattern to Torque to 130 Nm (95 ft-lbs).
✅ After Repair
- ✅ Pump the brake pedal several times before driving. This seats the brake caliper back into position.
- ✅ Start your Wrangler and check that the ABS warning light turns off after the bulb check.
- ✅ Drive slowly at first and listen for grinding, humming, or clicking.
- ✅ Recheck lug nut torque after 25-50 miles of driving.
- ✅ If the ABS light stays on, inspect the wheel speed sensor connector and wire routing first.
- ✅ Rear wheel bearings on your Wrangler are pressed onto the rear axle shaft and require a different axle-shaft removal procedure.
💰 DIY vs Shop Cost
Shop Cost: $350-$650 per front side (parts + labor)
DIY Cost: $120-$275 per front side (parts only)
You Save: $230-$375 by doing it yourself!
Shop labor rates vary but typically run $100-$150/hour. This repair takes a shop approximately 1.5-2.0 hours.
🎯 Ready to get started?
HowToo makes it easy: same-day/2-day shipping on every part, plus all the tools and specialty tools you need! Check out the parts and tools sections below to add everything to your cart.