


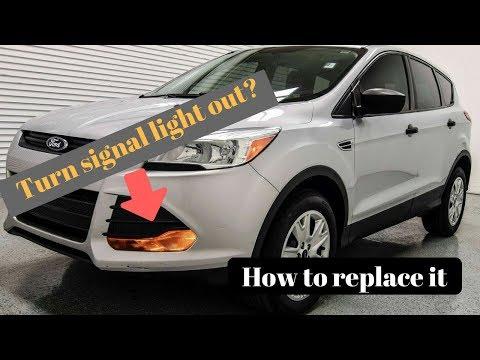






How to Replace Front Turn Signal Bulbs on a 2019 Ford Escape
Step-by-step DIY guide with required tools, bulb parts, safety tips, and testing steps for 2013, 2014, 2015, 2016, 2017, 2018, 2019, 2020, 2021, 2022
How to Replace Front Turn Signal Bulbs on a 2019 Ford Escape
Step-by-step DIY guide with required tools, bulb parts, safety tips, and testing steps for 2013, 2014, 2015, 2016, 2017, 2018, 2019, 2020, 2021, 2022


🔧 Escape - Front Turn Signal Bulb Replacement
Replacing the front turn signal bulbs on your Escape involves accessing the front lamp assemblies and swapping the bulb from the turn signal socket. This is a beginner-friendly repair, but work gently because the headlamp housings and plastic tabs can crack if forced.
Difficulty Level: Beginner | Estimated Time: 20-45 minutes
⚠️ Safety & Precautions
- ⚠️ Turn the ignition off and remove the key/fob from the vehicle before starting.
- ⚠️ Let the front lamps cool if the lights were recently on.
- ⚠️ Wear gloves and safety glasses to protect your hands and eyes from sharp plastic edges.
- ⚠️ Do not touch the glass part of a new bulb with bare fingers; skin oil can shorten bulb life.
- ⚠️ Battery disconnect is not normally required for this bulb replacement.
🔧 Required Tools
You'll need the following tools for this repair:
- 7mm socket
- 8mm socket
- 1/4-inch drive ratchet
- 6-inch extension
- Trim clip removal tool
- Flat-blade screwdriver
- Nitrile gloves
- Safety glasses
🔩 Required Parts
HowToo sells all the parts you need for this repair:
- Front turn signal bulb - Qty: 1 per side
- Front turn signal bulbs - Replace in pairs - Qty: 2
📋 Before You Begin
- 🅿️ Park your Escape on level ground and set the parking brake.
- 💡 Switch all exterior lights off.
- 🧤 Put on nitrile gloves before handling the new bulb.
- 📌 A trim clip removal tool is a small pry tool used to lift plastic fasteners without breaking them.
- 📌 A socket extension is a short bar that helps the ratchet reach bolts in tight spaces.
🔨 Step-by-Step Instructions
Follow these steps in order:
Step 1: Open the Hood
- Use your hand to pull the hood release inside the cabin.
- Use your hand to release the secondary latch at the front of the hood.
- Raise the hood and secure it with the prop rod if equipped.
Step 2: Remove the Upper Front Fasteners
- Use the trim clip removal tool to lift any plastic push clips along the upper front radiator cover near the headlamp area.
- Use the 7mm socket, 1/4-inch drive ratchet, and 6-inch extension to remove the upper fasteners near the lamp area if access is blocked.
- Set all clips and screws in a small container so they do not roll away.
- Take a photo first.
Step 3: Access the Turn Signal Bulb Socket
- Look behind the front lamp assembly from the engine bay side.
- Locate the turn signal bulb socket at the rear of the headlamp assembly.
- The turn signal socket is the twist-lock holder for the amber turn signal bulb.
- If your hand space is tight, use the 8mm socket and 1/4-inch drive ratchet to loosen the nearby lamp/cover fastener enough to create access. Do not force the plastic housing.
Step 4: Remove the Old Bulb Socket
- Use your gloved hand to grip the turn signal socket.
- Turn the socket counterclockwise about a quarter turn.
- Pull the socket straight out of the lamp housing.
- If it is stuck, use the flat-blade screwdriver gently at the socket edge, but do not pry against the clear lens.
Step 5: Remove the Old Bulb
- Use your gloved hand to pull the old bulb straight out of the socket if it is a push-in style.
- If the bulb has small locking pins, gently press it in and turn it counterclockwise to release it.
- Check the socket for heat damage, melting, corrosion, or loose terminals.
- If the socket is melted or badly corroded, replace the socket before installing the new bulb.
Step 6: Install the New Bulb
- Use nitrile gloves to handle the new front turn signal bulb.
- Push the new bulb fully into the socket until it seats firmly.
- If it is a locking-pin style bulb, press it in and turn clockwise until it locks.
- Do not use grease on the bulb contacts unless the bulb manufacturer specifically includes it.
Step 7: Test the Turn Signal Before Reassembly
- Use your hand to place the socket near the lamp opening, but do not lock it in yet.
- Turn the ignition to accessory mode.
- Use the turn signal stalk to test the side you repaired.
- Turn on the hazard lights to confirm the bulb flashes correctly.
- Turn the ignition and lights back off before continuing.
Step 8: Reinstall the Bulb Socket
- Use your gloved hand to insert the socket into the lamp housing.
- Align the socket tabs with the slots in the housing.
- Turn the socket clockwise about a quarter turn until it locks in place.
- Make sure the socket sits flush so water cannot enter the lamp housing.
Step 9: Reinstall Any Removed Covers or Fasteners
- Use the 7mm socket, 1/4-inch drive ratchet, and 6-inch extension to reinstall any upper fasteners removed earlier.
- Use the 8mm socket and 1/4-inch drive ratchet to tighten any lamp-area fastener you loosened earlier.
- Use your hand to press plastic push clips back into place.
- Snug the small screws only; do not overtighten into plastic.
- Torque small lamp/cover screws to 2-3 Nm (18-27 in-lbs) if torqueing is required.
Step 10: Repeat on the Other Side
- Use the same tools and steps to replace the other front turn signal bulb.
- Replacing both bulbs together helps keep brightness and bulb age even.
✅ After Repair
- ✅ Test the left turn signal, right turn signal, and hazard lights.
- ✅ Walk around the front of your Escape and confirm both front turn signals flash at normal speed.
- ✅ If the signal still flashes very fast, check that the bulb is fully seated and the socket connector is not damaged.
- ✅ Check the lamp area after the next rain or wash for moisture inside the housing.
💰 DIY vs Shop Cost
Shop Cost: $60-$140 (parts + labor)
DIY Cost: $8-$30 (parts only)
You Save: $50-$110 by doing it yourself!
Shop labor rates vary but typically run $100-$150/hour. This repair takes a shop approximately 0.3-0.6 hours.
🎯 Ready to get started?
HowToo makes it easy: same-day/2-day shipping on every part, plus all the tools and specialty tools you need! Check out the parts and tools sections below to add everything to your cart.
