


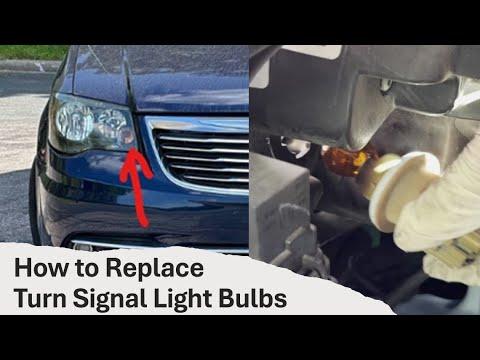







How to Replace Front Turn Signal Bulbs on a 2019-2020 Cadillac XT4
Step-by-step wheel-well replacement guide with tools, bulb size, safety tips, and LED checks for 2019, 2020
How to Replace Front Turn Signal Bulbs on a 2019-2020 Cadillac XT4
Step-by-step wheel-well replacement guide with tools, bulb size, safety tips, and LED checks for 2019, 2020


🔧 XT4 - Front Turn Signal Bulb Replacement
This is a straightforward wheel-well repair. Turn the steering wheel away from the side being serviced, loosen the front wheelhouse liner, and reach the bulb socket from behind the bumper.
Assumption: These instructions apply to a lamp with a removable amber bulb socket. If there’s no socket behind the lamp, that version uses a sealed LED assembly rather than a replaceable bulb.
Difficulty Level: Beginner | Estimated Time: 20-40 minutes per side
⚠️ Safety & Precautions
- ⚠️ Switch off all exterior lights and remove the key before touching the socket.
- 🧤 Let the lighting assembly cool before reaching behind it.
- 🔋 Battery disconnection isn’t normally required.
- 🚫 Don’t pull the wheelhouse liner farther than necessary. Its edges and clips can crack.
- 💡 Don’t install a white bulb behind a clear turn-signal lens. The emitted signal must remain amber.
🔧 Required Tools
You'll need the following tools for this repair:
- Torx T15 screwdriver
- 7mm socket
- 1/4-inch drive ratchet
- Plastic trim-clip removal tool
- Small flat-blade screwdriver
- LED inspection light
- Nitrile gloves
- Safety glasses
🔩 Required Parts
HowToo sells all the parts you need for this repair:
- Hella Behr OE-style 7440NA amber front turn-signal bulb - Qty: 2
Replace both sides together for matching color and brightness. This factory-style incandescent bulb also avoids the rapid flashing that can happen with unsupported LED conversions. Fancy electronics are a poor reward for changing a light bulb.
📋 Before You Begin
- 🅿️ Park your XT4 on level ground, select Park, and apply the parking brake.
- 🔄 For the left bulb, turn the steering wheel fully right. For the right bulb, turn it fully left.
- 💡 Switch the headlamps and turn signals off.
- 🧽 Clean loose dirt from the wheelhouse liner so it doesn’t fall into the connector.
🔨 Step-by-Step Instructions
Follow these steps in order:
Step 1: Create Working Room
- Turn the front wheel completely away from the side you’re repairing.
- Use the LED inspection light to locate the fasteners along the forward edge of the wheelhouse liner.
- The wheelhouse liner is the molded plastic panel surrounding the tire.
Step 2: Release the Front Wheelhouse Liner
- Use the Torx T15 screwdriver or 7mm socket and 1/4-inch drive ratchet to remove the forward liner fasteners present on your XT4.
- Use the plastic trim-clip removal tool to lift any push-pin retainers without breaking their centers.
- Keep every fastener organized for installation in its original location.
- No torque specification applies to reusable plastic push clips.
Step 3: Pull the Liner Back
- Wear nitrile gloves and gently pull the front portion of the liner toward the tire.
- Open only enough space to place your hand and the LED inspection light behind the bumper lamp.
- Warm plastic bends more safely than cold plastic.
Step 4: Identify the Turn-Signal Socket
- Use the LED inspection light to find the socket directly behind the front turn-signal chamber.
- Confirm that it’s a removable round socket with wires entering its rear.
- If the lamp has an electrical connector but no removable bulb socket, stop. That lamp is serviced as an LED assembly.
Step 5: Remove the Socket
- Grip the socket body by hand. Don’t pull on the wiring.
- Rotate the socket approximately one-quarter turn counterclockwise.
- Pull the socket straight out of the lamp housing.
- Inspect the sealing ring for cuts, flattening, or contamination.
Step 6: Replace the Bulb
- Grip the old wedge-base bulb by its plastic base and pull it straight out of the socket.
- If it’s stuck, use the small flat-blade screwdriver only to support the plastic base. Don’t pry against the glass.
- Push the new 7440NA amber bulb straight into the socket until fully seated.
- Check the socket terminals for melting, green corrosion, or looseness.
Step 7: Test Before Reassembly
- Place the socket safely where it can’t touch the tire or metal parts.
- Switch on the hazard lamps and verify that the new bulb flashes brightly.
- Switch the hazard lamps off before reinstalling the socket.
- If it doesn’t illuminate, remove the bulb and reseat it firmly. Also inspect the socket contacts.
Step 8: Reinstall the Socket
- Insert the socket into the housing with its locking tabs aligned.
- Rotate it clockwise by hand until it stops and locks securely.
- Don’t use pliers. The plastic socket can crack.
Step 9: Reinstall the Wheelhouse Liner
- Move the liner back behind the bumper and fender edges.
- Install the push clips by hand, then seat their center pins using the plastic trim-clip removal tool.
- Install the screws using the Torx T15 screwdriver or 7mm socket and 1/4-inch drive ratchet.
- Tighten the small liner screws until snug. Don’t crush or distort the plastic.
✅ After Repair
- ✅ Test the left turn signal, right turn signal, and hazard lamps.
- 👀 Confirm both front signals have similar brightness and amber color.
- ⏱️ Make sure neither side flashes unusually fast.
- 🔍 Check that the wheelhouse liner is secure and can’t contact the tire at full steering lock.
- 💧 After washing or driving in rain, inspect the lamp for condensation that could indicate an incorrectly seated socket seal.
💰 DIY vs Shop Cost
Shop Cost: ₹2,500-₹6,000 equivalent, including bulb and labor
DIY Cost: ₹300-₹1,500 equivalent, depending on bulb sourcing
You Save: Approximately ₹2,000-₹4,500 by doing it yourself!
Local labor and imported-part pricing vary. This repair normally takes a shop approximately 0.3-0.6 hours.
🎯 Ready to get started?
HowToo makes it easy: same-day/2-day shipping on every part, plus all the tools and specialty tools you need! Check out the parts and tools sections below to add everything to your cart.
