

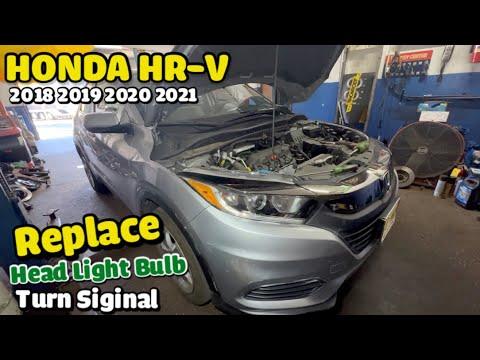






How to Replace Front Turn Signal Bulbs on a 2016-2022 Honda HR-V
Step-by-step bulb replacement guide with tools, parts, safety tips, and testing for 2016, 2017, 2018, 2019, 2020, 2022
How to Replace Front Turn Signal Bulbs on a 2016-2022 Honda HR-V
Step-by-step bulb replacement guide with tools, parts, safety tips, and testing for 2016, 2017, 2018, 2019, 2020, 2022


🔧 HR-V - Front Turn Signal Bulb Replacement
Replacing the front turn signal bulbs on your HR-V is a simple beginner-friendly job. The front turn signal bulbs are accessed from behind the headlight assemblies inside the engine bay, and both sides should be replaced as a pair for even brightness.
Difficulty Level: Beginner | Estimated Time: 20-40 minutes
⚠️ Safety & Precautions
- ⚠️ Turn the ignition OFF and remove the key before working near the headlight wiring.
- ⚠️ Make sure the turn signals and hazard lights are OFF before removing any bulb socket.
- ⚠️ Let the bulbs cool if the lights were recently used.
- ⚠️ Do not touch the glass of the new bulbs with bare fingers. Oil from your skin can shorten bulb life.
- ⚠️ Battery disconnect is not required for this repair.
🔧 Required Tools
You'll need the following tools for this repair:
- Nitrile gloves
- Safety glasses
- Clean microfiber towel
- Flashlight
🔩 Required Parts
HowToo sells all the parts you need for this repair:
- Front turn signal bulbs - Replace in pairs - Qty: 2
📋 Before You Begin
- Park your HR-V on level ground.
- Shift to Park and set the parking brake.
- Turn the ignition OFF.
- Turn the headlight switch and hazard switch OFF.
- Open the hood and support it securely with the hood prop rod.
- The bulb socket is the plastic holder that twists into the back of the headlight housing and holds the bulb.
🔨 Step-by-Step Instructions
Follow these steps in order:
Step 1: Open the hood and locate the front turn signal socket
- Use a flashlight to look behind the headlight assembly.
- Find the front turn signal socket at the outer/front corner area of the headlight housing.
- The socket is usually gray or black plastic with wiring attached.
- Do not pull on the wiring harness.
- Use the other side as a visual guide.
Step 2: Remove the driver-side bulb socket
- Put on nitrile gloves and safety glasses.
- Grip the turn signal bulb socket by the plastic base.
- Turn the socket counterclockwise by hand about a quarter turn.
- Pull the socket straight out of the headlight housing.
Step 3: Remove the old bulb
- Pull the old front turn signal bulb straight out of the socket by hand.
- If it is tight, gently wiggle the bulb while pulling straight outward.
- Inspect the socket for corrosion, melting, or loose terminals.
- If the socket is damaged, replace the socket before installing the new bulb.
Step 4: Install the new bulb
- Push the new front turn signal bulb straight into the socket until fully seated.
- Use a clean microfiber towel to wipe the bulb glass if it was touched.
- Make sure the bulb sits straight in the socket.
Step 5: Reinstall the driver-side socket
- Line up the tabs on the socket with the slots in the headlight housing.
- Push the socket into the housing by hand.
- Turn the socket clockwise until it locks.
- The socket should feel snug and should not wobble.
Step 6: Replace the passenger-side bulb
- Move to the passenger side of the engine bay.
- Use a flashlight to locate the front turn signal socket behind the headlight assembly.
- Turn the socket counterclockwise by hand about a quarter turn.
- Pull the socket out, remove the old bulb, and push in the new front turn signal bulb.
- Reinstall the socket by turning it clockwise until locked.
Step 7: Test both front turn signals
- Turn the ignition ON without starting the engine.
- Move the turn signal stalk left and check the driver-side front signal.
- Move the turn signal stalk right and check the passenger-side front signal.
- Press the hazard switch and confirm both front bulbs flash.
- If one side flashes very fast, that usually means a bulb is not seated correctly or the bulb type is wrong.
Step 8: Close the hood
- Turn the ignition and hazard switch OFF.
- Use your hand to lower the hood prop rod back into its clip.
- Close the hood firmly and make sure it latches securely.
✅ After Repair
- Confirm both front turn signals flash at normal speed.
- Confirm the hazard lights flash normally.
- Check that both bulb sockets are locked into the headlight housings.
- If moisture appears inside the headlight later, recheck that the socket is fully seated.
💰 DIY vs Shop Cost
Shop Cost: $60-$140 USD equivalent, parts + labor
DIY Cost: $8-$25 USD equivalent, parts only
You Save: $50-$115 by doing it yourself!
Shop labor rates vary but typically run $100-$150/hour. This repair takes a shop approximately 0.2-0.5 hours.
🎯 Ready to get started?
HowToo makes it easy: same-day/2-day shipping on every part, plus all the tools and specialty tools you need! Check out the parts and tools sections below to add everything to your cart.