

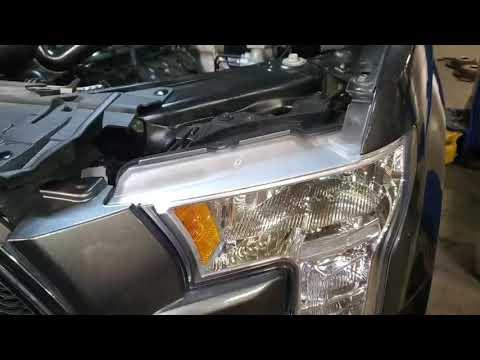






How to Replace Front Turn Signal Bulbs on a 2015-2020 Ford F-150
Step-by-step bulb replacement guide with wheel-well access, tools, parts, and safety tips for 2015, 2016, 2017, 2018, 2019, 2020
How to Replace Front Turn Signal Bulbs on a 2015-2020 Ford F-150
Step-by-step bulb replacement guide with wheel-well access, tools, parts, and safety tips for 2015, 2016, 2017, 2018, 2019, 2020


🔧 F-150 - Front Turn Signal Bulb Replacement
Replacing both front turn signal bulbs on your F-150 requires removing each front wheel-well splash shield access panel so you can reach the bulb sockets behind the headlamp assemblies. This is a simple job, but space is tight, so work slowly and avoid pulling on the wiring.
Difficulty Level: Beginner | Estimated Time: 30-60 minutes
Assumption: This applies to factory halogen front turn signal bulbs. If your F-150 has factory LED headlamp assemblies, the front turn signal may be integrated into the lamp assembly instead of replaceable separately.
⚠️ Safety & Precautions
- ⚠️ Park on a flat surface, shift to Park, and set the parking brake.
- ⚠️ Turn the ignition and all exterior lights OFF before removing bulbs.
- ⚠️ Let the headlamp area cool if the lights were recently on.
- ⚠️ Do not touch glass bulb surfaces with bare fingers. Skin oil can shorten bulb life.
- ⚠️ Battery disconnect is not normally required for this repair.
🔧 Required Tools
You'll need the following tools for this repair:
- 7mm socket
- 8mm socket
- 1/4-inch drive ratchet
- 1/4-inch drive extension 3-inch
- Plastic trim clip remover
- Flashlight
- Clean nitrile gloves
- Safety glasses
🔩 Required Parts
HowToo sells all the parts you need for this repair:
- Front turn signal bulbs - Replace in pairs - Qty: 2
- Wheel-well splash shield push clips - Qty: As needed
📋 Before You Begin
- Park your F-150 on level ground with the steering wheel straight.
- Turn the exterior lighting switch to OFF.
- Set the parking brake.
- For easier access to one side, turn the steering wheel away from the side you are working on.
- A wheel-well splash shield is the plastic liner inside the fender that blocks water and road debris.
- A push clip is a plastic fastener that pops out with a trim tool and can break if pried sideways.
🔨 Step-by-Step Instructions
Follow these steps in order:
Step 1: Turn the Wheel for Access
- To work on the driver side, turn the steering wheel fully to the right.
- To work on the passenger side, turn the steering wheel fully to the left.
- Use a flashlight to look inside the front wheel well behind the headlamp area.
Step 2: Open the Wheel-Well Access Area
- Use a 7mm socket, 1/4-inch drive ratchet, and 1/4-inch drive extension 3-inch to remove the small screws holding the front splash shield access area.
- Use a plastic trim clip remover to remove any push clips securing the liner.
- Gently pull the splash shield back enough to reach behind the headlamp.
- Do not crease the liner.
Step 3: Locate the Front Turn Signal Socket
- Use the flashlight to find the turn signal bulb socket at the rear of the headlamp assembly.
- The turn signal socket is the twist-lock plastic holder connected to the turn signal wiring.
- Confirm you are on the turn signal socket, not the headlamp bulb socket.
Step 4: Remove the Old Front Turn Signal Bulb
- Wear clean nitrile gloves.
- Turn the bulb socket counterclockwise by hand about a quarter turn.
- Pull the socket straight out of the headlamp housing.
- Pull the old bulb straight out of the socket by hand.
- If the bulb feels stuck, gently wiggle it while pulling. Do not twist the glass.
Step 5: Install the New Front Turn Signal Bulb
- Push the new front turn signal bulb straight into the socket by hand until fully seated.
- Line up the socket tabs with the headlamp housing slots.
- Insert the socket into the housing.
- Turn the socket clockwise by hand until it locks in place.
- Make sure the socket seal sits flat so water cannot enter the headlamp.
Step 6: Test the First Side Before Reassembly
- Turn the ignition to accessory mode without starting the engine.
- Use the turn signal stalk to turn on the side you just repaired.
- Check that the new front turn signal flashes normally.
- Turn the signal and ignition OFF after testing.
- If it flashes fast, remove the bulb and reseat it fully in the socket.
Step 7: Reinstall the Wheel-Well Splash Shield
- Push the splash shield back into its original position by hand.
- Reinstall any push clips by hand, then press their centers flush.
- Use the 7mm socket, 1/4-inch drive ratchet, and 1/4-inch drive extension 3-inch to reinstall the screws.
- If any larger fastener was removed, use the 8mm socket and 1/4-inch drive ratchet to reinstall it snugly.
- Tighten plastic liner screws snugly only. Do not overtighten.
Step 8: Repeat on the Other Side
- Turn the steering wheel fully away from the side you are working on.
- Use the 7mm socket, 1/4-inch drive ratchet, 1/4-inch drive extension 3-inch, and plastic trim clip remover to open the opposite splash shield access area.
- Remove the opposite turn signal socket by turning it counterclockwise by hand.
- Replace the old bulb with the new front turn signal bulb.
- Reinstall the socket by turning it clockwise by hand until locked.
- Reinstall the splash shield screws and clips snugly.
Step 9: Final Light Check
- Use the turn signal stalk to check the left front turn signal.
- Use the turn signal stalk to check the right front turn signal.
- Press the hazard switch to verify both front turn signals flash together.
- Walk around the front of your F-150 and confirm both bulbs are bright and flashing at the same speed.
✅ After Repair
- ✅ Confirm there is no fast flashing, which usually means a bulb is not seated or is incorrect.
- ✅ Make sure both splash shields are secure and not rubbing the tires.
- ✅ Check for any loose clips or screws in the wheel well.
- ✅ Recheck the signals at night to confirm both sides are equally bright.
💰 DIY vs Shop Cost
Shop Cost: $90-$180 parts + labor
DIY Cost: $10-$35 parts only
You Save: $80-$145 by doing it yourself!
Shop labor rates vary but typically run $100-$150/hour. This repair takes a shop approximately 0.4-0.8 hours.
🎯 Ready to get started?
HowToo makes it easy: same-day/2-day shipping on every part, plus all the tools and specialty tools you need! Check out the parts and tools sections below to add everything to your cart.