







How to Replace Front Turn Signal Bulbs on a 2015-2020 Chevrolet Tahoe
Step-by-step wheelhouse access guide with tools, 7444NA bulb details, and safety tips for 2015, 2016, 2017, 2018, 2019, 2020
How to Replace Front Turn Signal Bulbs on a 2015-2020 Chevrolet Tahoe
Step-by-step wheelhouse access guide with tools, 7444NA bulb details, and safety tips for 2015, 2016, 2017, 2018, 2019, 2020


🔧 Tahoe - Front Turn Signal Bulb Replacement
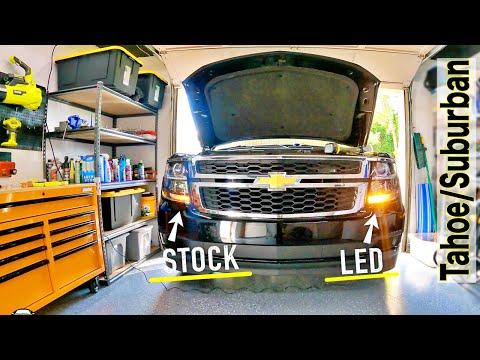
The front turn-signal bulbs are reached through the front wheelhouse liners. You do not need to remove the headlamp assemblies.
Difficulty Level: Beginner | Estimated Time: 20-40 minutes
⚠️ Safety & Precautions
- ⚠️ Switch off all exterior lights and let the bulbs cool before touching them.
- 🛞 Never work beneath a vehicle supported only by a jack; this repair does not require lifting the Tahoe.
- 💡 Wear clean nitrile gloves and avoid touching the replacement bulb glass with bare fingers.
- 🔋 Battery disconnection is not required.
🔧 Required Tools
You'll need the following tools for this repair:
- Plastic push-pin trim removal tool
- 1/4-inch flat-blade screwdriver
- Flashlight rated 200 lumens minimum
- Clean nitrile gloves
- Safety glasses
🔩 Required Parts
HowToo sells all the parts you need for this repair:
- Front amber turn-signal bulb, type 7444NA - Qty: 2 - Replace in pairs
- Front wheelhouse liner push-pin retainers - Qty: As needed
📋 Before You Begin
- 🅿️ Park your Tahoe on level ground, shift into Park, apply the parking brake, and switch off the ignition.
- 💡 Set the exterior-light control to OFF and remove the key or keep the key fob away from the vehicle.
- 🛞 Turn the steering wheel fully away from the side being serviced. For the left bulb, turn right; for the right bulb, turn left.
- 🧤 A push-pin retainer is a reusable plastic fastener with a small center pin that releases the outer body.
🔨 Step-by-Step Instructions
Follow these steps in order:
Step 1: Open the Wheelhouse Access Area
- Put on the safety glasses and clean nitrile gloves.
- Use the flashlight rated 200 lumens minimum to locate the push-pin retainers along the forward edge of the front wheelhouse liner.
- Use the 1/4-inch flat-blade screwdriver to lift each retainer’s center pin slightly.
- Use the plastic push-pin trim removal tool to remove the loosened retainers without tearing the liner.
- Pull the front section of the liner gently rearward to create access behind the headlamp.
- Keep each retainer together for easy reassembly.
Step 2: Remove the Turn-Signal Socket
- Use the flashlight rated 200 lumens minimum to identify the turn-signal socket at the rear of the headlamp assembly.
- With your gloved hand, rotate the socket counterclockwise approximately one-quarter turn.
- Pull the socket straight out without pulling on its wires.
Step 3: Replace the Bulb
- Using clean nitrile gloves, pull the old bulb straight out of the socket; do not twist it.
- Inspect the socket for melted plastic, green corrosion, or burned terminals. Replace or repair the socket before continuing if damage is present.
- Use clean nitrile gloves to press the new 7444NA amber bulb straight into the socket until fully seated.
- Never force a bulb that is not aligned.
Step 4: Test the New Bulb
- Keep the socket outside the lamp and clear of moving parts.
- Switch on the ignition and operate the turn signal for that side.
- Confirm that the new bulb flashes normally, then switch the ignition and exterior lights off.
- If it flashes rapidly, reseat the bulb and inspect the socket terminals using the flashlight rated 200 lumens minimum.
Step 5: Reinstall the Socket
- With your gloved hand, align the socket tabs with the openings in the headlamp assembly.
- Insert the socket fully and rotate it clockwise approximately one-quarter turn until locked.
- Verify that the socket seal sits evenly and the wiring is not pinched.
- No torque specification applies because the socket uses a hand-turned locking connection.
Step 6: Reinstall the Wheelhouse Liner
- Move the liner back into its original position by hand and align all mounting holes.
- Reset each push-pin retainer by extending its center pin.
- Insert the retainer bodies through the aligned holes, then press their center pins flush by hand.
- Use the plastic push-pin trim removal tool to check that every retainer is fully seated and the liner cannot rub against the tire.
- Replace any cracked or loose retainers.
Step 7: Replace the Opposite Bulb
- Turn the steering wheel fully in the opposite direction.
- Repeat Steps 1-6 with the same listed tools on the other side.
- Replacing both bulbs together helps maintain equal brightness and reliability.
✅ After Repair
- ✅ Test the left turn signal, right turn signal, and hazard-warning lights.
- 👀 Walk around the front of your Tahoe and confirm both lamps are equally bright and flashing at a normal speed.
- 🛞 Turn the steering wheel fully left and right, confirming that neither wheelhouse liner contacts a tire.
- 💧 After rain or washing, inspect the headlamps for unusual moisture that could indicate an incorrectly seated socket seal.
💰 DIY vs Shop Cost
Shop Cost: ₹2,500-₹5,000 (parts + labor)
DIY Cost: ₹500-₹1,500 (parts only)
You Save: ₹1,000-₹4,500 by doing it yourself!
Local labor rates vary. This repair takes a shop approximately 0.3-0.5 hour.
🎯 Ready to get started?
HowToo makes it easy: same-day/2-day shipping on every part, plus all the tools and specialty tools you need! Check out the parts and tools sections below to add everything to your cart.