

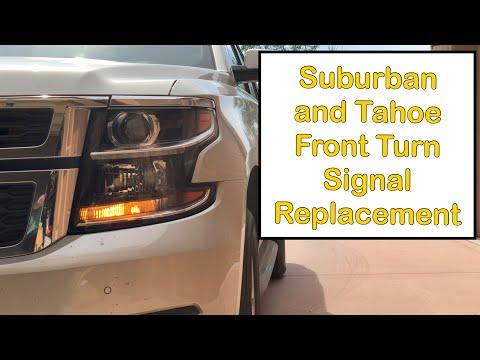







How to Replace Front Turn Signal Bulbs on a 2015-2020 Chevrolet Suburban
Step-by-step wheel-well access guide with tools, 7444NA bulb size, and safety tips for 2015, 2016, 2017, 2018, 2019, 2020
How to Replace Front Turn Signal Bulbs on a 2015-2020 Chevrolet Suburban
Step-by-step wheel-well access guide with tools, 7444NA bulb size, and safety tips for 2015, 2016, 2017, 2018, 2019, 2020


🔧 Suburban - Front Turn Signal Bulb Replacement
The front turn signal bulbs are reached through the front wheel-well liners. You will loosen part of each liner, reach behind the headlamp, and replace the amber bulb without removing the headlamp assembly.
Assumption: This procedure is for the factory replaceable front turn signal bulbs, not an aftermarket LED conversion.
Difficulty Level: Beginner | Estimated Time: 0.5-1 hour
⚠️ Safety & Precautions
- ⚠️ Switch off all exterior lights and allow the headlamps to cool.
- 🛑 Keep the ignition off and remove the key from the vehicle.
- 🧤 Wear gloves because the wheel-well liner can have sharp edges.
- 🔋 Battery disconnection is not required for this repair.
- 💡 Do not force the nearby HID headlamp connectors; they carry high voltage when operating.
🔧 Required Tools
You'll need the following tools for this repair:
- Torx T15 screwdriver
- 7mm socket
- 1/4-inch drive ratchet
- Plastic trim-clip removal tool
- LED work light
- Nitrile mechanic gloves
- Safety glasses
🔩 Required Parts
HowToo sells all the parts you need for this repair:
- Amber 7444NA front turn signal bulbs - Qty: 2 - Replace in pairs
- Front wheel-well liner push clips - Qty: As needed
📋 Before You Begin
- 🚙 Park your Suburban on level ground, select Park, and apply the parking brake.
- ↔️ Turn the steering wheel fully away from the side being serviced. For the left bulb, turn right; for the right bulb, turn left.
- 💡 Confirm that the replacement bulb matches the removed bulb before installing it.
- 🧼 Clean loose dirt from the front portion of the wheel-well liner.
🔨 Step-by-Step Instructions
Follow these steps in order:
Step 1: Open Access Through the Wheel Well
- Use the Torx T15 screwdriver or 7mm socket and 1/4-inch drive ratchet, depending on the installed fasteners, to remove the screws along the front edge of the wheel-well liner.
- Use the plastic trim-clip removal tool to release any push clips near the front of the liner. A push clip is a reusable plastic fastener with a center pin.
- Pull only the front section of the liner rearward. Do not crease or completely remove it.
- Place the removed fasteners somewhere safe. These small screws are not given a service torque; reinstall them snugly without crushing the plastic.
Step 2: Locate the Turn Signal Socket
- Use the LED work light to look upward behind the headlamp assembly.
- Identify the lower turn signal bulb socket by tracing its two-wire harness to the rear of the turn signal reflector.
- Avoid unplugging or handling the larger HID headlamp connectors.
Step 3: Remove the Bulb Socket
- While wearing nitrile mechanic gloves, hold the socket by its plastic body.
- Rotate the socket counterclockwise approximately one-quarter turn by hand.
- Pull the socket straight out of the headlamp housing.
- Do not pull on the wiring.
Step 4: Replace the Turn Signal Bulb
- Pull the old bulb straight out of the socket by hand. Gently rock it if it is tight; do not twist the bulb.
- Inspect the socket for melting, darkened terminals, or green corrosion. A damaged socket must be replaced before installing the bulb.
- Using nitrile mechanic gloves, press the new 7444NA amber bulb straight into the socket until fully seated.
- Match the new bulb to the old one.
Step 5: Test the New Bulb
- Keep the socket clear of moving parts and switch on the ignition.
- Operate the turn signal and hazard warning lights. Confirm the new bulb flashes normally.
- Switch the ignition and exterior lights off before continuing.
- If it does not illuminate, remove the bulb by hand, rotate it 180 degrees, and reinstall it. This is mainly necessary when an LED replacement is used.
Step 6: Reinstall the Socket
- Inspect the socket seal and wipe away loose dirt using a clean section of the nitrile mechanic gloves.
- Insert the socket into the headlamp opening by hand.
- Rotate the socket clockwise until its locking tabs stop. Do not use pliers.
- Confirm the socket sits evenly so water cannot enter the headlamp.
Step 7: Reinstall the Wheel-Well Liner
- Move the liner back into its original position by hand, making sure it overlaps the bumper edge correctly.
- Install the push clips by hand and seat their center pins with the plastic trim-clip removal tool.
- Use the Torx T15 screwdriver or 7mm socket and 1/4-inch drive ratchet to reinstall the screws.
- Tighten the liner screws only until snug. There is no published service torque for these small liner fasteners; overtightening can strip the plastic.
- Repeat the procedure on the opposite side if replacing both bulbs.
✅ After Repair
- ✅ Turn the steering wheel straight and confirm the liner does not contact the tire.
- 💡 Test the left signal, right signal, hazard lights, and parking lights.
- 👀 Verify both front signals have matching brightness and flash speed.
- 🔍 Check the repaired headlamp for condensation after the next wash or rain. Condensation can indicate an improperly seated socket seal.
- 🚫 No scan-tool reset, programming, or infotainment procedure is required.
💰 DIY vs Shop Cost
Shop Cost: $80-$160 (parts + labor)
DIY Cost: $10-$30 (parts only)
You Save: $50-$150 by doing it yourself!
Imported-vehicle parts and labor around Sonīpat may vary. This repair takes a shop approximately 0.3-0.7 hour.
🎯 Ready to get started?
HowToo makes it easy: same-day/2-day shipping on every part, plus all the tools and specialty tools you need! Check out the parts and tools sections below to add everything to your cart.