

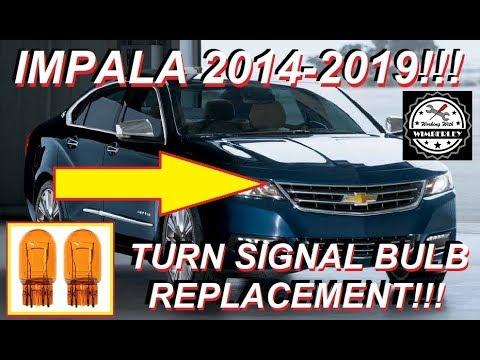






How to Replace Front Turn Signal Bulbs on a 2014-2018 Chevrolet Impala (Trim: LT)
Step-by-step 7444NA bulb replacement with required tools, access tips, and safety checks for 2014
How to Replace Front Turn Signal Bulbs on a 2014-2018 Chevrolet Impala (Trim: LT)
Step-by-step 7444NA bulb replacement with required tools, access tips, and safety checks for 2014


🔧 Impala - Front Turn Signal Bulb Replacement
Each front turn signal uses a replaceable amber bulb inside the headlamp housing. The driver side requires moving the windshield-washer filler neck; the passenger side may require moving the air-cleaner inlet duct for hand clearance.
Difficulty Level: Beginner | Estimated Time: 20-40 minutes
Assumption: These instructions apply to the factory headlamp assemblies.
⚠️ Safety & Precautions
- ⚠️ Switch off all exterior lights and allow the headlamps to cool.
- 🧤 Wear clean nitrile gloves and do not touch the new bulb’s glass.
- 🔑 Keep the ignition off and remove the key from the vehicle.
- 🔋 Battery disconnection is not required for this repair.
- 💡 Never force the bulb socket; the plastic housing can crack.
🔧 Required Tools
You'll need the following tools for this repair:
- 1/4-inch drive ratchet
- 7mm socket
- 8mm socket
- 1/4-inch drive 6-inch extension
- Plastic trim removal tool
- Small flat-blade screwdriver
- Nitrile mechanic gloves
- Safety glasses
🔩 Required Parts
HowToo sells all the parts you need for this repair:
- Front amber turn signal bulb, 7444NA type - Qty: 1 per side
- Front amber turn signal bulbs, 7444NA type - Qty: 2 when replacing in pairs
📋 Before You Begin
- 🚗 Park your Impala on level ground, shift into Park, and apply the parking brake.
- 💡 Turn the headlamp control to Off and switch off the hazard lamps.
- 🛠️ Open the hood and support it securely.
- 🌡️ Wait until the headlamp housing and nearby engine components are cool.
- 📱 No infotainment menu, scan tool, coding, or bulb reset is required.
🔨 Step-by-Step Instructions
Follow these steps in order:
Step 1: Identify the Correct Bulb Socket
- Use a flashlight or the vehicle’s underhood lighting to look behind the affected headlamp assembly.
- Locate the front turn signal socket at the rear of the headlamp housing. Follow the bulb position from the amber turn signal lens to avoid removing the wrong socket.
- The socket is the plastic holder that locks the bulb into the headlamp housing.
Step 2: Create Access on the Driver Side
- Use both gloved hands to grasp the windshield-washer filler neck.
- Pull the filler neck straight upward to release it from the washer reservoir. Do not twist it against the headlamp housing.
- If a retaining clip limits movement, use the plastic trim removal tool to release it gently.
- Place the filler neck aside without allowing dirt to enter it.
- Cover the opening with a clean glove.
Step 3: Create Access on the Passenger Side
- If your hand reaches the turn signal socket safely, leave the air-cleaner duct installed and continue to Step 4.
- If more room is needed, use the 7mm or 8mm socket, 1/4-inch drive ratchet, and 6-inch extension to loosen the air-cleaner inlet duct fastener fitted to your Impala.
- Use the small flat-blade screwdriver only if the duct has a slotted clamp.
- Move the inlet duct just far enough to reach the socket. Do not disconnect electrical connectors or allow debris into the air intake.
- No turn-signal component is removed during this access step.
Step 4: Remove the Turn Signal Socket
- Use a gloved hand to grasp the turn signal socket by its plastic base.
- Rotate the socket counterclockwise approximately one-quarter turn.
- Pull the socket straight out of the headlamp housing.
- Do not pull on the wiring.
- No tool or torque specification applies to this quarter-turn socket.
Step 5: Remove the Old Bulb
- Hold the socket firmly with one gloved hand.
- Use your other gloved hand to pull the old bulb straight out of the socket.
- If the bulb is stuck, wiggle it gently while pulling. Do not use the screwdriver against the glass.
- Inspect the socket for melted plastic, green corrosion, or burned terminals. A damaged socket must be replaced before installing the bulb.
Step 6: Install the New Bulb
- Keep the nitrile mechanic gloves clean and remove the new 7444NA bulb from its package.
- Align the bulb’s wedge base with the socket and press it straight in until fully seated.
- If bare skin touches the glass, clean it with isopropyl alcohol and allow it to dry completely before installation.
- Replace both sides for matching brightness.
Step 7: Reinstall the Bulb Socket
- Align the socket tabs with the openings in the headlamp housing.
- Push the socket fully into place with a gloved hand.
- Rotate the socket clockwise approximately one-quarter turn until it stops securely.
- Do not use the ratchet on the plastic socket. It is hand-tight only.
Step 8: Restore Driver-Side Access Components
- Use both gloved hands to align the washer filler neck with the reservoir opening.
- Push the filler neck straight down until fully seated.
- If removed, press the retaining clip into place by hand.
- Use the plastic trim removal tool only to guide the clip; do not strike it.
Step 9: Restore Passenger-Side Access Components
- Reposition the air-cleaner inlet duct and confirm it sits evenly without gaps.
- Use the correct 7mm or 8mm socket, ratchet, and extension to tighten its fastener snugly.
- If equipped with a worm-drive clamp, use the small flat-blade screwdriver and tighten only until the duct cannot rotate.
- Do not overtighten the plastic duct or housing. No manufacturer service torque is specified for the removable access duct fastener.
Step 10: Test the New Bulb
- Close the hood before performing the final light test.
- Switch on the ignition and use the turn-signal stalk to test the repaired side.
- Switch on the hazard lamps and verify that both front bulbs flash at equal brightness and speed.
✅ After Repair
- ✅ Confirm the turn signal flashes normally and the dashboard does not indicate a rapid flash.
- 🔍 Check that the bulb socket is locked and the headlamp remains dry after rain or washing.
- 💨 Verify that the passenger-side air duct is secure and does not leak or rattle.
- 💧 Confirm that the driver-side washer filler neck is fully seated and does not leak when filled.
- 📱 No scan-tool reset, programming, or calibration is necessary.
💰 DIY vs Shop Cost
Shop Cost: $45-$100 USD (parts + labor)
DIY Cost: $8-$25 USD (parts only)
You Save: $37-$75 USD by doing it yourself!
Local pricing in Sonīpat may vary. This repair takes a shop approximately 0.3-0.5 hour.
🎯 Ready to get started?
HowToo makes it easy: same-day/2-day shipping on every part, plus all the tools and specialty tools you need! Check out the parts and tools sections below to add everything to your cart.