

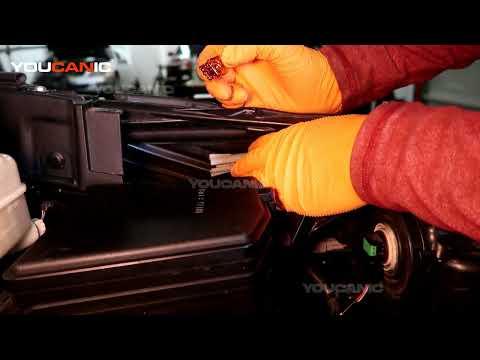







How to Replace Front Turn Signal Bulbs on a 2013 Toyota Highlander
Step-by-step DIY guide with required tools, bulb access tips, safety checks, and testing for 2010, 2011, 2012, 2013
How to Replace Front Turn Signal Bulbs on a 2013 Toyota Highlander
Step-by-step DIY guide with required tools, bulb access tips, safety checks, and testing for 2010, 2011, 2012, 2013


🔧 Highlander - Front Turn Signal Bulb Replacement
This repair replaces the front turn signal bulb in the headlamp assembly. A burned-out front turn signal can make lane changes and turns unsafe, and it may cause the dash indicator to blink faster than normal.
Difficulty Level: Beginner | Estimated Time: 15-30 minutes
⚠️ Safety & Precautions
- ⚠️ Turn the ignition off and remove the key before working near the headlamp wiring.
- ⚠️ Let the front lamps cool if they were recently on.
- ⚠️ Do not touch the glass part of the new bulb with bare fingers; skin oil can shorten bulb life.
- ⚠️ Battery disconnect is not required for this bulb replacement.
🔧 Required Tools
You'll need the following tools for this repair:
- Nitrile gloves
- Safety glasses
- Clean microfiber cloth
- Trim clip removal tool
- 10mm socket
- 1/4-inch ratchet
- Small flashlight
🔩 Required Parts
HowToo sells all the parts you need for this repair:
- Front turn signal bulb - Qty: 1
- Front turn signal bulbs - Replace in pairs - Qty: 2
📋 Before You Begin
- 🅿️ Park your Highlander on level ground and shift to Park.
- 🔑 Turn the ignition off and remove the key.
- 💡 Switch all exterior lights off.
- 🧤 Put on nitrile gloves before handling the new bulb.
- 📌 A trim clip removal tool is a small pry tool used to lift plastic retainers without breaking them.
- 📌 Access is normally through the engine bay behind the headlamp. If space is tight, the upper radiator cover fasteners may need to be loosened for hand clearance.
🔨 Step-by-Step Instructions
Follow these steps in order:
Step 1: Open the Hood
- Use your hand to pull the hood release inside the cabin.
- Use your fingers to release the safety latch at the front of the hood.
- Raise the hood and support it securely with the hood prop rod.
- Use a small flashlight to look behind the headlamp on the side you are replacing.
Step 2: Identify the Turn Signal Bulb Socket
- Use a small flashlight to locate the front turn signal bulb socket at the outer/front area of the headlamp assembly.
- The bulb socket is a plastic twist-lock holder with wiring attached.
- Do not pull on the wires.
- Turn the socket, not the wiring.
Step 3: Create Extra Access if Needed
- If your hand does not fit easily, use a trim clip removal tool to carefully lift any nearby plastic push clips from the upper radiator cover.
- If a small cover bracket blocks access, use a 10mm socket and 1/4-inch ratchet to remove the 10mm fastener.
- Set clips and fasteners in a cup or tray so they do not get lost.
- No torque spec is required for plastic push clips; reinstall them by hand until fully seated.
Step 4: Remove the Old Bulb Socket
- Use your gloved hand to grip the turn signal bulb socket.
- Turn the socket counterclockwise about a quarter turn.
- Pull the socket straight rearward out of the headlamp housing.
- If it feels stuck, gently wiggle the socket while turning by hand.
Step 5: Remove the Old Bulb
- Use your gloved fingers to pull the old bulb straight out of the socket.
- If the bulb is dirty or broken, use a clean microfiber cloth to handle it safely.
- Inspect the socket for melting, corrosion, or green/white crust on the contacts.
- If the socket is damaged, replace the socket before installing the new bulb.
Step 6: Install the New Bulb
- Use nitrile gloves to handle the new front turn signal bulb.
- Push the new bulb straight into the socket until it seats fully.
- Use a clean microfiber cloth to wipe the bulb if you accidentally touched the glass.
- A fully seated bulb will feel snug.
Step 7: Test Before Reassembly
- Keep the socket outside the headlamp opening.
- Use your hand to switch the hazard lights on.
- Verify the new bulb flashes brightly and evenly.
- Use your hand to switch the hazard lights off before reinstalling the socket.
Step 8: Reinstall the Bulb Socket
- Use your gloved hand to insert the bulb and socket straight into the headlamp opening.
- Turn the socket clockwise about a quarter turn until it locks.
- Do not force it; the tabs must line up with the headlamp housing.
- No torque spec is used because the socket is hand-tightened only.
Step 9: Reinstall Any Removed Covers or Fasteners
- Use your hand to reinstall any plastic push clips.
- If you removed a 10mm fastener, use a 10mm socket and 1/4-inch ratchet to reinstall it snugly.
- For small body/cover fasteners, tighten gently; do not overtighten plastic parts.
- Torque to snug only for plastic covers and light brackets.
Step 10: Final Light Check
- Use your hand to turn on the hazard lights again.
- Walk to the front of your Highlander and confirm both front turn signals flash.
- Use the turn signal stalk to test left and right signals separately.
- Close the hood once both sides work correctly.
✅ After Repair
- ✅ Confirm the dash turn signal indicator flashes at normal speed.
- ✅ Check that the bulb socket is locked in place and not loose.
- ✅ If the new bulb does not work, check that it is fully seated in the socket.
- ✅ If it still does not work, inspect the socket, fuse, and wiring for damage.
💰 DIY vs Shop Cost
Shop Cost: $45-$100 parts + labor
DIY Cost: $5-$20 parts only
You Save: $40-$80 by doing it yourself!
Shop labor rates vary but typically run $100-$150/hour. This repair takes a shop approximately 0.3-0.5 hours.
🎯 Ready to get started?
HowToo makes it easy: same-day/2-day shipping on every part, plus all the tools and specialty tools you need! Check out the parts and tools sections below to add everything to your cart.