


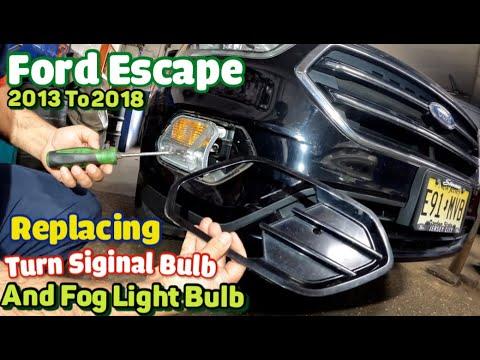







How to Replace Front Turn Signal Bulbs on a 2013-2023 Ford Escape (Trim: S)
Step-by-step wheel-well access guide with 7440 bulb size, tools, and safety tips for 2013, 2014, 2015, 2016, 2017, 2018, 2020, 2022
How to Replace Front Turn Signal Bulbs on a 2013-2023 Ford Escape (Trim: S)
Step-by-step wheel-well access guide with 7440 bulb size, tools, and safety tips for 2013, 2014, 2015, 2016, 2017, 2018, 2020, 2022


🔧 Escape - Front Turn Signal Bulb Replacement
This is a straightforward job. Access each front turn-signal bulb through the wheel-well splash shield, rotate the socket out, and install a new amber 7440-style bulb. Ford’s instructions don’t require removing the headlamp assembly. fordservicecontent.com
Difficulty Level: Beginner | Estimated Time: 20-40 minutes for both sides
⚠️ Safety & Precautions
- ⚠️ Switch off the ignition, headlights, and hazard lights.
- ⚠️ Let the lamps cool before reaching behind the housing.
- ⚠️ Work on level ground and keep the Escape in Park.
- ⚠️ Turn the steering wheel for access, but keep hands away while someone else is inside.
- ⚠️ Battery disconnection isn’t required for this repair.
- ⚠️ Don’t force the socket. Plastic lamp parts can become brittle from Haryana’s heat.
🔧 Required Tools
You'll need the following tools for this repair:
- Torx bit set (T20-T30)
- Metric socket set (7mm-10mm)
- 1/4-inch drive ratchet
- Plastic trim-clip removal tool
- Small LED flashlight
- Nitrile gloves
- Safety glasses
- Wheel chocks
🔩 Required Parts
HowToo sells all the parts you need for this repair:
- Amber 7440 front turn-signal bulbs - Qty: 2
Replace both sides together if the bulbs are the same age. The second one usually isn’t far behind. Plain incandescent bulbs also avoid the rapid-flashing problems sometimes caused by unsupported LED replacements.
📋 Before You Begin
- 🅿️ Park on level ground, select Park, apply the parking brake, and chock a rear wheel.
- 💡 Confirm which bulb has failed by briefly operating both turn signals, then switch everything off.
- 🛞 For the left bulb, turn the steering wheel fully right. For the right bulb, turn it fully left.
- 📦 Keep the new bulb nearby so the lamp opening isn’t left exposed to dust.
🔨 Step-by-Step Instructions
Follow these steps in order:
Step 1: Create Room at the Wheel Well
- Turn the front wheel away from the side you’re repairing.
- Use the small LED flashlight to locate the splash-shield fasteners ahead of the tire.
- The splash shield is the plastic liner separating the tire from the engine compartment.
Step 2: Release the Splash Shield
- Use the matching Torx bit from the T20-T30 set or metric socket from the 7mm-10mm set to remove the forward fasteners.
- Use the plastic trim-clip removal tool for any push clips.
- Remove only enough fasteners to pull the liner back and reach the lamp.
- Keep every fastener organized for reinstallation.
- Don’t bend a cold or brittle liner sharply.
Step 3: Locate the Turn-Signal Socket
- Wear nitrile gloves and reach through the opening behind the lower front lamp area.
- Use the small LED flashlight to identify the turn-signal bulb holder.
- Ford identifies the turn signal as position “C” in the lower lamp assembly. fordservicecontent.com
Step 4: Remove the Bulb Holder
- Grip the plastic bulb holder by hand.
- Rotate it counterclockwise approximately one-quarter turn.
- Pull the holder straight out of the lamp assembly.
- Disconnect the electrical connector only if it prevents the holder from reaching the access opening. Ford’s procedure includes disconnecting this connector. fordservicecontent.com
Step 5: Replace the Bulb
- Hold the socket firmly with one gloved hand.
- Pull the old bulb straight out. Don’t twist a wedge-base bulb.
- Compare the old and new bulb bases before installation.
- Push the new amber 7440 front turn-signal bulb straight into the socket until fully seated.
- Don’t apply grease unless the bulb manufacturer specifically includes or requires it.
Step 6: Test Before Reassembly
- Keep the socket away from moving parts.
- Switch the ignition on and operate that turn signal.
- Confirm the bulb flashes brightly at a normal rate.
- If it doesn’t work, switch everything off, remove the bulb, rotate it 180 degrees, and reinstall it.
- Incandescent bulbs normally work in either orientation, but this check catches poor terminal contact.
Step 7: Reinstall the Bulb Holder
- Switch the ignition and exterior lights off again.
- Reconnect the electrical connector until its locking tab clicks.
- Insert the holder into the lamp and rotate it clockwise until it locks.
- Make sure the socket seal sits evenly. A pinched seal can allow water into the lamp.
Step 8: Refit the Splash Shield
- Position the liner against the bumper and wheel well.
- Reinstall the push clips using your fingers.
- Use the matching Torx bit, metric socket, and 1/4-inch drive ratchet to reinstall the screws.
- Torque: Snug the small splash-shield fasteners by hand only. Don’t overtighten them into plastic.
- Repeat the procedure on the opposite side if replacing both bulbs.
✅ After Repair
- ✅ Test the left signal, right signal, parking lamps, and hazard lights.
- ✅ Verify both front bulbs have matching color and brightness.
- ✅ Check that neither indicator flashes unusually fast.
- ✅ Confirm the splash shield is secure and cannot contact the tire.
- ✅ Look through the lamp lens for gaps or moisture around the socket.
💰 DIY vs Shop Cost
Shop Cost: ₹1,500-₹3,500, depending on local labor and bulb choice
DIY Cost: Approximately $3-$10 for conventional bulbs
You Save: Most of the labor charge by doing it yourself!
Local labor rates vary. This repair usually takes a shop approximately 0.3-0.5 hour.
🎯 Ready to get started?
HowToo has already opened the matching front turn-signal bulb aisle for your Escape. Same-day/2-day shipping is available on eligible parts, plus the basic tools needed for the job.
