

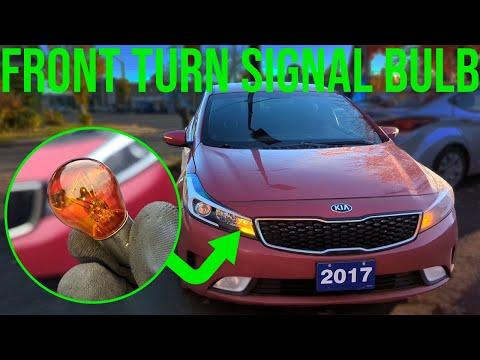





How to Replace Front Turn Signal Bulbs on a 2010-2018 Kia Forte
Step-by-step DIY instructions with required parts, tools, and safety tips for 2010, 2011, 2012, 2013, 2017, 2018
How to Replace Front Turn Signal Bulbs on a 2010-2018 Kia Forte
Step-by-step DIY instructions with required parts, tools, and safety tips for 2010, 2011, 2012, 2013, 2017, 2018


🔧 Forte - Front Turn Signal Bulb Replacement
Your Forte uses a replaceable amber dual-filament bulb inside each front headlamp assembly. The bulb socket is reached from under the hood, so the headlamp assembly normally does not need to be removed.
Difficulty Level: Beginner | Estimated Time: 15-30 minutes
⚠️ Safety & Precautions
- ⚠️ Turn off the engine, exterior lights, and hazard flashers before touching the socket.
- 🔥 Let the headlamp area cool if the lights were recently used.
- 🧤 Wear gloves and avoid touching the replacement bulb’s glass with bare fingers.
- 🔋 Battery disconnection is not required for this repair.
🔧 Required Tools
You'll need the following tools for this repair:
- Nitrile mechanic gloves
- ANSI Z87.1 safety glasses
- Clean microfiber cloth
🔩 Required Parts
HowToo sells all the parts you need for this repair:
- Front amber turn signal bulb (28/8W dual-filament) - Qty: 2 - Replace in pairs
📋 Before You Begin
- 🅿️ Park your Forte on level ground, select Park, and apply the parking brake.
- 💡 Switch the headlights, turn signals, and hazard flashers off.
- 🔑 Remove the key from the ignition and open the hood.
- 🧼 Put on nitrile mechanic gloves and safety glasses.
- 📌 A dual-filament bulb contains two lighting elements for separate brightness levels.
🔨 Step-by-Step Instructions
Follow these steps in order:
Step 1: Locate the Turn Signal Socket
- Stand in front of your Forte and look behind the affected headlamp assembly.
- Identify the front turn signal bulb socket at the rear of the headlamp housing. It is the twist-lock socket aligned with the amber turn signal section.
- Use a flashlight only if extra visibility is needed; no fasteners must normally be removed.
Step 2: Remove the Bulb Socket
- Hold the plastic socket by hand while wearing nitrile mechanic gloves.
- Rotate the socket counterclockwise approximately one-quarter turn.
- Pull the socket straight out of the headlamp housing.
- Do not pull on the wiring harness.
Step 3: Remove the Old Bulb
- Hold the socket firmly by hand.
- Press the bulb gently into the socket, rotate it counterclockwise, and lift it out.
- Inspect the socket for melted plastic, darkened terminals, moisture, or corrosion.
- Stop and replace the damaged socket before continuing if heat damage is present.
Step 4: Install the New Bulb
- Use nitrile mechanic gloves to align the bulb’s side pins with the slots in the socket.
- Press the bulb into the socket and rotate it clockwise until it locks.
- If the glass is touched, use a clean microfiber cloth to wipe it before installation.
- Never force a misaligned bulb into place.
Step 5: Reinstall the Socket
- Insert the socket straight into the headlamp housing by hand.
- Rotate the socket clockwise approximately one-quarter turn until it stops securely.
- Confirm the socket seal sits evenly against the housing to prevent water entry.
- No torque specification applies because this is a hand-operated twist-lock socket.
Step 6: Replace the Opposite Bulb
- Repeat Steps 1-5 on the other headlamp using nitrile mechanic gloves.
- Replacing both bulbs together helps maintain equal brightness and color.
✅ After Repair
- ✅ Switch on the hazard flashers and confirm both front bulbs flash brightly and at the same speed.
- ↔️ Test the left and right turn signals separately.
- ⚠️ A rapid flash usually means a bulb is not seated correctly, has the wrong specification, or another signal bulb has failed.
- 💧 Check that both bulb sockets are fully locked to keep moisture out of the headlamps.
- 🔧 No scan-tool reset, coding, or infotainment procedure is required.
💰 DIY vs Shop Cost
Shop Cost: ₹1,500-₹3,500 (parts + labor)
DIY Cost: ₹500-₹1,500 (parts only)
You Save: ₹1,000-₹2,000 by doing it yourself!
Local labor rates vary. This repair takes a shop approximately 0.2-0.5 hour.
🎯 Ready to get started?
HowToo makes it easy: same-day/2-day shipping on every part, plus all the tools and specialty tools you need! Check out the parts and tools sections below to add everything to your cart.