

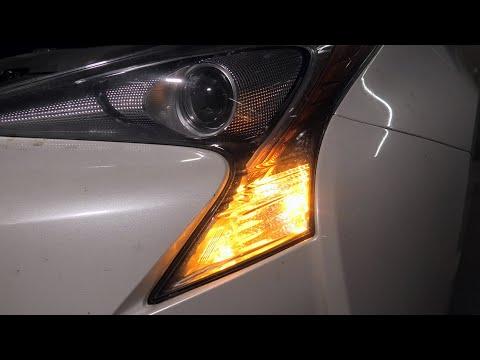







How to Replace Front Turn Signal Bulbs on a 2001-2022 Toyota Prius
Step-by-step wheel-well access guide with tools, 7444NA bulbs, and safety tips for 2001, 2002, 2003, 2004, 2005, 2006, 2007, 2008, 2009, 2010, 2011, 2012, 2013, 2014, 2015, 2016, 2017, 2018, 2019, 2021, 2022
How to Replace Front Turn Signal Bulbs on a 2001-2022 Toyota Prius
Step-by-step wheel-well access guide with tools, 7444NA bulbs, and safety tips for 2001, 2002, 2003, 2004, 2005, 2006, 2007, 2008, 2009, 2010, 2011, 2012, 2013, 2014, 2015, 2016, 2017, 2018, 2019, 2021, 2022


🔧 Prius - Front Turn Signal Bulb Replacement
The front turn signals on your Prius use replaceable amber dual-filament bulbs accessed through the front wheel-well liners. Replacing both bulbs together is recommended because they are the same age and brightness.
Difficulty Level: Beginner | Estimated Time: 30-45 minutes
⚠️ Safety & Precautions
- ⚠️ Turn the exterior lights off and keep the smart key away from the Prius.
- ⚠️ Allow the light housing to cool before touching the bulb socket.
- ⚠️ Do not touch the new bulb’s glass with bare fingers; skin oil can shorten its life.
- ⚠️ Do not touch orange hybrid-system cables or connectors.
- ⚠️ A 12-volt battery disconnect is not required for this repair.
🔧 Required Tools
You'll need the following tools for this repair:
- Plastic trim-clip removal tool
- Small flat-blade screwdriver
- LED inspection light
- Nitrile mechanic gloves
- Safety glasses
🔩 Required Parts
HowToo sells all the parts you need for this repair:
- Front amber turn signal bulb, 7444NA type - Qty: 2 - Replace in pairs
- Front fender-liner push clips - Qty: 6 recommended if damaged
📋 Before You Begin
- 📍 Park your Prius on level ground, select Park, apply the parking brake, and switch the power off.
- 🔑 Move the smart key at least 15 feet away so the vehicle cannot be started accidentally.
- 💡 Confirm which side has failed by briefly operating the hazard lights, then switch them off.
- 🛞 Access is through each front wheel well; no lifting or wheel removal is normally required.
🔨 Step-by-Step Instructions
Follow these steps in order:
Step 1: Position the Front Wheel
- Start your Prius, turn the steering wheel fully away from the bulb being replaced, and then switch the vehicle completely off.
- For the left bulb, turn the wheels right. For the right bulb, turn the wheels left.
- Use the LED inspection light to identify the push clips along the forward edge of the wheel-well liner.
Step 2: Remove the Fender-Liner Clips
- Wear safety glasses before working inside the wheel well.
- Use the small flat-blade screwdriver to gently raise the center pin of each forward liner clip.
- Use the plastic trim-clip removal tool to pull each loosened clip from the liner.
- Remove only enough clips to fold the front portion of the liner backward without sharply creasing it.
- Keep the clips together in a small container.
Step 3: Locate the Turn Signal Socket
- Wear nitrile mechanic gloves and gently pull the loosened liner away from the bumper.
- Use the LED inspection light to locate the turn signal socket at the rear of the lamp housing.
- The socket is the removable plastic holder connected to the bulb wiring.
- Do not pull on the wires or disturb nearby orange hybrid-system components.
Step 4: Remove the Old Bulb
- Using your gloved hand, rotate the turn signal socket counterclockwise approximately one-quarter turn.
- Pull the socket straight out of the lamp housing.
- Using your gloved hand, pull the old bulb straight out of the socket without twisting it.
- Inspect the socket for melted plastic, corrosion, or darkened electrical contacts.
Step 5: Install the New Bulb
- Keep the nitrile mechanic gloves clean while handling the new bulb.
- Using your gloved hand, align the new 7444NA amber bulb with the socket and press it straight in until fully seated.
- If the glass is touched accidentally, clean it with a lint-free portion of the glove before installation.
- Do not force the bulb; verify its base is aligned correctly if it will not seat.
Step 6: Reinstall the Socket
- Use the LED inspection light to align the socket tabs with the openings in the lamp housing.
- Insert the socket fully and rotate it clockwise approximately one-quarter turn until locked.
- Check that the socket seal sits evenly so moisture cannot enter the lamp.
- No fastener torque specification applies; the socket locks by hand.
Step 7: Test the New Bulb
- Keep the liner temporarily open and move clear of the wheel.
- Bring the smart key back, switch on the hazard lights, and visually confirm that the new bulb flashes.
- Check both the bright turn-signal function and the lower-intensity parking-light function.
- If it does not illuminate, switch the lights off and use your gloved hand to reseat the bulb and socket.
Step 8: Refit the Wheel-Well Liner
- Switch the hazard lights off and move the smart key away again.
- Return the liner to its original position by hand, ensuring its edges overlap the bumper correctly.
- Use the plastic trim-clip removal tool to align the liner holes if necessary.
- Reset each push clip by extending its center pin, inserting the clip body, and pressing the center pin flush by hand.
- Replace any clip that is cracked or will not lock securely.
Step 9: Replace the Opposite Bulb
- Turn the steering wheel in the opposite direction and repeat Steps 2 through 8 using the same listed tools.
- Replacing both bulbs keeps their color, brightness, and expected service life consistent.
✅ After Repair
- ✅ Operate the left signal, right signal, hazard lights, and parking lights.
- ✅ Confirm both front signals flash at the normal rate; rapid flashing can indicate a loose bulb or another failed signal lamp.
- ✅ Check that every fender-liner clip is flush and the liner cannot contact the tire.
- ✅ Inspect the lamp housings after rain or washing for unusual condensation.
- ✅ No scan-tool reset, coding, or hybrid-system procedure is required.
💰 DIY vs Shop Cost
Shop Cost: $70-$140 (parts + labor)
DIY Cost: $12-$30 (parts only)
You Save: $40-$128 by doing it yourself!
Shop labor rates vary but typically run $100-$150/hour. This repair takes a shop approximately 0.3-0.5 hours.
🎯 Ready to get started?
HowToo makes it easy: same-day/2-day shipping on every part, plus all the tools and specialty tools you need! Check out the parts and tools sections below to add everything to your cart.