
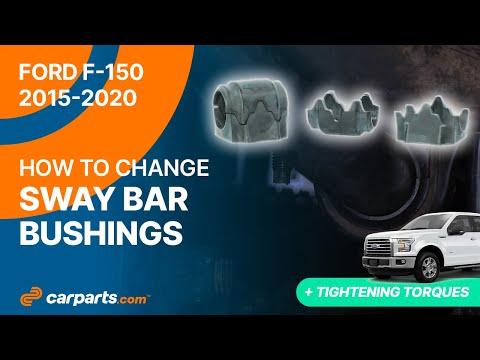






How to Replace Front Sway Bar Bushings on a 2015-2020 Ford F-150 (Trim: XL)
Step-by-step suspension bushing guide with tools, parts, torque specs, and safety tips for 2015, 2016, 2017, 2018, 2019, 2020
How to Replace Front Sway Bar Bushings on a 2015-2020 Ford F-150 (Trim: XL)
Step-by-step suspension bushing guide with tools, parts, torque specs, and safety tips for 2015, 2016, 2017, 2018, 2019, 2020


🔧 F-150 - Suspension Bushing Replacement
Suspension bushings are rubber or bonded rubber sleeves that isolate vibration and allow suspension arms to move smoothly. On your F-150, “suspension bushings” can mean control arm bushings, sway bar bushings, leaf spring/shackle bushings, or shock bushings, but the most common DIY-friendly repair is replacing worn front sway bar bushings.
Assumption: This guide covers front stabilizer/sway bar frame bushings on your F-150. These are the safest beginner-level suspension bushings to replace without a hydraulic press.
Difficulty Level: Beginner | Estimated Time: 1-2 hours
⚠️ Safety & Precautions
- ⚠️ Work on a cool vehicle parked on level ground.
- ⚠️ Use jack stands if lifting the truck. Never work under a vehicle supported only by a jack.
- ⚠️ Keep hands clear of the sway bar while brackets are loose. The bar can shift slightly.
- ⚠️ Do not loosen control arm bolts unless you are specifically replacing control arm bushings. Those repairs often require alignment afterward.
- ⚠️ Battery disconnect is not required for front sway bar bushing replacement.
🔧 Required Tools
You'll need the following tools for this repair:
- 13mm socket
- 15mm socket
- 3/8-inch ratchet
- 3/8-inch torque wrench
- 6-inch socket extension
- Trim clip remover
- Flat-blade screwdriver
- Rubber mallet
- Floor jack (rated 3-ton minimum)
- Jack stands (rated 3-ton minimum)
- Wheel chocks
- Nitrile gloves
- Safety glasses
- Shop rags
🔩 Required Parts
HowToo sells all the parts you need for this repair:
- Front sway bar frame bushing set - Qty: 1
- Silicone-based bushing grease - Qty: 1
- Sway bar bracket bolts - Qty: 4
📋 Before You Begin
- 🅿️ Park your F-150 on level ground and set the parking brake.
- 🛞 Place wheel chocks behind the rear wheels.
- 🔎 Look under the front of the truck and locate the sway bar. It is the round steel bar that runs left-to-right across the front suspension.
- 🔩 Find the two frame brackets holding the sway bar bushings to the frame crossmember.
- 💡 A bushing is a rubber cushion. A bracket is the metal clamp that holds it in place.
🔨 Step-by-Step Instructions
Follow these steps in order:
Step 1: Raise and Secure the Front of the Truck
- Use wheel chocks behind the rear tires.
- Use a floor jack rated 3-ton minimum under the front frame crossmember or approved front jacking point.
- Lift only high enough to safely reach the sway bar brackets.
- Place jack stands rated 3-ton minimum under the front frame rails.
- Slowly lower the truck onto the jack stands.
- Keep the floor jack lightly touching as backup support.
- Shake gently to confirm stability.
Step 2: Remove Any Front Splash Shield Blocking Access
- If a lower splash shield blocks the sway bar brackets, use a trim clip remover to remove plastic push clips.
- Use a 13mm socket and 3/8-inch ratchet to remove any small shield bolts if equipped.
- Set the splash shield and clips aside in order.
- Take a phone photo first.
Step 3: Locate the Front Sway Bar Bushings
- Use safety glasses and look behind the front bumper area under the truck.
- Find the two rubber bushings mounted around the sway bar near the frame.
- Each bushing is held by a metal saddle bracket with two bolts.
- Do one side at a time so the sway bar stays aligned.
Step 4: Remove One Sway Bar Bushing Bracket
- Use a 15mm socket, 6-inch socket extension, and 3/8-inch ratchet to loosen the two bracket bolts.
- Remove both bolts by hand once loose.
- Pull the bracket away from the bushing.
- If the bracket sticks, tap it gently with a rubber mallet.
- Do not pry hard against brake lines or wiring.
Step 5: Remove the Old Bushing
- Use a flat-blade screwdriver to gently open the split in the rubber bushing.
- Slide the old bushing off the sway bar.
- Use shop rags to clean dirt and old grease from the sway bar where the bushing sits.
- Check the sway bar for heavy rust, deep grooves, or cracking.
Step 6: Install the New Bushing
- Apply a thin layer of silicone-based bushing grease inside the new bushing using nitrile gloves.
- Open the split in the bushing by hand and slide it over the sway bar.
- Position the bushing in the same location as the old one.
- Make sure the split faces the same direction as the original bushing.
- Do not use petroleum grease.
Step 7: Reinstall the Bracket
- Place the metal bracket over the new bushing by hand.
- Start both bracket bolts by hand to prevent cross-threading.
- Use a 15mm socket, 6-inch socket extension, and 3/8-inch ratchet to snug both bolts evenly.
- Use a 3/8-inch torque wrench with a 15mm socket to tighten the bracket bolts to Torque to 55 Nm (41 ft-lbs).
Step 8: Repeat on the Other Side
- Move to the opposite sway bar frame bushing.
- Use the 15mm socket, 6-inch socket extension, and 3/8-inch ratchet to remove the bracket bolts.
- Remove the old bushing with a flat-blade screwdriver.
- Clean the sway bar with shop rags.
- Install the new greased bushing by hand.
- Reinstall the bracket and tighten the bolts with a 3/8-inch torque wrench to Torque to 55 Nm (41 ft-lbs).
Step 9: Reinstall the Splash Shield
- If removed, lift the splash shield back into place by hand.
- Use the trim clip remover to help align plastic clips if needed.
- Push the clips in by hand until seated.
- Use a 13mm socket and 3/8-inch ratchet to reinstall any shield bolts until snug.
Step 10: Lower the Truck
- Use the floor jack rated 3-ton minimum to lift the truck slightly off the jack stands.
- Remove the jack stands rated 3-ton minimum.
- Lower the truck slowly to the ground.
- Remove the wheel chocks.
✅ After Repair
- ✅ Turn the steering wheel left and right while parked and listen for rubbing or clunking.
- ✅ Test drive slowly over a small bump or driveway entrance.
- ✅ Recheck that the sway bar brackets are seated flat against the frame.
- ✅ If clunking remains, inspect sway bar end links, control arm bushings, ball joints, and struts next.
- ✅ An alignment is usually not required for sway bar bushing replacement.
💰 DIY vs Shop Cost
Shop Cost: $180-$350 (parts + labor)
DIY Cost: $25-$80 (parts only)
You Save: $155-$270 by doing it yourself!
Shop labor rates vary but typically run $100-$150/hour. This repair takes a shop approximately 0.8-1.5 hours.
🎯 Ready to get started?
HowToo makes it easy: same-day/2-day shipping on every part, plus all the tools and specialty tools you need! Check out the parts and tools sections below to add everything to your cart.