


How to Replace Front Sway Bar Bushings on a 2012 Jeep Wrangler
Step-by-step DIY guide with required tools, parts, torque specs, and safety tips
How to Replace Front Sway Bar Bushings on a 2012 Jeep Wrangler
Step-by-step DIY guide with required tools, parts, torque specs, and safety tips
🔧 Wrangler - Front Sway Bar Bushing Replacement
Assumption: “Suspension bushings” means the front sway bar frame bushings, which are a common DIY-friendly bushing replacement on your Wrangler.
This repair replaces the rubber bushings that hold the front sway bar to the frame. Worn sway bar bushings can cause clunks over bumps, loose steering feel, or squeaks from the front suspension.
Difficulty Level: Beginner | Estimated Time: 1-2 hours
⚠️ Safety & Precautions
- ⚠️ Park your Wrangler on flat, solid ground before working underneath it.
- ⚠️ Let the exhaust and suspension cool before touching nearby parts.
- ⚠️ Do not rely on a jack alone. Use jack stands if lifting the vehicle.
- ⚠️ Keep your hands clear of the sway bar while loosening brackets, because it can shift slightly.
- ⚠️ Battery disconnect is not required for this repair.
🔧 Required Tools
You'll need the following tools for this repair:
- 15mm socket
- 3/8-inch drive ratchet
- 3/8-inch drive extension
- Torque wrench rated 10-100 ft-lbs
- Flat-blade screwdriver
- Trim clip remover
- Floor jack rated 3-ton minimum
- Jack stands rated 3-ton minimum
- Wheel chocks
- Shop rags
- Safety glasses
- Mechanic gloves
🔩 Required Parts
HowToo sells all the parts you need for this repair:
- Front sway bar frame bushings - Qty: 2
- Silicone-based bushing grease - Qty: 1 small tube
- Front sway bar bushing bracket bolts - Qty: 4, replace if corroded or damaged
📋 Before You Begin
- Park your Wrangler on level ground with the transmission in 1st gear.
- Set the parking brake firmly.
- Place wheel chocks behind the rear tires.
- You can usually do this job with the front tires on the ground. If more room is needed, lift the front using a floor jack rated 3-ton minimum and support it with jack stands rated 3-ton minimum.
- A sway bar is the round steel bar that connects the left and right suspension sides to reduce body roll while turning.
- A bushing is the rubber sleeve that cushions and holds that bar in place.
🔨 Step-by-Step Instructions
Follow these steps in order:
Step 1: Secure Your Wrangler
- Put on safety glasses and mechanic gloves.
- Place wheel chocks behind the rear tires.
- If lifting is needed, use a floor jack rated 3-ton minimum under the front axle tube, then place jack stands rated 3-ton minimum under the axle.
- Gently lower the vehicle onto the jack stands using the floor jack rated 3-ton minimum.
- Shake test before crawling under.
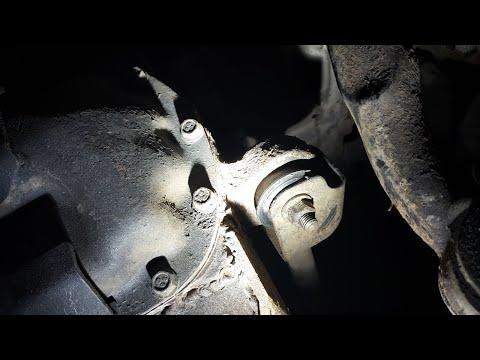
Step 2: Locate the Front Sway Bar Bushings
- Look behind the front bumper and below the grille area.
- Find the front sway bar, which runs side-to-side across the front of your Wrangler.
- Locate the two rubber bushings held by metal brackets to the frame crossmember.
- Use a shop rag to wipe dirt from the bracket bolts so the socket seats fully.
Step 3: Remove the Driver-Side Bushing Bracket
- Use a 15mm socket, 3/8-inch drive extension, and 3/8-inch drive ratchet to loosen the two bracket bolts.
- Remove the two bolts and keep the bracket supported with your hand.
- Pull the metal bracket down and away from the bushing.
- If the bracket sticks, use a flat-blade screwdriver to gently pry it loose.
- Do not bend the bracket.
Step 4: Remove the Old Driver-Side Bushing
- Find the split line in the rubber bushing.
- Use your hands to open the split and peel the bushing off the sway bar.
- If it is stuck, use a flat-blade screwdriver carefully at the split to open it.
- Clean the sway bar mounting area with a shop rag.
Step 5: Install the New Driver-Side Bushing
- Apply a light coat of silicone-based bushing grease to the inside of the new bushing.
- Open the split in the new bushing by hand and place it around the sway bar.
- Rotate the bushing so the split faces toward the rear or downward, matching the original orientation if visible.
- Slide the bushing into the same location as the old one.
- Use only silicone-safe grease.
Step 6: Reinstall the Driver-Side Bracket
- Place the metal bracket over the new bushing by hand.
- Start both bolts by hand first to avoid cross-threading.
- Use a 15mm socket, 3/8-inch drive extension, and 3/8-inch drive ratchet to snug both bolts evenly.
- Use a torque wrench rated 10-100 ft-lbs and 15mm socket to tighten the bracket bolts to Torque to 75 Nm (55 ft-lbs).
Step 7: Replace the Passenger-Side Bushing
- Repeat the same process on the passenger side using the 15mm socket, 3/8-inch drive extension, and 3/8-inch drive ratchet.
- Remove the bracket, peel off the old bushing, clean the sway bar with a shop rag, and install the new greased bushing.
- Reinstall the bracket and start both bolts by hand.
- Use a torque wrench rated 10-100 ft-lbs and 15mm socket to tighten the bolts to Torque to 75 Nm (55 ft-lbs).
Step 8: Inspect Nearby Sway Bar Links
- Use a flashlight if available and visually inspect the sway bar links at both ends of the sway bar.
- Look for torn rubber boots, loose joints, or missing hardware.
- If a plastic splash shield or trim clip is in the way, use a trim clip remover to move it carefully.
- If sway bar links are loose or torn, they should be replaced in pairs.
Step 9: Lower the Vehicle
- If your Wrangler was lifted, use the floor jack rated 3-ton minimum to raise the front axle slightly.
- Remove the jack stands rated 3-ton minimum.
- Lower the vehicle slowly with the floor jack rated 3-ton minimum.
- Remove the wheel chocks.
✅ After Repair
- Start with a slow test drive around the block.
- Drive over a small bump at low speed and listen for clunks or squeaks.
- Recheck both sway bar bushing brackets after the test drive.
- If the steering wheel is off-center or the vehicle pulls, the issue is not caused by these bushings alone and the front suspension should be inspected further.
- No alignment is normally required for front sway bar frame bushing replacement.
💰 DIY vs Shop Cost
Shop Cost: $150-$300 USD equivalent (parts + labor)
DIY Cost: $20-$70 USD equivalent (parts only)
You Save: $130-$230 USD equivalent by doing it yourself!
Shop labor rates vary but typically run $100-$150/hour. This repair takes a shop approximately 0.7-1.2 hours.
🎯 Ready to get started?
HowToo makes it easy: same-day/2-day shipping on every part, plus all the tools and specialty tools you need! Check out the parts and tools sections below to add everything to your cart.
