

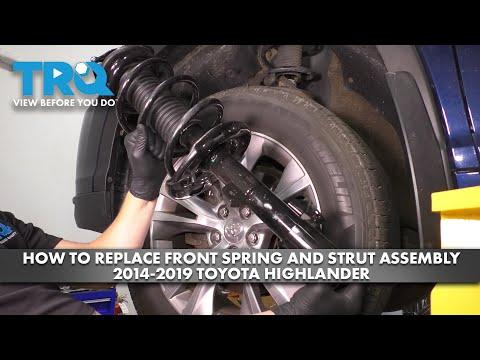






How to Replace Front Struts on a 2019 Toyota Highlander (Trim: LE | Body: Sport Utility)
Step-by-step loaded strut assembly guide with tools, parts, torque specs, and safety tips for 2019
How to Replace Front Struts on a 2019 Toyota Highlander (Trim: LE | Body: Sport Utility)
Step-by-step loaded strut assembly guide with tools, parts, torque specs, and safety tips for 2019


🔧 Highlander - Front Strut Assembly Replacement
Replacing the front struts on your Highlander restores ride control, braking stability, and steering feel. For a beginner DIYer, the safest method is installing complete loaded strut assemblies, which include the spring, mount, and strut already assembled.
Difficulty Level: Intermediate | Estimated Time: 3-5 hours
⚠️ Safety & Precautions
- ⚠️ Replace front struts in pairs. Do both left and right sides so the suspension stays balanced.
- ⚠️ Do not loosen the center nut on the strut shaft if using a complete loaded strut. The spring is under heavy pressure and can cause serious injury.
- ⚠️ Support your Highlander with jack stands before working underneath or inside the wheel well.
- ⚠️ Never rely on a floor jack alone to hold the vehicle.
- ⚠️ Keep the brake hose and ABS wheel speed sensor wire from stretching while the strut is removed.
- ⚠️ A wheel alignment is required after strut replacement because camber and toe can change.
🔧 Required Tools
You'll need the following tools for this repair:
- Floor jack rated 3-ton minimum
- Jack stands rated 3-ton minimum
- Wheel chocks
- 21mm lug nut socket
- 19mm socket
- 22mm socket
- 12mm socket
- 14mm socket
- 3/8-inch ratchet
- 1/2-inch breaker bar
- 1/2-inch ratchet
- Torque wrench 20-250 Nm
- Torque wrench 5-60 Nm
- 19mm box-end wrench
- 22mm box-end wrench
- Flat pry bar 18-inch
- Rubber mallet
- Paint marker
- Bungee cord 24-inch
- Penetrating oil spray
- Mechanic gloves
- Safety glasses
A breaker bar is a long handle used to loosen very tight bolts safely with steady force.
🔩 Required Parts
HowToo sells all the parts you need for this repair:
- Front loaded strut assembly - Left: 1, Right: 1 - Replace in pairs
- Front strut-to-knuckle bolts and nuts - Qty: 4 if damaged or corroded
- Front sway bar link nuts - Qty: 2 if removed or damaged
📋 Before You Begin
- 🚗 Park your Highlander on a flat, solid surface.
- 🅿️ Shift to Park and set the parking brake.
- 🧱 Place wheel chocks behind both rear wheels.
- 🔩 Loosen the front lug nuts slightly before lifting the vehicle.
- 📏 Plan for a professional wheel alignment after the repair.
- 🛠️ Spray penetrating oil on the lower strut bolts and sway bar link nuts 10-15 minutes before removal.
🔨 Step-by-Step Instructions
Follow these steps in order:
Step 1: Loosen the Front Wheel Lug Nuts
- Use a 21mm lug nut socket and 1/2-inch breaker bar to loosen each front wheel lug nut about one turn.
- Do not remove the lug nuts yet.
- Loosen while tires touch ground.
Step 2: Raise and Support the Front of the Vehicle
- Use a floor jack rated 3-ton minimum to lift the front of your Highlander at the front center jacking point.
- Place jack stands rated 3-ton minimum under the front side pinch welds or approved support points.
- Lower the vehicle slowly onto the jack stands.
- Gently shake the vehicle by hand to confirm it is stable.
Step 3: Remove the Front Wheels
- Use a 21mm lug nut socket and 1/2-inch ratchet to remove the loosened lug nuts.
- Remove both front wheels by hand.
- Slide the wheels under the vehicle as an extra safety backup.
Step 4: Mark the Strut-to-Knuckle Position
- Use a paint marker to draw alignment marks across the lower strut bracket and steering knuckle.
- The steering knuckle is the large metal part that holds the wheel hub and connects to the suspension.
- This mark helps keep the alignment close enough to drive to the alignment shop.
Step 5: Free the Brake Hose and ABS Wire Brackets
- Use a 12mm socket and 3/8-inch ratchet to remove the brake hose bracket bolt from the strut.
- Use a 10mm socket and 3/8-inch ratchet if the ABS wire bracket uses a smaller bolt.
- Move the hose and wire gently aside by hand.
- Secure them with a 24-inch bungee cord if needed so they do not hang or stretch.
- ABS means anti-lock braking system; the wire reads wheel speed for braking control.
Step 6: Disconnect the Sway Bar Link from the Strut
- Use a 19mm socket and 1/2-inch ratchet to remove the sway bar link nut from the strut bracket.
- If the stud spins, hold the back side with a 19mm box-end wrench while removing the nut with the 19mm socket.
- Push the sway bar link out of the strut bracket by hand.
- The sway bar link is a short rod that helps reduce body roll in turns.
Step 7: Support the Steering Knuckle
- Place the floor jack lightly under the lower control arm near the ball joint.
- Raise the jack just enough to support the suspension, not lift the vehicle off the jack stand.
- This keeps the steering knuckle from dropping when the strut bolts are removed.
Step 8: Remove the Lower Strut Bolts
- Use a 22mm socket and 1/2-inch breaker bar on the lower strut nuts.
- Hold the bolt heads with a 22mm box-end wrench if they turn.
- Remove the two lower nuts with the 22mm socket and 1/2-inch ratchet.
- Tap the bolts out with a rubber mallet if they are stuck.
- Use a flat pry bar 18-inch only if needed to gently separate the strut bracket from the knuckle.
Step 9: Remove the Upper Strut Mount Nuts
- Open the hood by hand.
- Locate the three upper strut mount nuts on the strut tower.
- Use a 14mm socket and 3/8-inch ratchet to remove two upper nuts completely.
- Loosen the third upper nut but leave it threaded on a few turns while supporting the strut by hand.
- Do not loosen the large center shaft nut.
Step 10: Remove the Old Strut Assembly
- Support the strut assembly with one hand.
- Use a 14mm socket and 3/8-inch ratchet to remove the final upper mount nut.
- Lower the strut out through the wheel well by hand.
- Keep fingers clear of pinch points between the strut and fender.
Step 11: Compare the New Strut Assembly
- Place the old and new loaded strut assemblies side by side on the ground.
- Confirm the brake hose bracket, sway bar link bracket, and top mount stud positions match.
- Make sure the left and right struts are not swapped.
- Match brackets before installing.
Step 12: Install the New Strut Assembly
- Guide the new strut assembly up into the strut tower by hand.
- Start the three upper mount nuts by hand to avoid cross-threading.
- Use a 14mm socket and 3/8-inch ratchet to snug the upper nuts lightly.
- Do not fully torque them yet.
Step 13: Attach the Strut to the Steering Knuckle
- Use the floor jack to raise or lower the steering knuckle until the lower strut holes line up.
- Insert the two lower strut bolts by hand.
- Install the lower nuts by hand.
- Use a 22mm socket, 22mm box-end wrench, and torque wrench 20-250 Nm to tighten the lower strut nuts.
- Torque to 240 Nm (177 ft-lbs)
Step 14: Torque the Upper Strut Mount Nuts
- Use a 14mm socket and torque wrench 5-60 Nm to tighten the three upper strut mount nuts.
- Torque to 80 Nm (59 ft-lbs)
- Do not tighten or loosen the center strut shaft nut.
Step 15: Reconnect the Sway Bar Link
- Insert the sway bar link stud into the strut bracket by hand.
- Install the nut by hand.
- Use a 19mm socket and torque wrench 20-250 Nm to tighten the sway bar link nut.
- If the stud spins, hold it with a 19mm box-end wrench while tightening.
- Torque to 74 Nm (55 ft-lbs)
Step 16: Reattach Brake Hose and ABS Wire Brackets
- Position the brake hose bracket on the new strut by hand.
- Use a 12mm socket and torque wrench 5-60 Nm to tighten the brake hose bracket bolt.
- Torque to 29 Nm (21 ft-lbs)
- Position the ABS wire bracket by hand.
- Use a 10mm socket and torque wrench 5-60 Nm if your bracket uses a 10mm bolt head.
- Torque to 8 Nm (71 in-lbs)
- Confirm the hose and wire do not rub the tire or strut.
Step 17: Repeat on the Other Front Side
- Repeat Steps 4 through 16 on the opposite front strut.
- Use the same tools and torque specs.
- Keep parts separated left and right during installation.
Step 18: Reinstall the Front Wheels
- Lift each wheel onto the hub by hand.
- Install lug nuts by hand first to avoid cross-threading.
- Use a 21mm lug nut socket and 1/2-inch ratchet to snug the lug nuts in a star pattern.
- A star pattern means tightening across the wheel, not around in a circle.
Step 19: Lower the Vehicle
- Use the floor jack rated 3-ton minimum to lift the vehicle slightly off the jack stands.
- Remove the jack stands by hand.
- Lower your Highlander slowly to the ground.
Step 20: Torque the Lug Nuts
- Use a 21mm lug nut socket and torque wrench 20-250 Nm to tighten the lug nuts in a star pattern.
- Torque to 103 Nm (76 ft-lbs)
- Recheck each lug nut once more after the first full pass.
✅ After Repair
- ✅ Bounce the front of your Highlander gently by hand. It should settle quickly without repeated bouncing.
- ✅ Turn the steering wheel lock-to-lock while parked and listen for rubbing, clunks, or stretched hoses.
- ✅ Test drive slowly at first over a smooth road.
- ✅ Listen for knocking noises from the strut mount, sway bar link, or lower bolts.
- ✅ Get a professional wheel alignment as soon as possible.
- ✅ Recheck lug nut torque after 25-50 miles.
💰 DIY vs Shop Cost
Shop Cost: $850-$1,400 (parts + labor)
DIY Cost: $300-$650 (parts only)
You Save: $550-$750 by doing it yourself!
Shop labor rates vary but typically run $100-$150/hour. This repair takes a shop approximately 2.5-4 hours.
🎯 Ready to get started?
HowToo makes it easy: same-day/2-day shipping on every part, plus all the tools and specialty tools you need! Check out the parts and tools sections below to add everything to your cart.