

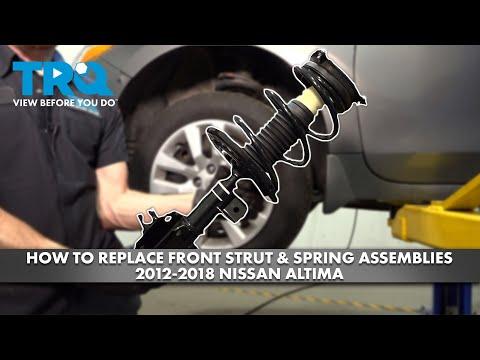







How to Replace Front Struts on a 2017 Nissan Altima
Step-by-step loaded strut assembly guide with tools, torque specs, safety tips, and alignment advice for 2013, 2014, 2015, 2016, 2017, 2018
How to Replace Front Struts on a 2017 Nissan Altima
Step-by-step loaded strut assembly guide with tools, torque specs, safety tips, and alignment advice for 2013, 2014, 2015, 2016, 2017, 2018


🔧 Altima - Front Strut Assembly Replacement
This procedure covers replacing the front strut assemblies on your Altima. For a first-time DIYer, the safest method is to install complete loaded strut assemblies, which come with the spring and upper mount already assembled.
Difficulty Level: Intermediate | Estimated Time: 3-5 hours
⚠️ Safety & Precautions
- ⚠️ Replace front struts in pairs so braking, steering, and ride height stay even.
- ⚠️ Use loaded strut assemblies. A loaded strut is a complete preassembled unit with the coil spring already compressed safely.
- ⚠️ Do not remove the center nut on the old strut. The coil spring is under very high pressure.
- ⚠️ Always support your Altima with jack stands. A floor jack alone is not safe for working.
- ⚠️ Do not stretch the brake hose or ABS wheel speed sensor wire.
- ⚠️ A wheel alignment is required after front strut replacement.
- ⚠️ Battery disconnect is not required for this repair.
🔧 Required Tools
You'll need the following tools for this repair:
- Floor jack (rated 2-ton minimum)
- Jack stands (rated 2-ton minimum)
- Wheel chocks
- 19mm lug nut socket
- 1/2-inch drive breaker bar
- 1/2-inch drive torque wrench
- 3/8-inch drive ratchet
- 10mm socket
- 12mm socket
- 14mm socket
- 21mm socket
- 21mm wrench
- Flathead screwdriver
- Needle-nose pliers
- Rubber mallet
- 18-inch pry bar
- Paint marker
- Penetrating oil
- Safety glasses
- Mechanic gloves
🔩 Required Parts
HowToo sells all the parts you need for this repair:
- Front loaded strut assembly - Left: 1
- Front loaded strut assembly - Right: 1
- Front strut-to-knuckle bolts and nuts - Qty: 4 recommended
- Front upper strut mount nuts - Qty: 6 recommended
📋 Before You Begin
- 🚗 Park your Altima on level ground and set the parking brake.
- 🧱 Place wheel chocks behind the rear wheels.
- 🔩 Loosen the front lug nuts before lifting the vehicle.
- 🖊️ Use a paint marker to mark the strut-to-knuckle position before removal.
- 🧰 Spray penetrating oil on the two lower strut bolts on each side.
- 📐 Schedule a wheel alignment after the repair.
🔨 Step-by-Step Instructions
Follow these steps in order:
Step 1: Loosen the Front Lug Nuts
- Use a 19mm lug nut socket and 1/2-inch drive breaker bar to loosen each front lug nut about half a turn.
- Do not remove the lug nuts yet.
- Loosen them while tires touch ground.
Step 2: Raise and Support the Vehicle
- Use a floor jack to lift the front of your Altima.
- Place jack stands under the front side support points.
- Lower the vehicle slowly onto the jack stands.
- Keep the floor jack lightly touching as backup support.
Step 3: Remove the Front Wheels
- Use a 19mm lug nut socket to remove the loosened lug nuts.
- Remove both front wheels.
- Place the wheels flat under the car as an extra safety backup.
Step 4: Mark the Strut Position
- Use a paint marker to draw alignment marks where the strut bolts to the steering knuckle.
- The steering knuckle is the large metal part behind the wheel hub that the strut attaches to.
- This mark helps you get close enough to drive safely to an alignment shop.
Step 5: Remove the Brake Hose and ABS Wire Brackets
- Use a 12mm socket or 10mm socket with a 3/8-inch drive ratchet to remove the brake hose bracket bolt from the strut.
- Use a flathead screwdriver or needle-nose pliers to release the ABS wire clip from the strut.
- Move the hose and wire aside gently.
- Do not bend, kink, or stretch them.
Step 6: Support the Steering Knuckle
- Use the floor jack under the lower control arm or steering knuckle area.
- Raise it just enough to support the suspension.
- Do not lift your Altima off the jack stands.
Step 7: Remove the Lower Strut Bolts
- Use a 21mm socket and 1/2-inch drive breaker bar to loosen the two lower strut nuts.
- Use a 21mm wrench on the bolt heads if they turn with the nuts.
- Remove both lower nuts.
- Use a rubber mallet to tap the bolts out.
- Use an 18-inch pry bar only for gentle movement if the knuckle is stuck.
- Keep one hand on the knuckle so it does not fall outward.
Step 8: Remove the Upper Strut Mount Nuts
- Open the hood.
- Find the three upper strut mount nuts at the top of the strut tower.
- Use a 14mm socket and 3/8-inch drive ratchet to remove the three outer nuts.
- Support the strut from below while removing the last nut.
- Do not touch the center strut shaft nut.
Step 9: Remove the Old Strut Assembly
- Lower the old strut assembly out through the wheel well by hand.
- Use a rubber mallet only if the strut is lightly stuck.
- Compare the old strut to the new loaded strut before installation.
- Make sure the left and right loaded struts are not swapped.
Step 10: Install the New Loaded Strut Assembly
- Guide the new loaded strut assembly up into the strut tower by hand.
- Start the three upper mount nuts by hand.
- Use a 14mm socket and 3/8-inch drive ratchet to snug the nuts lightly.
- Do not fully tighten them yet.
Step 11: Connect the Strut to the Steering Knuckle
- Use the floor jack to raise or lower the knuckle until the lower bolt holes line up.
- Install the two lower strut bolts by hand.
- Install the lower nuts by hand.
- Use a 21mm socket, 21mm wrench, and 1/2-inch drive torque wrench to tighten the lower fasteners.
- Torque to 165 Nm (122 ft-lbs).
Step 12: Torque the Upper Mount Nuts
- Use a 14mm socket and 1/2-inch drive torque wrench to tighten the three upper strut mount nuts.
- Torque to 44 Nm (33 ft-lbs).
- Do not tighten or loosen the center nut.
Step 13: Reattach the Brake Hose and ABS Wire
- Use a 12mm socket or 10mm socket with a 3/8-inch drive ratchet to reinstall the brake hose bracket bolt.
- Torque small bracket bolts to 10 Nm (89 in-lbs).
- Use needle-nose pliers to clip the ABS wire back into its holder.
- Turn the steering by hand side to side and make sure nothing pulls tight.
Step 14: Repeat on the Other Side
- Repeat Steps 4 through 13 on the opposite front strut.
- Use the same tools and torque specs.
Step 15: Reinstall the Front Wheels
- Place each front wheel back onto the hub by hand.
- Start every lug nut by hand first.
- Use a 19mm lug nut socket to snug the lug nuts in a star pattern.
Step 16: Lower the Vehicle and Torque Lug Nuts
- Use the floor jack to raise the front slightly.
- Remove the jack stands.
- Lower your Altima fully to the ground.
- Use a 19mm lug nut socket and 1/2-inch drive torque wrench to tighten the lug nuts in a star pattern.
- Torque to 113 Nm (83 ft-lbs).
✅ After Repair
- ✅ Turn the steering wheel fully left and right while parked. Listen for rubbing, popping, or clunking.
- ✅ Take a short, slow test drive on a smooth road first.
- ✅ Recheck that the brake hoses and ABS wires are secure on both sides.
- ✅ Get a professional wheel alignment as soon as possible.
- ✅ Recheck lug nut torque after 25-50 miles using a 19mm lug nut socket and 1/2-inch drive torque wrench.
💰 DIY vs Shop Cost
Shop Cost: $850-$1,350 (parts + labor + alignment)
DIY Cost: $300-$650 (parts only, alignment extra)
You Save: $400-$700 by doing it yourself!
Shop labor rates vary but typically run $100-$150/hour. This repair takes a shop approximately 2.5-4 hours.
🎯 Ready to get started?
HowToo makes it easy: same-day/2-day shipping on every part, plus all the tools and specialty tools you need! Check out the parts and tools sections below to add everything to your cart.