

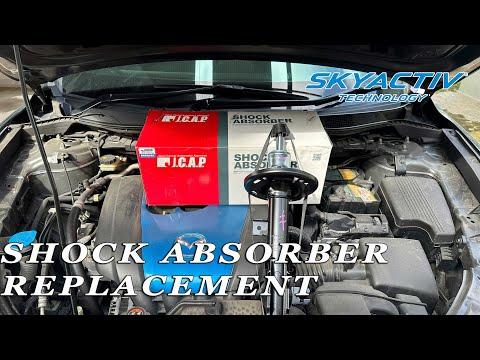





How to Replace Front Struts on a 2017-2025 Mazda CX-5
Step-by-step loaded strut installation with tools, torque specs, and safety tips for 2017, 2018, 2019, 2020, 2021, 2022, 2023, 2024, 2025
How to Replace Front Struts on a 2017-2025 Mazda CX-5
Step-by-step loaded strut installation with tools, torque specs, and safety tips for 2017, 2018, 2019, 2020, 2021, 2022, 2023, 2024, 2025


🔧 CX-5 - Front Strut Replacement
The beginner-friendly move is replacing both front struts with complete loaded assemblies. The FCS Struts Complete Strut and Coil Spring Assemblies shown in the parts list cost about $137.43 per side and include the springs, avoiding dangerous spring transfer work.
This procedure covers the front pair. Your CX-5 uses separate shock absorbers at the rear, so those follow a different procedure. Replace front struts in pairs, then have the wheel alignment checked.
Difficulty Level: Intermediate | Estimated Time: 4-6 hours
⚠️ Safety & Precautions
- ⚠️ Never work beneath a vehicle supported only by a floor jack. Use properly rated jack stands.
- ⚠️ Do not loosen the large center piston-rod nut on an assembled strut. The coil spring stores enough energy to cause severe injury.
- ⚠️ Complete assemblies are strongly recommended for a first-time repair. Compressing and transferring springs requires professional equipment.
- ⚠️ Disconnect and secure the ABS wheel-speed sensor wiring before moving the steering knuckle. Mazda warns that allowing it to stretch can damage the harness. mcx5.org
- ⚠️ Support the steering knuckle after separating it from the strut. Letting it hang can strain the brake hose, ABS wiring, and drive axle.
- ⚠️ Do not allow the brake caliper to hang from its hose.
- ⚠️ A battery disconnect is not required for complete front-strut replacement.
🔧 Required Tools
You'll need the following tools for this repair:
- 21mm wheel-nut socket
- 14mm deep socket
- 17mm combination wrench
- 21mm socket
- 21mm combination wrench
- 6mm hex-bit socket
- 3/8-inch drive ratchet
- 1/2-inch drive breaker bar
- 1/2-inch drive torque wrench rated to 250 Nm
- 150mm socket extension
- Flat-blade trim tool
- Needle-nose locking pliers
- Rubber mallet
- Paint marker
- Hydraulic floor jack rated 2-ton minimum
- Jack stands rated 2-ton minimum
- Wheel chocks
- Small support jack rated 1-ton minimum
- Mechanic’s gloves
- Safety glasses
🔩 Required Parts
HowToo sells all the parts you need for this repair:
- FCS Struts complete front-left strut and coil spring assembly - Qty: 1
- FCS Struts complete front-right strut and coil spring assembly - Qty: 1
- Front sway-bar link lock nuts - Qty: 2 if not supplied
- Front strut-to-knuckle locking nuts - Qty: 4 recommended
- Penetrating oil - Qty: 1 can
Loaded struts keep the exciting spring energy inside.
📋 Before You Begin
- Park your CX-5 on firm, level ground. Shift to Park and apply the parking brake.
- Center the steering wheel and place wheel chocks securely behind both rear tires.
- Confirm that the replacement assemblies are marked left and right. Their hose brackets must face the correct direction.
- Use the 21mm wheel-nut socket and breaker bar to loosen each front wheel nut about one-quarter turn.
- Do not remove the wheel nuts until the vehicle is safely supported by jack stands.
- No infotainment menu, electronic parking-brake service mode, or scan-tool command is needed.
- Plan for a professional alignment immediately after the repair. Mazda’s procedure calls for inspecting and adjusting alignment after strut installation. mcx5.org
🔨 Step-by-Step Instructions
Follow these steps in order:
Step 1: Raise and support the front
- Place the hydraulic floor jack under the approved front-center lifting point and raise your CX-5.
- Position the two jack stands beneath the reinforced side support points.
- Lower the vehicle gently onto the stands. Give it a firm stability check before continuing.
- Keep the floor jack lightly touching the front lifting point as a backup, without carrying the vehicle’s weight.
Step 2: Remove both front wheels
- Use the 21mm wheel-nut socket and ratchet to remove the five nuts from each front wheel.
- Remove both wheels and slide one beneath each reinforced rocker area as an additional safety measure.
Step 3: Record the original strut position
- Use the paint marker to draw reference lines across the steering knuckle and old strut flange.
- These marks provide an installation reference, but they do not replace the final alignment.
Step 4: Disconnect the ABS wiring and brake-hose bracket
- Use the flat-blade trim tool to release the ABS wheel-speed sensor wire from every clip attached to the strut and steering knuckle.
- Disconnect the axle-side ABS harness connector where accessible, then secure the loose harness away from the work area.
- Use the needle-nose locking pliers to withdraw the brake-hose retaining clip without crushing it.
- Lift the brake hose from its strut bracket. Do not open the hydraulic brake connection.
Step 5: Disconnect the sway-bar link
- Place the small support jack beneath the lower control arm and lift only enough to support the suspension.
- Use the 17mm combination wrench to loosen the upper sway-bar link nut.
- If the stud spins, hold its center with the 6mm hex-bit socket while turning the nut with the 17mm wrench.
- Remove the link from the strut bracket and move it aside without pulling its rubber boot.
- Do not damage the boot. A torn boot quickly ruins the link joint.
Step 6: Support the steering knuckle
- Position the small support jack directly under the steering knuckle or lower control-arm area.
- Raise it until the knuckle is supported but the vehicle remains fully seated on both jack stands.
- Secure the knuckle so it cannot fall outward when the lower strut bolts are removed.
Step 7: Remove the two lower strut bolts
- Use the 21mm combination wrench to hold each bolt head.
- Use the 21mm socket and breaker bar to loosen both strut-to-knuckle nuts.
- Remove the nuts, then withdraw the bolts while controlling the knuckle with the support jack.
- Tap stubborn bolts with the rubber mallet. Do not strike the threads with a steel hammer.
- Move the knuckle slightly outward and secure it. Never let it hang from the brake hose or axle.
Step 8: Remove the upper strut-mount nuts
- Open the hood and locate the three small nuts surrounding the strut mount.
- Support the complete strut from beneath with one hand.
- Use the 14mm deep socket, extension, and ratchet to remove the three upper mounting nuts.
- Do not loosen the large center nut.
- Lower and guide the complete strut assembly out through the wheel opening.
Step 9: Compare the replacement assembly
- Place the old and new assemblies beside one another without dismantling either unit.
- Confirm that the overall height, lower bolt holes, upper studs, spring position, and hose brackets match.
- Verify that the part marked left is being installed on the driver side and the part marked right on the passenger side.
- Do not install an assembly with damaged threads, a displaced spring, or a mount that turns roughly.
Step 10: Install the new complete strut
- Guide the complete strut through the wheel opening and insert its three upper studs into the body.
- Install all three upper nuts by hand. Do not use an impact wrench.
- Use the 14mm deep socket and torque wrench to tighten the upper nuts evenly to 49-59 Nm (36-44 ft-lbs).
Step 11: Attach the steering knuckle
- Use the small support jack to align the knuckle with the lower strut flange.
- On the right side, insert the two bolts from the front toward the rear.
- On the left side, insert the two bolts from the rear toward the front. Mazda specifies these installation directions. mcx5.org)
- Thread both nuts by hand before tightening either one.
- Use the 21mm wrench, 21mm socket, and high-capacity torque wrench to tighten both nuts to 222-245 Nm (164-181 ft-lbs). mazbook.ru)
Step 12: Reconnect the sway-bar link
- Adjust the small support jack until the sway-bar link stud enters the strut bracket without force.
- Install the lock nut by hand.
- Hold the stud with the 6mm hex-bit socket if it spins.
- Use the 17mm wrench and torque wrench to tighten the nut to 45-55 Nm (33-41 ft-lbs).
Step 13: Reattach the brake hose and ABS wiring
- Seat the brake hose fully inside its strut bracket.
- Install the retaining clip with the needle-nose locking pliers until it locks into its groove.
- Reconnect the ABS harness connector and press every wiring retainer back into its original location.
- Turn the steering gently from side to side and confirm that neither the hose nor wire stretches, twists, or contacts the tire area.
Step 14: Repeat the procedure on the opposite side
- Repeat Steps 3 through 13 using the opposite complete strut assembly.
- Keep left- and right-side hardware separated so each bolt returns to its correct location.
Step 15: Reinstall the wheels
- Clean loose rust and dirt from the wheel-to-hub contact surfaces with a dry cloth.
- Install each wheel and start all five wheel nuts by hand.
- Use the 21mm wheel-nut socket and ratchet to tighten the nuts lightly in a star pattern.
- Raise your CX-5 with the hydraulic floor jack, remove the jack stands, and lower it until the tires touch the ground.
- Use the 21mm wheel-nut socket and torque wrench to tighten the wheel nuts in a star pattern to 108-147 Nm (80-108 ft-lbs).
✅ After Repair
- ✅ Check that every ABS-wire clip and brake-hose retainer is installed before moving your CX-5.
- ✅ Start the engine and verify that the ABS and stability-control warning lights switch off normally.
- ✅ Turn the steering fully left and right while stationary. Stop if you hear binding, spring popping, or hose contact.
- ✅ Drive slowly around the parking area and listen for clunks before entering normal traffic.
- ✅ Avoid high speeds and hard cornering until a professional wheel alignment is completed.
- ✅ After approximately 80-160 km, recheck wheel-nut torque with the 21mm socket and torque wrench.
- ✅ If the steering wheel sits crooked, the vehicle pulls, or an ABS warning remains on, stop driving and inspect the work.
💰 DIY vs Shop Cost
Shop Cost: Approximately ₹45,000-₹75,000 for two front complete assemblies, labor, and alignment
DIY Cost: Approximately ₹25,000-₹40,000 for parts and alignment, before international freight or import charges
You Save: Approximately ₹15,000-₹35,000 by doing it yourself!
Local labor and imported-part pricing around Sonīpat vary considerably. This repair normally occupies a workshop bay for approximately 2-3 hours, plus alignment time.
🎯 Ready to get started?
HowToo has already opened the matched struts, mounts, boots, links, and installation hardware for your CX-5. Complete left and right assemblies are the smart first-time choice because they eliminate spring-compressor work and keep the job manageable.