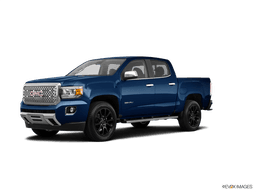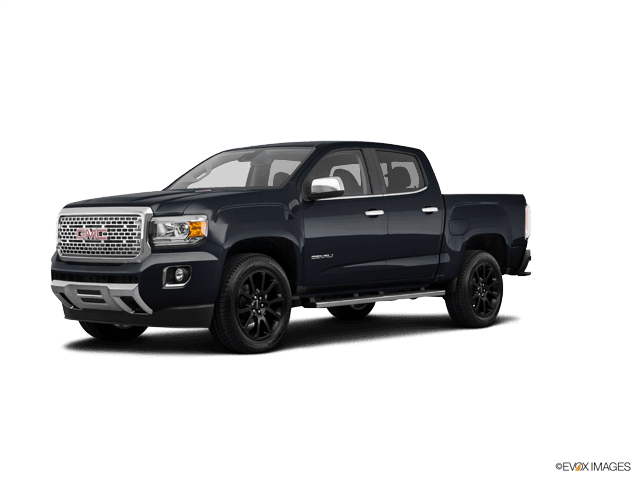








How to Replace Front Struts on a 2015-2022 GMC Canyon (Trim: Denali)
Step-by-step complete strut assembly installation with tools, safety tips, and torque guidance for 2015, 2016, 2017, 2018, 2019, 2020
How to Replace Front Struts on a 2015-2022 GMC Canyon (Trim: Denali)
Step-by-step complete strut assembly installation with tools, safety tips, and torque guidance for 2015, 2016, 2017, 2018, 2019, 2020


🔧 Canyon - Front Strut Replacement
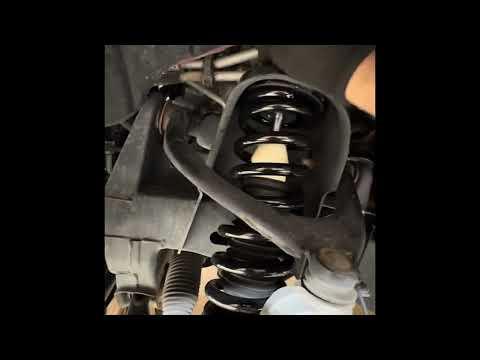
Replace the front struts as complete spring-and-strut assemblies, one on each side. This is the safest beginner route because the coil spring arrives installed and contained. Replace both sides together so the Canyon handles evenly.
Difficulty Level: Advanced | Estimated Time: 4-6 hours
Assumption: These instructions cover a stock-height front suspension using complete replacement assemblies. Fastener sizes can vary slightly by supplier.
⚠️ Safety & Precautions
- ⚠️ Never work beneath the Canyon while it is supported only by a floor jack.
- ⚠️ The coil spring stores enough energy to cause severe injury. Do not loosen the center shaft nut.
- ⚠️ Use a complete assembly unless an experienced technician with a wall-mounted spring compressor transfers the spring.
- ⚠️ Support the steering knuckle so the brake hose and wheel-speed sensor wire cannot be stretched.
- ⚠️ Do not let the brake caliper hang from its hose.
- ⚠️ Replace both front assemblies, then obtain a four-wheel alignment.
- ⚠️ A battery disconnect is not required for this repair.
🔧 Required Tools
You'll need the following tools for this repair:
- 3-ton floor jack
- 3-ton jack stands
- Wheel chocks
- 1/2-inch drive breaker bar
- 1/2-inch drive torque wrench rated to 200 ft-lbs
- 3/8-inch drive ratchet
- 13mm socket
- 15mm socket
- 18mm socket
- 21mm deep socket
- 22mm socket
- 15mm combination wrench
- 18mm combination wrench
- 21mm combination wrench
- 6-inch socket extension
- Ball-joint separator (specialty)
- Brass or dead-blow hammer
- Medium pry bar
- Hydraulic support jack
- Paint marker
- Penetrating oil
- Medium-strength threadlocker
- Mechanic gloves
- Safety glasses
🔩 Required Parts
HowToo sells all the parts you need for this repair:
- Complete front strut and coil spring assemblies - Qty: 2, replace in pairs
- Upper strut mounting nuts - Qty: 6, if not supplied
- Lower strut mounting hardware - Qty: 2 sets, replace if damaged or specified as single-use
- Upper ball-joint nuts - Qty: 2, if removed and specified as single-use
- Front sway-bar link nuts - Qty: 2, if removed and damaged
My pick: Use the complete assembly shown as Orion's pick in the parts list, after the catalog confirms the Canyon's drive type. A bare strut requires transferring the loaded spring, and that isn't beginner territory. Springs don't give second chances.
📋 Before You Begin
- Park on firm, level concrete. Shift into Park and apply the parking brake.
- Place wheel chocks tightly behind both rear tires.
- Measure from the center of each front wheel to the fender edge and record both measurements.
- Spray penetrating oil on the lower strut bolt, sway-bar link nut and upper ball-joint nut.
- Open the hood and locate the three upper mounting nuts for each assembly.
- Do not touch the large center nut in the middle of the upper mount.
- No infotainment service mode, scan tool command or battery reset is required.
🔨 Step-by-Step Instructions
Follow these steps in order:
Step 1: Loosen the Front Wheel Nuts
- Use a 22mm socket and breaker bar to loosen each front wheel nut about one-quarter turn.
- Do not remove the nuts while the tires are supporting the Canyon.
Step 2: Raise and Support the Canyon
- Use the 3-ton floor jack beneath the approved front-center lifting point.
- Position the 3-ton jack stands beneath the reinforced frame lifting points.
- Lower the Canyon onto the stands and gently shake it to confirm stability.
- Leave the floor jack touching the lifting point without carrying the vehicle's weight.
Step 3: Remove the Front Wheels
- Use the 22mm socket to remove the wheel nuts.
- Remove both front wheels and slide one beneath each frame rail as an extra safety measure.
Step 4: Support the Steering Knuckle
- Place the hydraulic support jack beneath the lower control arm near the ball joint.
- Raise it only enough to support the suspension. Do not lift the Canyon off the jack stand.
- Check that the brake hose and wheel-speed sensor wire have enough slack.
Step 5: Disconnect Attached Brackets
- Use a 13mm or 15mm socket, as fitted, to remove the brake-hose and wheel-speed sensor brackets from the suspension assembly.
- Move the brackets aside without twisting the brake hose.
- Use a 15mm or 18mm socket and matching wrench, as fitted, to disconnect the sway-bar end link if it prevents the lower control arm from dropping.
- Photograph every bracket before removal.
Step 6: Separate the Upper Ball Joint
- Use an 18mm or 21mm socket, as fitted, to loosen and remove the upper ball-joint nut.
- Use the ball-joint separator between the upper control arm and steering knuckle.
- Do not hammer directly on the ball-joint stud or damage its threads.
- Guide the upper control arm away from the knuckle while supporting the knuckle with the jack.
Step 7: Remove the Lower Strut Fastener
- Mark the bolt orientation with the paint marker.
- Use a 21mm or 22mm socket with the breaker bar and matching wrench to remove the lower strut bolt and nut.
- Adjust the support jack slightly to remove tension from the bolt.
- Use the brass or dead-blow hammer to tap the bolt out if necessary.
Step 8: Remove the Upper Mounting Nuts
- Support the assembly with one hand or have a helper hold it from below.
- Use a 13mm or 15mm socket, as fitted, to remove the three upper mounting nuts.
- Do not loosen the large center shaft nut.
- Lower the complete assembly through the wheel opening.
Step 9: Compare the Replacement Assembly
- Place the old and new assemblies side by side.
- Confirm the upper stud pattern, lower mounting sleeve, spring orientation and bracket locations match.
- Confirm the new assembly is for the same side if it is marked left or right.
- Do not install an assembly that is visibly longer, differently clocked or missing required brackets.
Step 10: Install the New Assembly
- Guide the new assembly into the upper mounting opening.
- Install the three upper nuts by hand. Do not fully tighten them yet.
- Use the medium pry bar only for gentle alignment. Do not pry against the brake hose or spring.
- Align the lower mount and insert the lower bolt in its original direction.
- Install the lower nut by hand.
Step 11: Reconnect the Upper Ball Joint
- Use the hydraulic support jack to raise the lower control arm gradually.
- Guide the upper ball-joint stud into the steering knuckle.
- Install the nut by hand, then tighten it with the appropriate 18mm or 21mm socket.
- Do not use an impact wrench for final tightening.
Step 12: Reconnect the Sway Bar and Brackets
- Use the appropriate 15mm or 18mm socket and matching wrench to reconnect the sway-bar end link.
- Use the appropriate 13mm or 15mm socket to reinstall the brake-hose and wheel-speed sensor brackets.
- Verify the hoses and wires follow their original routing and cannot rub the tire or spring.
Step 13: Tighten the Suspension Fasteners
- Use the torque wrench and tighten every fastener to the specification supplied with the replacement assembly or the current GMC service information.
- Do not guess torque values. The lower bolt and ball-joint specifications can differ with suspension and drive configuration.
- Tighten the three upper mounting nuts evenly in stages. Never apply torque to the center shaft nut unless the assembly manufacturer specifically instructs you to do so.
- Apply medium-strength threadlocker only where the replacement-part instructions permit it.
Step 14: Repeat on the Opposite Side
- Repeat Steps 4 through 13 on the other front corner.
- Keep left-side hardware separate from right-side hardware.
Step 15: Reinstall the Wheels
- Install both wheels and thread every wheel nut by hand.
- Use the 22mm socket to snug the nuts in a star pattern.
- Raise the Canyon with the 3-ton floor jack, remove the jack stands and lower it fully.
- Use the torque wrench and 22mm socket to tighten the wheel nuts in a star pattern to 190 Nm (140 ft-lbs).
✅ After Repair
- Push down firmly on each front corner and verify the suspension rises once without continued bouncing.
- Turn the steering wheel slowly from lock to lock. Listen for binding, popping or spring movement.
- Check that both brake hoses and wheel-speed sensor wires remain clear at full steering lock.
- Compare the new ride-height measurements with the measurements recorded before repair.
- Drive slowly around the block. Stop immediately if the steering pulls sharply, a warning light appears or knocking develops.
- Arrange a four-wheel alignment before normal or highway driving.
- Recheck the wheel-nut torque to 190 Nm (140 ft-lbs) after approximately 80-160 km.
💰 DIY vs Shop Cost
Shop Cost: $750-$1,300 USD equivalent, including parts, labor and alignment
DIY Cost: $250-$550 USD equivalent, including complete assemblies and alignment
You Save: Approximately $400-$750 USD equivalent by doing it yourself!
Local labor rates in Sonīpat vary considerably. A professional workshop typically needs approximately 3-5 hours plus alignment time.
🎯 Ready to get started?
HowToo makes it easy: same-day/2-day shipping on every part, plus all the tools and specialty tools you need! Check out the parts and tools sections below to add everything to your cart.