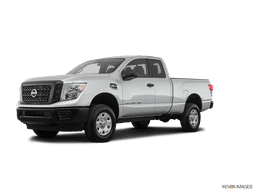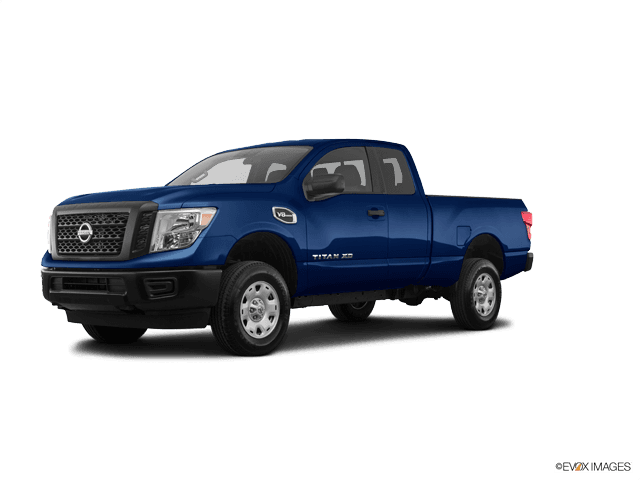








How to Replace Front Struts on a 2004-2024 Nissan TITAN
Step-by-step loaded strut assembly guide with tools, parts, torque specs, and safety tips for 2004, 2005, 2006, 2007, 2008, 2009, 2010, 2011, 2012, 2013, 2014, 2015, 2017, 2018, 2019, 2020, 2021, 2022, 2023, 2024
How to Replace Front Struts on a 2004-2024 Nissan TITAN
Step-by-step loaded strut assembly guide with tools, parts, torque specs, and safety tips for 2004, 2005, 2006, 2007, 2008, 2009, 2010, 2011, 2012, 2013, 2014, 2015, 2017, 2018, 2019, 2020, 2021, 2022, 2023, 2024


🔧 TITAN - Front Strut Assembly Replacement
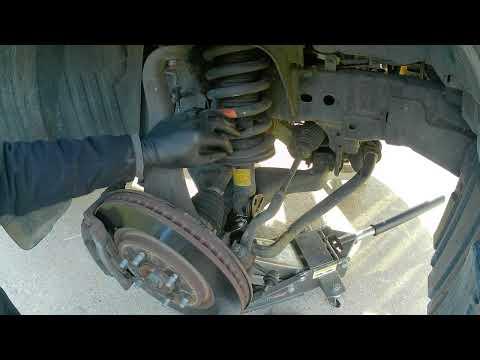
This job replaces the front strut assemblies on your TITAN. The front strut assembly is the coil spring and shock unit that supports the front of the truck and controls bouncing over bumps.
Difficulty Level: Intermediate | Estimated Time: 2-4 hours
⚠️ Safety & Precautions
- ⚠️ The coil spring is under very high pressure. For a beginner, replace the complete loaded strut assembly instead of disassembling the spring.
- ⚠️ Never remove the center strut shaft nut unless the spring is safely compressed with a proper spring compressor.
- ⚠️ Support your TITAN with jack stands. Never work under a truck supported only by a floor jack.
- ⚠️ Replace front struts in pairs so braking, steering, and ride height stay even.
- ⚠️ A wheel alignment is required after replacement.
- ⚠️ Battery disconnect is not required for this repair.
🔧 Required Tools
You'll need the following tools for this repair:
- Floor jack rated 3-ton minimum
- Jack stands rated 3-ton minimum
- Wheel chocks
- 21mm lug nut socket
- 1/2-inch drive breaker bar
- 1/2-inch drive ratchet
- Torque wrench rated to 200 ft-lbs
- 14mm socket
- 17mm socket
- 19mm socket
- 21mm socket
- 22mm socket
- 14mm combination wrench
- 17mm combination wrench
- 19mm combination wrench
- 21mm combination wrench
- 22mm combination wrench
- Trim clip removal tool
- Flat-head screwdriver
- Pry bar 18-inch
- Rubber mallet
- Paint marker
- Penetrating oil
- Safety glasses
- Mechanic gloves
🔩 Required Parts
HowToo sells all the parts you need for this repair:
- Front loaded strut assembly - Left: 1, Right: 1
- Front strut lower mounting bolt and nut set - Qty: 2
- Front strut upper mounting nut set - Qty: 6
- Front sway bar link nut set - Qty: 2
📋 Before You Begin
- Park your TITAN on level ground and set the parking brake.
- Place wheel chocks behind the rear wheels.
- Spray penetrating oil on the lower strut bolts and sway bar link nuts before starting.
- Use loaded strut assemblies. A loaded strut comes preassembled with the spring, mount, and shock already together.
- Work on one side at a time so the other side can be used as a visual reference.
🔨 Step-by-Step Instructions
Follow these steps in order:
Step 1: Loosen the Front Wheel Lug Nuts
- Use a 21mm lug nut socket and 1/2-inch drive breaker bar to loosen the front lug nuts about one turn.
- Do not remove the lug nuts yet.
- Loosen wheels before lifting.
Step 2: Raise and Support the Front of the Truck
- Use the floor jack rated 3-ton minimum to lift the front of your TITAN at the front frame crossmember.
- Place jack stands rated 3-ton minimum under the frame rails.
- Lower the truck gently onto the jack stands.
- Keep the floor jack nearby to support the lower control arm later.
Step 3: Remove the Front Wheel
- Use the 21mm lug nut socket and 1/2-inch drive ratchet to remove the lug nuts.
- Remove the wheel and set it flat under the side of the truck as an added safety backup.
Step 4: Support the Lower Control Arm
- Place the floor jack rated 3-ton minimum under the lower control arm near the ball joint area.
- Raise the jack slightly until it just supports the arm.
- The lower control arm is the large metal arm that holds the bottom of the wheel hub in place.
Step 5: Disconnect the Sway Bar Link from the Lower Control Arm
- Use a 17mm socket and 17mm combination wrench to remove the sway bar link nut from the lower control arm.
- The sway bar link is the short vertical link that connects the sway bar to the suspension arm.
- Move the link aside by hand.
- During installation, tighten the sway bar link nut to Torque to 98 Nm (72 ft-lbs).
Step 6: Mark the Strut Position
- Use a paint marker to mark the position of the lower strut mount and bolt before removal.
- This helps you install the new strut in the same orientation.
- Marks help alignment stay close.
Step 7: Remove the Lower Strut Mounting Bolt
- Use a 22mm socket, 22mm combination wrench, and 1/2-inch drive breaker bar to loosen the lower strut bolt and nut.
- Remove the nut, then slide the bolt out.
- If the bolt is tight, use a rubber mallet to tap it out gently.
- Do not use a steel hammer directly on the bolt threads.
- During installation, tighten the lower strut mounting bolt to Torque to 155 Nm (114 ft-lbs).
Step 8: Remove the Upper Strut Mount Nuts
- Open the hood.
- Locate the three upper strut mount nuts at the top of the strut tower.
- Use a 14mm socket and 1/2-inch drive ratchet to remove the three upper nuts.
- Hold the strut with one hand while removing the final nut so it does not drop.
- Do not remove the center shaft nut.
- During installation, tighten the upper strut mount nuts to Torque to 44 Nm (32 ft-lbs).
Step 9: Remove the Strut Assembly
- Slowly lower the floor jack rated 3-ton minimum under the lower control arm just enough to create space.
- Use a pry bar 18-inch only if needed to gently guide the lower strut mount free.
- Pull the strut assembly out through the wheel well.
- Watch the brake hose and ABS wire so they are not stretched.
Step 10: Install the New Loaded Strut Assembly
- Place the new loaded strut assembly into the wheel well.
- Guide the upper studs through the strut tower holes by hand.
- Install the new upper mounting nuts finger-tight first.
- Use a 14mm socket and torque wrench rated to 200 ft-lbs to tighten the upper nuts to Torque to 44 Nm (32 ft-lbs).
Step 11: Install the Lower Strut Bolt
- Use the floor jack rated 3-ton minimum to raise or lower the lower control arm until the lower strut holes line up.
- Slide the lower strut bolt through the mount by hand.
- Install the new nut.
- Use a 22mm socket, 22mm combination wrench, and torque wrench rated to 200 ft-lbs to tighten the lower strut bolt to Torque to 155 Nm (114 ft-lbs).
Step 12: Reconnect the Sway Bar Link
- Move the sway bar link back into the lower control arm bracket.
- Install the new nut by hand.
- Use a 17mm socket, 17mm combination wrench, and torque wrench rated to 200 ft-lbs to tighten the nut to Torque to 98 Nm (72 ft-lbs).
Step 13: Reinstall the Wheel
- Put the wheel back on the hub.
- Install the lug nuts by hand to avoid cross-threading.
- Use a 21mm lug nut socket and 1/2-inch drive ratchet to snug the lug nuts in a star pattern.
Step 14: Repeat on the Other Side
- Repeat Steps 3 through 13 on the opposite front strut assembly.
- Use the same tools and torque specs.
- Replace both front struts as a pair.
Step 15: Lower the Truck and Torque the Wheels
- Use the floor jack rated 3-ton minimum to lift the truck slightly off the jack stands.
- Remove the jack stands rated 3-ton minimum.
- Lower your TITAN to the ground.
- Use the 21mm lug nut socket and torque wrench rated to 200 ft-lbs to tighten the lug nuts in a star pattern to Torque to 133 Nm (98 ft-lbs).
✅ After Repair
- ✅ Bounce each front corner of your TITAN by hand. It should settle quickly without repeated bouncing.
- ✅ Turn the steering wheel lock-to-lock and check that brake hoses and ABS wires are not stretched or rubbing.
- ✅ Road test slowly first. Listen for clunks, rattles, or pulling.
- ✅ Schedule a front wheel alignment as soon as possible.
- ✅ Recheck lug nut torque after 25-50 miles.
💰 DIY vs Shop Cost
Shop Cost: $750-$1,250 (parts + labor)
DIY Cost: $350-$700 (parts only)
You Save: $400-$550 by doing it yourself!
Shop labor rates vary but typically run $100-$150/hour. This repair takes a shop approximately 2-3 hours.
🎯 Ready to get started?
HowToo makes it easy: same-day/2-day shipping on every part, plus all the tools and specialty tools you need! Check out the parts and tools sections below to add everything to your cart.