

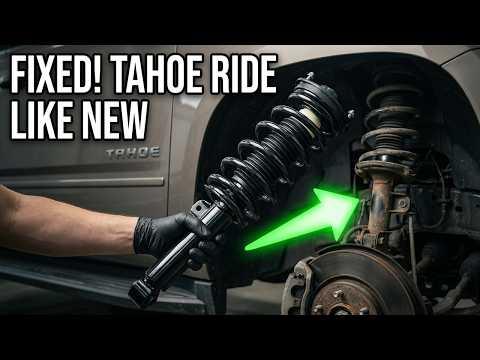





How to Replace Front Strut Assemblies on a 2015-2020 Chevrolet Tahoe (Trim: LT)
Step-by-step loaded strut installation with tools, torque specs, and safety tips for 2015, 2016, 2017, 2018, 2019, 2020
How to Replace Front Strut Assemblies on a 2015-2020 Chevrolet Tahoe (Trim: LT)
Step-by-step loaded strut installation with tools, torque specs, and safety tips for 2015, 2016, 2017, 2018, 2019, 2020


🔧 Tahoe - Front Strut Assembly Replacement
Your Tahoe uses front coil-over shock modules, commonly called struts. For a beginner, replacing each complete preassembled unit is much safer than transferring the coil spring with a spring compressor.
Difficulty Level: Intermediate | Estimated Time: 3-5 hours
Assumption: This procedure covers both front assemblies using complete loaded struts.
⚠️ Safety & Precautions
- ⚠️ The coil spring stores enough energy to cause severe injury. Do not remove the center shaft nut from the strut mount.
- ⚠️ Never work under your Tahoe when it is supported only by a floor jack.
- ⚠️ Replace both front struts together so damping and ride height remain balanced.
- ⚠️ Support the lower control arm before removing the strut fasteners.
- ⚠️ Keep the brake hose and ABS wheel-speed sensor wire from being stretched.
- ⚠️ Battery disconnection is not required.
🔧 Required Tools
You'll need the following tools for this repair:
- 22mm impact-rated socket
- 15mm deep socket
- 18mm socket
- 18mm combination wrench
- 21mm socket
- 1/2-inch-drive breaker bar
- 1/2-inch-drive ratchet
- 3/8-inch-drive ratchet
- 1/2-inch-drive torque wrench rated 20-150 ft-lbs
- 150mm socket extension
- Trim-clip removal tool
- Rubber mallet
- Medium pry bar
- Hydraulic floor jack rated 3-ton minimum
- Jack stands rated 3-ton minimum
- Wheel chocks
- Paint marker
- Mechanic gloves
- Safety glasses
🔩 Required Parts
HowToo sells all the parts you need for this repair:
- Front loaded strut assemblies - Qty: 2 - Replace in pairs
- Front strut upper mounting nuts - Qty: 6
- Front strut lower mounting bolts and nuts - Qty: 4
- Penetrating lubricant - Qty: 1 can
📋 Before You Begin
- 🅿️ Park your Tahoe on firm, level ground. Shift into Park and apply the parking brake.
- 🛞 Chock both rear wheels before lifting the front.
- 📏 Measure from the center of each front wheel to the lower edge of the fender. Save the measurements for the final ride-height check.
- 🔩 Verify that each loaded strut includes the spring, upper mount, bearing, bump stop, and dust boot.
- 🧭 Arrange for a wheel-alignment inspection after replacement, especially if the steering wheel becomes off-center.
🔨 Step-by-Step Instructions
Follow these steps in order:
Step 1: Loosen the Front Wheel Nuts
- Use a 22mm impact-rated socket and 1/2-inch-drive breaker bar to loosen each front wheel nut about one-half turn.
- Do not remove the nuts while your Tahoe is still on the ground.
Step 2: Raise and Support the Front
- Position the 3-ton floor jack beneath the front frame crossmember and raise your Tahoe.
- Place the 3-ton jack stands beneath the left and right frame rails.
- Lower the vehicle onto the stands, then gently shake it to verify stability.
- Keep the floor jack lightly touching the crossmember as backup support.
Step 3: Remove the Front Wheels
- Use the 22mm impact-rated socket and 1/2-inch-drive ratchet to remove the wheel nuts.
- Remove both front wheels and slide them away from the work area.
Step 4: Inspect and Prepare the Fasteners
- Use the trim-clip removal tool to release any brake-hose or ABS-wire retainers that restrict movement near the strut.
- Apply penetrating lubricant to the two lower strut bolts and three upper mounting nuts.
- Use the paint marker to mark the installed orientation of the upper mount and lower bracket.
- Do not loosen the large center nut on top of the strut.
Step 5: Support the Lower Control Arm
- Place the 3-ton floor jack beneath the lower control arm, close to the ball-joint area.
- Raise the jack only until it supports the arm. Do not lift your Tahoe off the jack stand.
- The lower control arm is the heavy metal arm connecting the wheel assembly to the frame.
Step 6: Remove the Lower Strut Bolts
- Use an 18mm socket, 18mm combination wrench, and 1/2-inch-drive breaker bar to loosen the two lower strut fasteners.
- Remove both nuts, but leave the bolts loosely installed until the upper nuts have been loosened.
- If a bolt sticks, tap its threaded end gently with the rubber mallet. Do not damage the threads.
Step 7: Remove the Upper Mounting Nuts
- Open the hood and locate the three upper strut mounting nuts above the wheel well.
- Use a 15mm deep socket, 150mm extension, and 3/8-inch-drive ratchet to loosen the three nuts.
- Remove two nuts. Leave the easiest-to-reach nut installed by several threads to hold the assembly.
- Do not touch the center shaft nut.
Step 8: Remove the Old Strut Assembly
- Use the 18mm socket and rubber mallet as needed to withdraw the two lower bolts.
- Use the 3-ton floor jack to lower the control arm slowly, watching the brake hose and ABS wire.
- Support the strut with one hand and use the 15mm deep socket to remove the final upper nut.
- Guide the complete assembly downward and out through the wheel opening.
- Use the medium pry bar only for gentle clearance at the lower mount. Do not pry against the brake hose, axle boot, or ABS wire.
Step 9: Compare the New Assembly
- Place the old and new assemblies beside each other.
- Confirm that the upper studs, lower mounting holes, spring position, and hose brackets match.
- Use the paint marker to copy the old assembly’s orientation onto the new one if needed.
- Match every bracket before installation.
Step 10: Install the New Strut Assembly
- Guide the new assembly into the wheel well and insert its three upper studs through the body mounting holes.
- Install the three new upper nuts by hand. Do not tighten them fully yet.
- Use the 3-ton floor jack to raise the lower control arm until the lower strut holes align.
- Use the rubber mallet to install the two lower bolts without damaging their threads.
- Install the new lower nuts by hand.
Step 11: Tighten the Strut Fasteners
- Use an 18mm socket, 18mm combination wrench, and 1/2-inch-drive torque wrench to tighten the lower strut bolts to 80 Nm (59 ft-lbs).
- Use a 15mm deep socket, 150mm extension, and 1/2-inch-drive torque wrench to tighten the three upper mounting nuts evenly to 50 Nm (37 ft-lbs).
- Do not tighten or adjust the center shaft nut supplied on the loaded strut.
Step 12: Restore the Hose and Wire Routing
- Use the trim-clip removal tool by hand to reinstall all brake-hose and ABS-wire retainers in their original positions.
- Turn the steering from side to side by hand and verify that nothing becomes tight, twisted, or pinched.
Step 13: Replace the Opposite Strut
- Repeat Steps 4 through 12 on the other side using the same listed tools and torque specifications.
- Replace both assemblies even if only one old strut was leaking.
Step 14: Reinstall the Wheels
- Install each wheel and start all wheel nuts by hand.
- Use the 22mm impact-rated socket and 1/2-inch-drive ratchet to snug the nuts in a crossing pattern.
- Use the 3-ton floor jack to lift your Tahoe, remove the jack stands, and lower it until the tires touch the ground.
- Use the 22mm impact-rated socket and 1/2-inch-drive torque wrench to tighten the wheel nuts in a crossing pattern to 190 Nm (140 ft-lbs).
✅ After Repair
- ✅ Bounce each front corner gently. Listen for clunks and verify that the struts remain firmly mounted.
- ✅ Start the engine and turn the steering wheel fully left and right. Check that the ABS wires and brake hoses do not rub or stretch.
- ✅ Drive slowly over a smooth route first. Stop immediately if you hear heavy knocking or notice unstable steering.
- ✅ Recheck the wheel-nut torque at 190 Nm (140 ft-lbs) after approximately 80 km.
- ✅ Compare the final wheel-center-to-fender measurements with the original measurements. A small increase is normal with new assemblies.
- ✅ Have the front alignment inspected if the steering wheel is off-center, your Tahoe pulls, or the tire angles appear uneven.
💰 DIY vs Shop Cost
Shop Cost: ₹75,000-₹145,000 (parts + labor)
DIY Cost: ₹40,000-₹90,000 (parts only)
You Save: ₹25,000-₹55,000 by doing it yourself!
Local labor and imported-part prices vary significantly. This repair takes a shop approximately 2.5-4 hours.
🎯 Ready to get started?
HowToo makes it easy: same-day/2-day shipping on every part, plus all the tools and specialty tools you need! Check out the parts and tools sections below to add everything to your cart.