

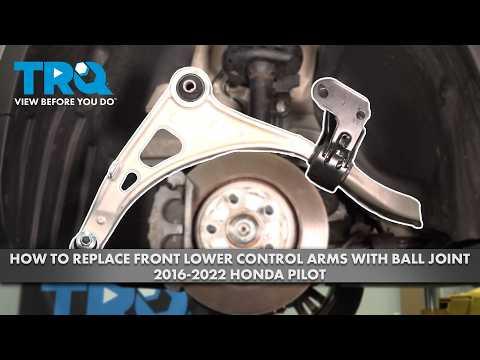







How to Replace Front Lower Control Arms on a 2016-2022 Honda Pilot
Step-by-step DIY guide with required tools, parts, torque specs, safety tips, and alignment advice for 2016, 2017, 2018, 2019, 2020, 2021, 2022
How to Replace Front Lower Control Arms on a 2016-2022 Honda Pilot
Step-by-step DIY guide with required tools, parts, torque specs, safety tips, and alignment advice for 2016, 2017, 2018, 2019, 2020, 2021, 2022


🔧 Pilot - Front Lower Control Arm Replacement
This repair covers replacing the front lower control arms on your Pilot. The lower control arm connects the wheel hub/knuckle to the vehicle frame and uses rubber bushings plus a ball joint to keep the wheel aligned and controlled.
Difficulty Level: Advanced | Estimated Time: 3-5 hours
Assumption: This guide covers the front lower control arms, which are the most common “control arm” replacement on your Pilot.
⚠️ Safety & Precautions
- ⚠️ Never work under your Pilot supported only by a jack. Use jack stands on solid lift points.
- ⚠️ The front suspension carries vehicle weight. Keep hands clear when separating the ball joint.
- ⚠️ Do not hammer directly on the aluminum steering knuckle. It can crack.
- ⚠️ After replacement, a professional wheel alignment is required before normal driving.
- ⚠️ Final tightening of control arm bushing bolts must be done at normal ride height. Tightening them while the suspension hangs can damage the new bushings.
- ⚠️ Battery disconnect is not required for this repair.
🔧 Required Tools
You'll need the following tools for this repair:
- Floor jack (rated 3-ton minimum)
- Jack stands (rated 3-ton minimum)
- Wheel chocks
- Safety glasses
- Mechanic gloves
- 1/2-inch drive breaker bar
- 1/2-inch drive torque wrench
- 3/8-inch drive ratchet
- 19mm socket
- 21mm socket
- 22mm socket
- 17mm socket
- 14mm socket
- 10mm socket
- 17mm wrench
- 19mm wrench
- 21mm wrench
- 22mm wrench
- Needle-nose pliers
- Ball joint separator (specialty)
- Pry bar 18-inch
- Dead blow hammer
- Paint marker
- Penetrating oil
- Wire brush
- Support jack or second floor jack
🔩 Required Parts
HowToo sells all the parts you need for this repair:
- Front lower control arm assembly - Left: 1, Right: 1
- Front lower ball joint castle nut - Qty: 2
- Front lower ball joint cotter pin - Qty: 2
- Front lower control arm mounting bolts - Qty: 4
- Front lower control arm mounting nuts - Qty: 4
Recommendation: Replace control arms in pairs so both sides have matching bushings and ball joints.
📋 Before You Begin
- Park your Pilot on level ground.
- Set the parking brake and place wheel chocks behind the rear wheels.
- Loosen the front wheel lug nuts slightly before lifting the vehicle.
- Spray penetrating oil on the lower ball joint nut and control arm mounting bolts.
- A ball joint separator is a tool that presses the ball joint stud out of the steering knuckle without damaging nearby parts.
- A cotter pin is a small bent safety pin that keeps the castle nut from backing off.
🔨 Step-by-Step Instructions
Follow these steps in order:
Step 1: Loosen the Front Wheel Lug Nuts
- Use a 19mm socket and 1/2-inch drive breaker bar to loosen the front lug nuts about one turn.
- Do not remove the lug nuts yet.
- Loosen wheels before lifting.
Step 2: Raise and Support the Front of the Vehicle
- Use a floor jack rated 3-ton minimum to lift the front of your Pilot at the front center jacking point.
- Place jack stands rated 3-ton minimum under the approved front side support points.
- Gently lower the vehicle onto the jack stands.
- Shake the vehicle lightly by hand to confirm it is stable before working underneath.
Step 3: Remove the Front Wheel
- Use a 19mm socket to remove the lug nuts fully.
- Remove the wheel and set it flat under the side of the vehicle as an added safety backup.
Step 4: Remove Any Lower Splash Shield Fasteners Blocking Access
- Use a 10mm socket to remove lower splash shield bolts if they block access to the front control arm bolts.
- Use needle-nose pliers to remove any plastic clips carefully.
- Set the shield and fasteners aside in order.
Step 5: Mark the Original Control Arm Position
- Use a paint marker to mark around the front and rear control arm bushing mounts.
- This helps you place the new arm close to the original position before alignment.
- Alignment is still required.
Step 6: Remove the Lower Ball Joint Cotter Pin
- Use needle-nose pliers to straighten and pull out the cotter pin from the lower ball joint castle nut.
- If the cotter pin is rusty, use penetrating oil and work it out slowly.
Step 7: Loosen the Lower Ball Joint Castle Nut
- Use a 22mm socket and 1/2-inch drive breaker bar to loosen the lower ball joint castle nut.
- Leave the nut threaded on a few turns. This keeps the control arm from dropping suddenly when the joint separates.
Step 8: Separate the Lower Ball Joint from the Steering Knuckle
- Install the ball joint separator between the lower control arm ball joint and steering knuckle.
- Tighten the separator with the correct socket from your tool kit, commonly a 19mm socket or 22mm socket.
- When the joint pops loose, stop tightening.
- Remove the loosened castle nut using the 22mm socket.
- The pop sound is normal.
Step 9: Support the Steering Knuckle
- Use a support jack or second floor jack lightly under the steering knuckle or brake rotor area.
- Do not lift the vehicle from this point. Just support the assembly so the brake hose and axle are not strained.
Step 10: Remove the Stabilizer Bar Link from the Control Arm if Attached
- Use a 17mm socket and 17mm wrench to remove the stabilizer bar link nut if it connects to the lower control arm.
- Move the link aside by hand.
- The stabilizer bar link connects the suspension to the anti-roll bar, which helps reduce body lean in turns.
Step 11: Remove the Front Control Arm Mounting Bolt
- Use a 21mm socket on the bolt head and a 21mm wrench on the nut if needed.
- Remove the front lower control arm mounting bolt and nut.
- If rusty, clean exposed threads with a wire brush and apply penetrating oil.
Step 12: Remove the Rear Control Arm Mounting Bolt
- Use a 22mm socket and 22mm wrench to remove the rear lower control arm mounting bolt and nut.
- Keep one hand on the control arm as the last bolt comes out.
- Use a pry bar 18-inch only if the arm is stuck in the bracket.
Step 13: Remove the Old Control Arm
- Lower the control arm out of the subframe brackets by hand.
- Use a dead blow hammer to tap it free if it is stuck.
- Do not hit brake lines, CV axle boots, or the aluminum steering knuckle.
Step 14: Compare the New and Old Control Arms
- Place the new and old control arms side by side.
- Check that the ball joint, bushing shape, mounting points, and left/right orientation match.
- Do not install the wrong side arm.
Step 15: Install the New Control Arm into the Subframe
- Position the new control arm in the front and rear mounting brackets.
- Install the front and rear mounting bolts by hand first.
- Use a 21mm socket, 21mm wrench, 22mm socket, and 22mm wrench only to snug the bolts for now.
- Do not fully torque the bushing bolts while the suspension is hanging.
Step 16: Connect the Lower Ball Joint
- Guide the lower ball joint stud into the steering knuckle by hand.
- Install the new castle nut by hand.
- Use a 22mm socket and 1/2-inch drive torque wrench to tighten the lower ball joint castle nut to Torque to 69 Nm (51 ft-lbs).
- Continue tightening only enough to align the castle nut slot with the cotter pin hole.
- Install a new cotter pin using needle-nose pliers and bend the ends over securely.
Step 17: Reconnect the Stabilizer Bar Link if Removed
- Install the stabilizer bar link into the control arm.
- Use a 17mm socket, 17mm wrench, and 1/2-inch drive torque wrench to tighten the stabilizer link nut to Torque to 44 Nm (33 ft-lbs).
Step 18: Load the Suspension to Ride Height
- Place the support jack or second floor jack under the outer end of the lower control arm.
- Raise it slowly until the control arm sits close to normal driving height.
- This prevents twisting and early failure of the new rubber bushings.
Step 19: Final Torque the Control Arm Mounting Bolts
- Use a 21mm socket, 21mm wrench, and 1/2-inch drive torque wrench on the front mounting bolt.
- Tighten the front lower control arm mounting bolt to Torque to 137 Nm (101 ft-lbs).
- Use a 22mm socket, 22mm wrench, and 1/2-inch drive torque wrench on the rear mounting bolt.
- Tighten the rear lower control arm mounting bolt to Torque to 137 Nm (101 ft-lbs).
Step 20: Reinstall the Splash Shield
- Use a 10mm socket to reinstall any splash shield bolts removed earlier.
- Use needle-nose pliers to reinstall any plastic clips if needed.
Step 21: Reinstall the Wheel
- Place the wheel back on the hub.
- Install lug nuts by hand first to avoid cross-threading.
- Use a 19mm socket to snug the lug nuts in a star pattern.
Step 22: Lower the Vehicle and Torque Lug Nuts
- Use the floor jack rated 3-ton minimum to lift slightly and remove the jack stands.
- Lower your Pilot to the ground.
- Use a 19mm socket and 1/2-inch drive torque wrench to tighten the lug nuts in a star pattern to Torque to 127 Nm (94 ft-lbs).
Step 23: Repeat on the Other Side
- Repeat the same steps on the opposite front lower control arm.
- Use the same tools and torque values.
- Pairs give the best result.
✅ After Repair
- ✅ Turn the steering wheel lock-to-lock while parked and listen for clunks or rubbing.
- ✅ Take a slow test drive around the block only. Avoid highway speeds until alignment is complete.
- ✅ Get a four-wheel alignment as soon as possible. New control arms can change camber and toe angles.
- ✅ Recheck the lug nut torque after 25-50 miles using a 19mm socket and 1/2-inch drive torque wrench.
- ✅ If the steering wheel is off-center, the vehicle pulls, or tires squeal, stop driving and have the alignment checked.
💰 DIY vs Shop Cost
Shop Cost: $750-$1,300 (parts + labor)
DIY Cost: $220-$500 (parts only)
You Save: $530-$800 by doing it yourself!
Shop labor rates vary but typically run $100-$150/hour. This repair takes a shop approximately 3-5 hours.
🎯 Ready to get started?
HowToo makes it easy: same-day/2-day shipping on every part, plus all the tools and specialty tools you need! Check out the parts and tools sections below to add everything to your cart.