


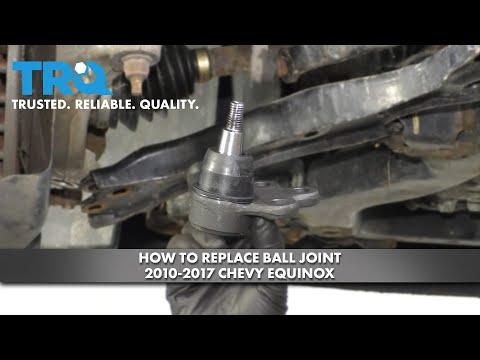


How to Replace Front Lower Ball Joints on a 2019 Chevrolet Equinox
Step-by-step instructions, required tools, parts, torque tips, and alignment safety notes for 2018, 2019
How to Replace Front Lower Ball Joints on a 2019 Chevrolet Equinox
Step-by-step instructions, required tools, parts, torque tips, and alignment safety notes for 2018, 2019
🔧 Ball Joints - Front Lower Ball Joint Replacement
Assumption: This covers the front lower ball joints on your Equinox. On many GM front suspensions, the ball joint is serviced with the lower control arm, so the repair may be done by replacing the control arm assembly instead of pressing in a separate joint.
The ball joint lets the front suspension move while keeping the wheel attached. If it is loose or torn, you can get clunks, uneven tire wear, and unstable steering. This repair should be done carefully because the suspension must be reassembled and torqued correctly.
Difficulty Level: Advanced | Estimated Time: 2-4 hours
⚠️ Safety & Precautions
- Support the vehicle securely with jack stands before removing any suspension parts.
- Do not work under a vehicle held up only by a jack.
- Use caution around the spring-loaded suspension components.
- If your Equinox has an electronic parking brake, keep it set unless a rear brake repair is being done. It is not normally needed for this job.
- After the repair, a wheel alignment is required.
- Battery disconnect is not required for this repair.
🔧 Required Tools
You'll need the following tools for this repair:
- Floor jack (rated 3-ton minimum)
- Jack stands (rated 3-ton minimum)
- Wheel chocks
- Safety glasses
- Nitrile gloves
- 21mm lug wrench or socket
- 18mm socket
- 21mm socket
- 15mm socket
- 15mm wrench
- Torx T50 socket
- Breaker bar
- Torque wrench
- Ball joint separator (specialty)
- Hammer
- Penetrating oil
- Paint marker
🔩 Required Parts
HowToo sells all the parts you need for this repair:
- Front lower ball joint - Qty: 2
- Ball joint pinch bolt and nut - Qty: 2
- Front lower control arm assembly - Qty: 2, if your ball joint is not serviceable separately
- Front wheel alignment - Qty: 1
📋 Before You Begin
- Park on level ground and set the parking brake.
- Loosen the front lug nuts slightly before lifting the vehicle.
- Raise the front and support it securely on jack stands.
- Remove the front wheels.
- Spray the ball joint fasteners and related pinch points with penetrating oil before starting.
🔨 Step-by-Step Instructions
Follow these steps in order:
Step 1: Remove the wheel
- Use a 21mm lug wrench or socket to remove the front wheel.
- Set the wheel aside where it will not roll.
Step 2: Access the lower ball joint
- Inspect the lower control arm and knuckle area.
- Find the ball joint where the control arm meets the steering knuckle.
- Mark parts before disassembly.
Step 3: Remove the ball joint fasteners
- Use a 15mm socket and 15mm wrench to remove the ball joint pinch bolt and nut, if equipped.
- If the joint is held with a nut on a stud, use the correct socket and wrench combination to remove it.
- Use a Torx T50 socket if the axle or related knuckle fastener access requires it on your setup.
Step 4: Separate the ball joint from the knuckle
- Use a ball joint separator (specialty) to free the stud from the knuckle.
- If needed, use a hammer with light taps on the knuckle area to help release the taper.
- Do not strike the ball joint stud directly.
Step 5: Remove the ball joint or control arm assembly
- If the ball joint is separate, remove it from the control arm using the correct press-out method for your suspension design.
- If the ball joint is not serviceable separately, remove the lower control arm assembly instead.
- Use an 18mm socket and 21mm socket for the lower control arm bolts as needed.
Step 6: Install the new ball joint or control arm
- Position the new ball joint or new control arm into place.
- Hand-start all fasteners first.
- Use the torque wrench to tighten fasteners to the factory specification for your suspension. Torque to manufacturer specification.
- If the joint uses a pinch bolt, install a new bolt and nut.
Step 7: Reconnect the steering knuckle
- Align the ball joint stud with the knuckle.
- Use the ball joint separator (specialty) if needed to guide the joint into place.
- Tighten the fastener with the correct socket and wrench, then torque it to specification.
Step 8: Reinstall the wheel
- Reinstall the wheel and snug the lug nuts by hand first.
- Lower the vehicle enough for the tire to touch the ground.
- Use the torque wrench and 21mm socket to tighten the lug nuts in a crisscross pattern. Torque to manufacturer specification.
✅ After Repair
- Check that all fasteners are tight.
- Start the vehicle and test for clunks or loose steering feel.
- Inspect the ball joint area for proper seating.
- Get a professional wheel alignment as soon as possible.
- Recheck lug nut torque after a short drive.
💰 DIY vs Shop Cost
Shop Cost: $450-$900 (parts + labor)
DIY Cost: $120-$350 (parts only)
You Save: $330-$550 by doing it yourself!
Shop labor rates vary but typically run $100-$150/hour. This repair takes a shop approximately 2-4 hours.
🎯 Ready to get started?
HowToo makes it easy: same-day/2-day shipping on every part, plus all the tools and specialty tools you need! Check out the parts and tools sections below to add everything to your cart.
